Saturday, November 26, 2011

Deep Dish Apple Pie

Happy Thanksgiving...a little late!  I hope you all had a wonderful time with those you love.  We had about 20 people at my parents' house.  It was smaller than usual but still very enjoyable.  At the end of the 3 days, we had so much food left over...now we know who REALLY eats the food...all the people who weren't here this year.  ;-) We always have tacos on Wednesday night and then a conglomeration of desserts.

  However, my aunt Jo Ellen decided to make a deep dish apple pie.  Let me tell you, it was beautiful and delicious.  She got the recipe out of a Southern Living magazine.  I would highly recommend it!  She used premade pie crusts, but you could make your own crust if you REALLY wanted to be hard core about it.

Easy Skillet Apple Pie from Southern Living Sept 2011
4 pounds of apples (the recipe suggests 2 eat of granny smith and  braeburn.)
1 teaspoon ground cinnamon
3/4 cup sugar
1/2 up butter (1 stick)
1 cup packed brown sugar
1 package refrigerated pie crust (has two in the package)
1 egg white (we did not use this)
2 tablespoons sugar for dusting

Preheat oven to 350.  Peel and cut apples.  We used an apple-peeler-corer-slicer on some; so, we had wedges and thin slices.  I think the combination of sizes was actually a good thing.  Toss apples with cinnamon and the 3/4 cup sugar.  Melt the butter in a 10-inch cast iron skillet.  After it is melted, add the brown sugar and stir until sugar is dissolved.  Place one pie crust in the bottom of the pan on top of the sugar mixture.  Pour the apples over the pie crust and top with the remaining crust.  Brush with egg white if desired.  Sprinkle sugar on top.  Cut small slits in the top crust.  Place in over and bake for 1 hour to 1 hour 10 minutes or until golden and bubbly.  Remove from oven and cool for 30 minutes before serving.  Serve with ice cream or cool whip.  Enjoy!

Monday, November 21, 2011

Pretending It's Cold - Potato Soup

A few weeks ago, it actually felt like fall around here.  Today, it is 80 degrees...but we'll forget about that for now and pretend.  Just imagine, it's a beautiful fall day...just enough chill in the air.  You've had a long day at work and want something warm and comforting for dinner.  So does your family.  What could you make that is quick but definitely has that homemade feel?  I suggest this potato soup!  It is souper (HA! couldn't resist!) easy and very kid friendly.
I made it for D and K the other day.  She refused to eat anything but bread and banana, but he said it was really good.  Even took some left over home to his mom who promptly asked for the recipe.  I like sharing recipes!  :-)  This really only takes as long as the potatoes take to cook; and since you cut them into cubes, that's not really very long.  It does call for jalapenos, but if you don't want the spice, just leave them out.  So, if you're in the South (or southern hemisphere!)...pretend it's cold and try this.  If you're somewhere that actually feels like fall, just enjoy the weather AND the soup! 

Aunt Merle's Potato Soup
5-6 red potatoes (not the tiny ones, the bigger ones)
1 cup chopped onion (about 1 medium onion)
water to cover
2 cans of cream of celery soup (I use 98% fat free)
1 pound Velveeta type cheese (1/2 of the standard block or the whole small block, I used 2% version)
chopped jalapenos to taste
1 oz. jalapeno cheese if you want to add some extra spice

Chop potatoes and onion.  Place in your large stock pot and cover with water.  Bring water to a boil and then cook until potatoes are fork tender.  Meanwhile, cut the cheese into cubes.  When potatoes are ready add the remaining ingredients...do NOT drain the potatoes.  Stir over heat until cheese melts and everything incorporates into a yummy, cheesy, potato soup!  Enjoy!

Thursday, November 17, 2011

T-shirts and Toffee

Last year, I got that wonderful cookies book for my birthday.  My goal is to bake through it...and that's still my goal.  But I took a little break from it. 
Sometimes I just really like to try out things that I see on other blogs.  However, I still have some recipes that I need to share with you from the book.  This cookie is one that I made in August when I went home between ER shifts.  On special thing I want to share with you about that trip before you get this YUMMY cookie is the quilt that my mom made for me. 
Several years ago, she had me choose special t-shirts to use on a T-shirt quilt.  One of them is from my sixth grade year, some from high school, and some from college.  This trip, she gave me the finished quilt.  It's pretty awesome if I do say so myself....and HUGE!  I could fit a couple of people under it.  She suggested using it for "picnics on the floor."  We used to have these every year when it was Miss Mississippi and Miss America time!  Such fun!  Thanks for the great quilt, Mama!  Now, the cookies.  I knew these would be good ones.  I mean, toffee...chocolate...nuts.  YUM!  Tried to be a little creative with the pictures this time...

whatcha think?  ;-)  Daddy enjoyed these per usual.  Don't remember the specific comments...I mean, it has been three months!  However, I do know that I would highly recommend them.

Chocolate-Toffee Cookies from Southern Living Incredible Cookies
1 cup pecans, toasted
1 cup butter, softened
3/4 cup packed brown sugar
1/2 cup white sugar
2 eggs
1 tablespoon vanilla
2 1/4 cups flour
1 1/2 teaspoons baking powder
1/2 teaspoon baking soda
1 cup chopped toffee and chocolate (you can use Bits'O Brickel or just chop Heath bars)
1-1 1/2 cups chocolate chips

Toast pecans in toaster oven.  Preheat oven to 350 degrees.  Cream butter until creamy, then add sugars and beat well.  Add eggs and vanilla and mix well.  Stir in the dry ingredients and mix until well blended.  Stir in the toffee, chocolate chips, and nuts.

Place on baking stones or sheets in tablespoonfuls.  Place stone in oven and bake for 10 minutes or until slightly browned.  Cool for 1-2 minutes on stones then remove to cooling rack to completely cool. Enjoy!


Saturday, November 12, 2011

Forever Lentils

A few weeks ago when the weather was cool (before it got warm again and then cool and then warm...you see the cycle), I decided to make some soup.  I had seen this great looking lentil recipe on Brittany's site and knew I had to try it.  So, one Sunday after church, I pulled out the crockpot and started cooking.  I wanted to eat it for supper, so I increased the heat to high, thinking that would help it cook faster. 

Wellllll, all it did was make the crockpot overflow!  Yes, it bubbled over and I ended up having to was the insides of my crockpot.  Maybe I'll try those liners one day.  :-)  Anyway, I turned the heat down to low, like the recipe called for and let it cook for the full time.  Thankfully, I had some distraction and just had a late supper.  It was SO good!  I ate it for days, sent some home with my parents, and have some frozen in the freezer for later when the weather turns cold for good....or not!  Try it out!

Slow Cooker Lentil Chili from A Healthy Slice of Life 

8 cups stock/broth (I used chicken because it cost less but to make this vegan use veggie stock)
1 package dried lentils
1 medium yellow onion, diced
1 large red bell pepper, diced
2 cans diced tomatoes
5 cloves of garlic, finely chopped (or cheat and use pre-minced garlic like Brittany and I did)
4 tsp chili powder

Rinse your lentils well, but no need to soak.  Chop the onion, pepper, and tomatoes.  Put these, lentils, and broth along with garlic and chili powder into your slow cooker.  Set on low and go do something fun.  Let it cook for 8 hours.  Serve with yogurt atop.  Enjoy!

Tuesday, November 08, 2011

Only One


 Last week we had a "party" in the ER for Halloween.  Now, a party in the ER means that we all bring food and when the rush of patients slows down (Hopefully!) around 1-2am, we eat.  I'm usually the sweets person...and that was no different this time.  I had seen this recipe from Recipe girl a few weeks earlier and thought it looked pretty good.  At first I was going to change things up and use a peanut butter filling but decided to stick with the recipe. 

MAN was it good.  The only thing I did change was cutting some of the semi-sweet chocolate in the actual cookie and substituting some white chocolate.  One of the nurses asked me for the recipe for tailgaiting...I think it would make a fantastic tailgaiting recipe.  On the way home, I went and left a bag of them for D, who was post-call from the ICU.  Later he told me that they were good...but so rich he could "only eat one!"  Well, I think I take that as a compliment.  :-)

Ooey Chocolate Chip Sandwich Bars from Recipe Girl
GOOEY CHOCOLATE FILLING:
2 cups semi-sweet chocolate chips
One 14-ounce can sweetened condensed milk
2 teaspoons vanilla extract

COOKIES:
1 cup (2 sticks) unsalted butter, at room temperature
1 cup light brown sugar
1/2 cup granulated white sugar
1 large egg (ALMOST forgot this!)
1 tablespoon vanilla extract
2 cups all-purpose flour
1 cup quick-cooking or old-fashioned rolled oats
1 teaspoon baking powder
1 teaspoon baking soda
1 teaspoon salt
1 cup semi-sweet chocolate chips
1 cup white chocolate chips

Preheat oven to 350 degrees F. Lightly butter a 9x13-inch pan with parchment paper, allowing enough overhang on the long side to lift the bars from the pan.

For the filling: Place the chocolate chips and condensed milk in a small saucepan over the lowest possible heat and cook, stirring constantly, until the chocolate has melted and the mixture has thickened, 3 to 5 minutes. Turn off the heat, add vanilla, and stir until smooth. Set aside to cool to room temperature.

Dough: Place the butter and sugars in a large bowl and cream with a mixer.  Add the egg and vanilla. Beat well. Whisk together the flour, oats, baking powder, baking soda and salt in a medium bowl then add to the butter mixture. Beat until everything is well incorporated, scraping down the sides of the bowl as needed. Stir in the chocolate chips.

Using half of the batch of cookie dough, place dollops into the prepared pan and press down lightly to even it out. Pour the cooled chocolate mixture over the dough and then add small dollops of the remaining dough on top. Don't worry if the dollops don't completely cover the chocolate mixture. Just spread it together as much as you can, and let some chocolate peek through.  This will fill in when it is cooked.  Bake until lightly browned, 20 to 25 minutes. Set aside to cool completely.  Placing it in the refrigerator to chill helps the cutting go more smoothly.  Cut into 32 bars. Enjoy!

Tuesday, November 01, 2011

Apple Pie...in a Muffin

So, I have had several requests to post this recipe ever since I made the muffins.  Plus, it's finally cool and fall like here...so, I give you apple pie muffins.  After making a fruit salad for that surprise party a few weeks back, I had LOTS of apples left over.  So, I went in search of a good recipe to use those apples.  I stumbled across this muffin recipe and thought it looked great...plus, it had a crumble topping.  I think the top is the best part of the muffin...so a crumble top is even BETTER!  I ended up using applesauce in replacement of the oil to make these a little bit healthier.

On a side note, I am of the opinion that applesauce does make the "shelf life" of baked goods a lot shorter.  So, if you do use the applesauce, either eat these quickly, or freeze them!

On the other hand, the texture of the muffins was still good.  I didn't think the topping was quite crispy and dry enough.  I still haven't figured out how to make the best topping.  All in all, though, these were really good muffins!  These were great and had a great amount of apple in them.  Check them out!

Apple Pie Muffins adapted from My Baking Addiction

2 1/4 cups all-purpose flour
2 teaspoons cinnamon
1 teaspoon baking soda
1/2 teaspoon kosher salt
1 egg
1 cup buttermilk
1/2 cup applesauce
1 teaspoon vanilla extract
1 1/2 cups packed brown sugar
2 cups peeled, chopped apples - I used gala but granny smith is the traditional type

Topping:
1/2 cup packed brown sugar
1/3 cup all-purpose flour
¼ cup rolled oats
1 teaspoon ground cinnamon
2 tablespoons butter, melted

Preheat the oven to 375 degrees F. Spray muffin tin with baking spray.  In a large bowl, whisk together flour, cinnamon, baking soda, and salt. In a small bowl, whisk together the egg, buttermilk, applesauce, vanilla and brown sugar. Stir until sugar has dissolved. Pour liquid mixture into the flour mixture and stir until just combined. Gently fold in apples. Use a large scoop to fill each muffin well, filling the cups to the top.

  In a small bowl, stir together 1/2 cup of brown sugar, 1/3 cup flour, rolled oats, and cinnamon. Drizzle in 3 tablespoons of melted butter, mixing until well blended. Sprinkle this over the tops of the muffins. Bake in preheated oven for 25 minutes, or until the tops of the muffins spring back when lightly pressed.  Cool on wire rack. Store at room temperature or freeze. Enjoy!

Thursday, October 27, 2011

Povitica

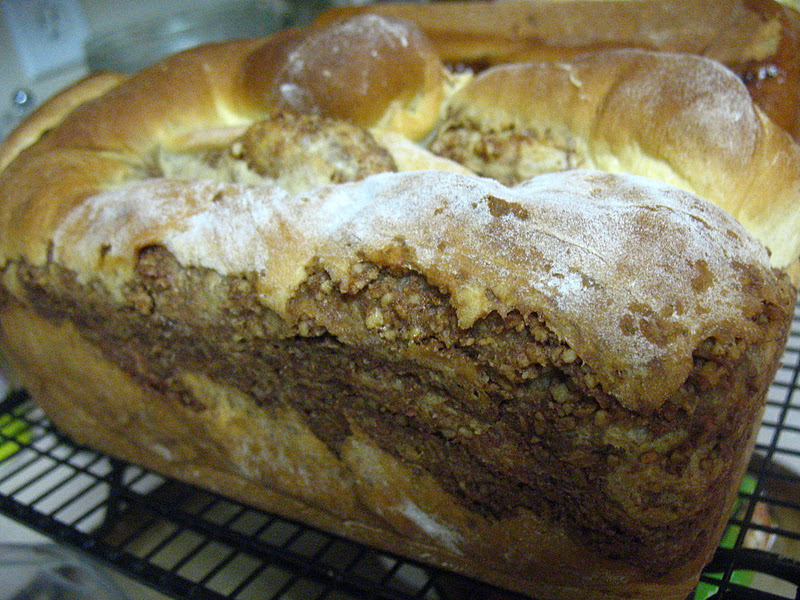
When I saw the name of this month's Daring Baker challenge, I thought for sure that I had probably tasted this bread but didn't realize it.  The name just SOUNDS Russian!  However, I don't think that I have ever had it prior to making it.  The Daring Baker’s October 2011 challenge was Povitica, hosted by Jenni of The Gingered Whisk. Povitica is a traditional Eastern European Dessert Bread that is as lovely to look at as it is to eat! 

I was a little nervous when it came to this challenge.  You see, we've had challenges before that required rolling the dough so thin that you can read something through the dough.  In those challenges, I had such trouble rolling out the dough.  This time, however, was a different story.  (Can you see where I work?!)

I don't know if the difference was the dough or the rolling location.  This was a GREAT dough to work with.  It rolled SO easily and stretched beautifully when I began to "pull" at it.  I used the knuckle strategy when I pulled my down-turned hand out under the dough, which causes the dough to stretch.  Worked wonderfully. 

The other change was using my dining room table to roll it out...MUCH MORE ROOM!  I did have to use a bed sheet as my pastry towel but that worked well, too.  Hmmm...I'll have to remember this in the future.

I was planning on doing maybe two different fillings but didn't have enough nuts.  So, I decided to use the traditional cinnamon nut filling (I used pecans) for one loaf.  This one ended up being the most striking one on the inside and was definitely flaky.  In fact, when I picked it up it flaked away!  This is one that I left at clinic today. 

For the next loaf I used some of the remaining nuts, mixed it with orange marmalade and some sugar.  SURPRISE!  When I pulled the loaf out of the pan, it had formed an orange caramel.

Didn't expect that but the caramel did taste GREAT!  I think that I will end up freezing this one and taking it to Thanksgiving.  I hope the caramel doesn't get too hard.

Loaf three was to be a cream cheese chocolate chip loaf.  Well, I think I under did it on both the cream cheese AND the chocolate chips.  The swirl is very unimpressive.  Adding some icing to the top added to the flavor.  This loaf found a home in the ER!
And loaf four is the cheese loaf.  I got some inspiration after D brought my sunglasses back to me.  I knew I was going to give him a loaf and suddenly remembered that I had some cheese in my refrigerator. I knew that he would like a cheese loaf.  So, I sprinkled some Nature's Seasoning on the dough, then put sharp cheddar cheese on that and topped it all with Parmesan cheese. 
Oh my goodness!  The aroma coming out of my kitchen when that one was baking was amazing.  It smelled like a pizza parlor is the best way.  And the loaf was beautiful!  Something about the cheese made the inside more bubbly than swirly but I liked it!
Left that one at clinic, too.

All in all, this was a fantastic challenge!  I actually enjoyed rolling the dough out and trying to stretch it as thin as I could.  Coming up with different fillings and seeing how they came out was fun.  And, as always, giving away what I made always gives me joy!  Thanks for a great challenge.  Try this one out for yourself.
Povitica (makes 4 loaves)
Ingredients

To activate the Yeast:
2 Teaspoons (10 ml/9 gm) Sugar
1 Teaspoon (5 ml/3 gm) All-Purpose (Plain) Flour
½ Cup (120ml) Warm Water
2 Tablespoons (30ml/14 gm/½ oz/2 sachets) Dry Yeast

Place sugar and flour in a small bowl.  Pour water over and stir to dissolve.  Add the yeast and stir.  Cover with plastic wrap (or be brave like I was and don't!) and allow to sit for five minutes.


Dough:
2 cups (480ml) milk - I used skim
¾ cup (180 ml/170gm/6 oz) Sugar
3 teaspoons (15 ml/18 gm/2/3 oz) Table Salt
4 Eggs
½ cup (120ml/115 gm/one stick/4 oz) Unsalted Butter, melted
8 cups (1.92 l/1.12 kg/39½ oz/2½ lb) All-Purpose Flour, divided

Place the milk in a sauce pan.  Place on medium heat and cook until the milk reaches 180 degrees F.  This scalds the milk.  Remove from heat and allow to cool to 110 degrees F.  Meanwhile, put sugar and salt in a large bowl.  When milk is cooled, stir it into the sugar until dissolved.  Add 2 cups flour, beaten eggs, melted butter, and yeast mixture.  Stir until well combined.  Slowly add flour until the mixture pulls away from the bowl and is not sticky (I ended up using 7.5 cups total, including the original 2 cups).  Divide the dough into four equal portions and place in smaller bowls.  Cover and allow to rise in a warm place for 1.5 hours (mine probably rose about 4 hours!).

Walnut Filling for one loaf:
1.5 cups ground pecans
 1/4 cup almond milk
1/2 stick margarine
1/2 cup sugar
1 teaspoon (5 ml/4 gm) cocoa powder
1 teaspoon (5 ml/3 gm) cinnamon

Melt butter and milk together.  Stir in remaining ingredients.

Place a clean bed sheet on a large table.  Sprinkle flour on the sheet so that there is a thin layer of flour on the sheet.  Place one piece of dough on the sheet.  After lightly flouring the rolling pin and dough, roll out to about 12 X 18 inches.  The dough will still be fairly thick.  At this point, you can continue to roll the dough or you can start stretching by hand.  Slowly roll/stretch until you can see through the dough enough to read something or see patterns. 
Once it is thin enough, place your filling on the dough to cover it.  Then roll up jellyroll style.
  Spray a bread pan with cooking spray and place the dough in the pan in a U-shape.  Do this with all the pieces of dough.
I had to cook three and then prepare my fourth because I only have 3 bread pans.  When your loaves are ready, preheat the oven to 350.  Let the dough rest 15 minutes.  Then place the loaves in the oven and cook for 15 minutes.  After 15 minutes, decrease the oven temperature to 300 F.  Then bake for 30-40 minutes, or until the loaves are golden.  After removing from the oven, allow the loaves to cool for at least 20 minutes before removing from the pan.  If freezing a loaf, wrap well in plastic wrap and then aluminum foil.  Can freeze for 3 months.  Enjoy!

Sunday, October 23, 2011

Hello, My Name is Pumpkindoodle

For my first shift in the pediatric ER this month (and because my dad was in town and I LOVE to make him cookies!), I pulled out quite a fantastic little recipe from Annie!  First, please note that Annie has some great photographs.  Then notice that her recipes are great.  And finally, notice that she is also a resident!  Cool!  :-)  Anyway, this recipe just screamed fall.  Snickerdoodles are probably my favorite cookie.  Just simple and sweet!  Combine that with a light taste of pumpkin and you have a fantastic cookie. 

Daddy isn't a huge pumpkin fan but he liked these.  He said that he could tell they weren't regular snickerdoodle but that the flavor was more like a whisper (okay, I made that one up!) of pumpkin than "Hello!  My name is pumpkin and I'm in your cookie." 

All the nurses in the ER liked the cookies (and actually ask me quite often, now, if I made anything!  I like that!) and Dr. D, one of my attendings (who just completed the Augusta Ironman, go Dr. D!) asked me for the recipe.  I thought they were great cookies.  They had a great fluffiness to them, which is sometimes hard to obtain in a snickerdoodle.  They also still maintained a classic snickerdoodle flavor (even without my beloved cream of tartar!) with an extra fall taste to it.  Will definitely be making these again!  Thanks, Annie, for a great cookie!

Pumpkin Snickerdoodles from Annie at Annie's Eats
For the cookies:
3¾ cups all-purpose flour
1½ tsp. baking powder
½ tsp. salt
1 tsp. ground cinnamon
1 cup (2 sticks) unsalted butter, at room temperature
1 cup granulated sugar
½ cup light brown sugar
¾ cup pumpkin puree
1 large egg
2 tsp. vanilla extra
 
For the coating:
½ cup granulated sugar
1 tsp. ground cinnamon
  
Directions: 
In a medium bowl, combine the flour, baking powder, salt, cinnamon, and nutmeg.  Whisk to blend and set aside.  In the bowl of an electric mixer, cream together the butter and sugars on medium-high speed until light and fluffy, 2-3 minutes (I do about 5).  Blend in the pumpkin puree.  Beat in the egg and vanilla until incorporated.  With the mixer on low speed add in the dry ingredients and mix just until incorporated.  Cover and chill the dough for at least 1 hour.
 
Preheat the oven to 350˚ F.  Line baking sheets with silicone baking mats or parchment paper.  Combine the sugar and cinnamon for the coating in a bowl and mix to blend.  Scoop the dough (about 1.5 tablespoons) and roll into a ball - I just use my small cookie scooper.  Coat the dough ball in the sugar-spice mixture and place on the prepared baking sheet.  Repeat with the remaining dough to fill the sheets, spacing the dough balls 2-3 inches apart. Bake the cookies for 10-12 minutes, or until just set and baked through.  Let cool on the baking sheets about 5 minutes, then transfer to a wire rack to cool completely.  Repeat with the remaining dough.  Store in an airtight container.  Enjoy!

Friday, October 21, 2011

Combining Two Recipes

I'm keeping a friend's two year old little girl tonight.  She was quite the talker and very active.  I don't think she stopped talking until suppertime.  D doesn't like "anything green" but I decided to make couscous, green beans, sausage balls (that D made and left here...yum!), and strawberries.  She ate some of everything.  YAY!  The question is, is there any way to get someone who doesn't like veggies to like them?  I mean, I do know that some people are seriously "strong tasters" and the strong, more bitter taste of veggies isn't pleasing.  Hmmmm...
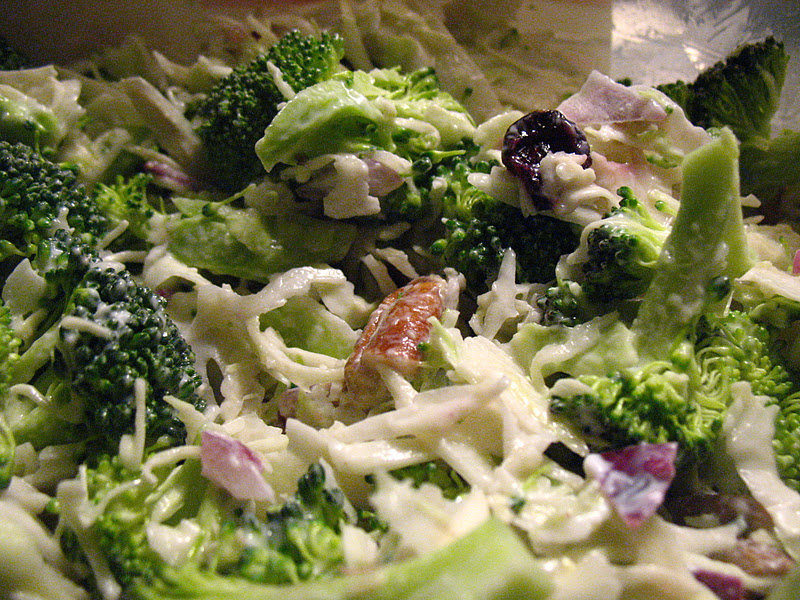
However, all the guys in my SS class are salad eaters, so when we had a surprise party for Mrs. Vickie (SO much fun...she had NO clue!) I took several things.  Corn casserole, fruit salad, and a broccoli salad.  now, the broccoli salad I know is SO good but uses both a lot of sugar and mayo.  So, I went in search of another.  Found this one on Cate's site but it also uses a pretty good amount of mayo, but I liked that it actually had slaw in it.  So, I combined the two, decreased the mayo and added some yogurt.  SOOO good!


 Broccoli Slaw Salad
4-5 cups cabbage slaw
4 cups broccoli
1/2 cup (about 1/2) red onion
1/2 cup cut pecans
handful of cranberries
1/2 cup mayo with olive oil
1/2 cup yogurt
2 tablespoons cider vinegar
1/3 cup splenda (or sugar)

Combine the first five ingredients in a large bowl with a sealing lid.  Whisk together the remaining ingredients.  Pour over salad.  Put the lid on the bowl and shake!  Refrigerate for at least one hour.  Enjoy!

Tuesday, October 18, 2011

Peanut, Peanut butter...and brownies

If you remember, last month I was on night float.  We would work 5 nights, have 3 off, work 4, have two off and so on.  Well, my intern's birthday was in September.  Thankfully, if was on a Sunday.  Double thankfully (does that even make sense?!), that was a 3 day off week so we didn't work that Sunday.  However, when we were waiting for labs late one night I asked her what she wanted me to make for her birthday.  She wasn't very specific other than not liking coconut! 

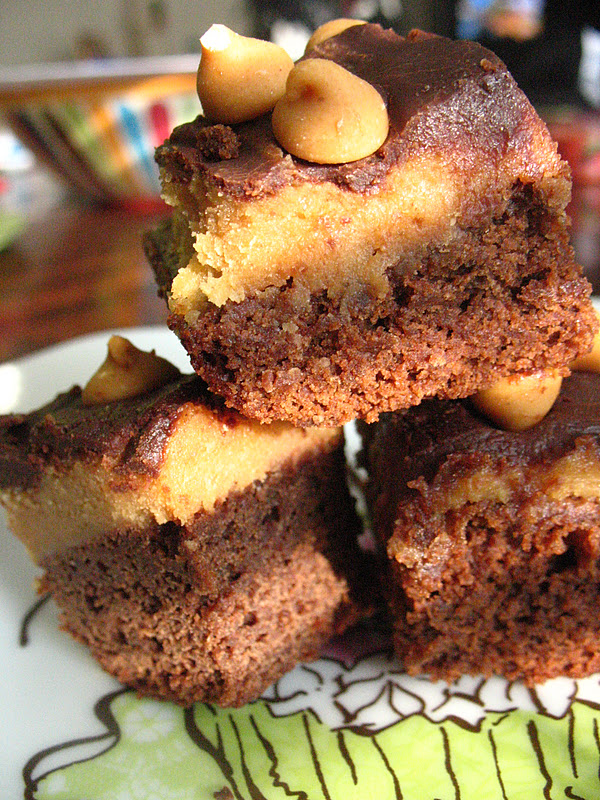
Deep in the recesses of my mind I knew there was something I had seen that I wanted to try.  When I opened my e-mail I remembered...this wonderful peanut butter cookie dough brownie.  She agreed...that would be a perfect treat, so it was settled.  I mean, really, peanut butter?  Cookie dough?  Brownies?  Great combos. 

So, I accessed this recipe from Recipe Girl and tried it.  It was GREAT!  The cookie dough was my favorite but it combined perfectly with the brownie.  Usually when I make brownies, I cheat on the baking chocolate and just use chocolate chips. This time, however, I decided to do it right and use baker's chocolate.  It really does make a big difference.    Obviously, it made WAY too much for the two of us to eat, so I shared with others who were there that night including our program director.  All enjoyed it.  If you like Reese's then you will like this!  Just try...and don't worry, the cookie dough is egg free, though that doesn't keep me from eating other cookie doughs! 

Peanut Butter Cookie Dough Brownie from Recipe Girl
BROWNIE LAYER:
1/2 cup unsalted butter
2 ounces unsweetened chocolate
1 teaspoon vanilla extract
1 cup granulated white sugar
2 large eggs
1/2 cup + 2 tablespoons all-purpose flour
1/2 teaspoon baking powder
1/2 teaspoon salt


COOKIE DOUGH LAYER:
1/4 cup unsalted butter, at room temperature
1/2 cup packed light brown sugar
2 tablespoons milk
1/2 cup creamy peanut butter
1/2 cup + 2 tablespoons all-purpose flour
1/2 teaspoon salt

GANACHE TOPPING:
3/4 cup bittersweet chocolate chips
1/4 cup milk
1 tablespoon granulated white sugar
1 cup peanut butter chips

Preheat oven to 350 degrees F. Spray an 8x8-inch pan with nonstick spray. Line the bottom of the pan with a strip of parchment paper, so that it comes up two of the sides that are opposite each other. Spray the parchment with nonstick spray.

Brownies:  In a small bowl, melt the butter and unsweetened chocolate in the microwave until the butter is melted, about 2 minutes. Stir briskly until well-combined, then stir in the vanilla. Meanwhile, in a large bowl- beat together the sugar and eggs - use a mixer. Scrape in the partially cooled chocolate mixture and mix to combine. In separate medium bowl, whisk together flour, baking powder and salt. Stir the flour ingredients into the wet ingredients. Spread the batter into the prepared pan. Bake 22 to 28 minutes, or until a toothpick inserted into the center of the brownies comes out clean. Remove from the oven and let cool.

Meanwhile, prepare the cookie dough: In a large bowl, use an electric mixer to combine butter and brown sugar. Mix until creamy. Add milk and peanut butter and mix to combine. Stir in flour and salt. Spread the peanut butter cookie dough in an even layer over the cooled brownies.

Now make the ganache.  In a small bowl, microwave chocolate chips cream and sugar for 1 minute, stirring after 30 seconds. Continue to microwave in 30 second bursts, stirring after each heating time. Continue heating and stirring until the chocolate is melted and the mixture is smooth. Pour the ganache over the peanut butter cookie dough layer and carefully spread to cover the top. Sprinkle with peanut butter chips. Refrigerate until the dough and the ganache topping are set (at least 1 hour). Use a knife to loosen the sides, then carefully grab the parchment paper and remove the whole pan of brownies to a cutting board. Use a sharp knife to cut them into squares. Keep refrigerated until ready to serve.

Source: RecipeGirl.com (Adapted slightly from Food Network)

Saturday, October 15, 2011

For your Breakfast Pleasure

When I was growing up, my dad would make pancakes or waffles every Saturday.  A great tradition if you ask me!  Pancakes were always my favorite.  I guess I like the fluffiness. 

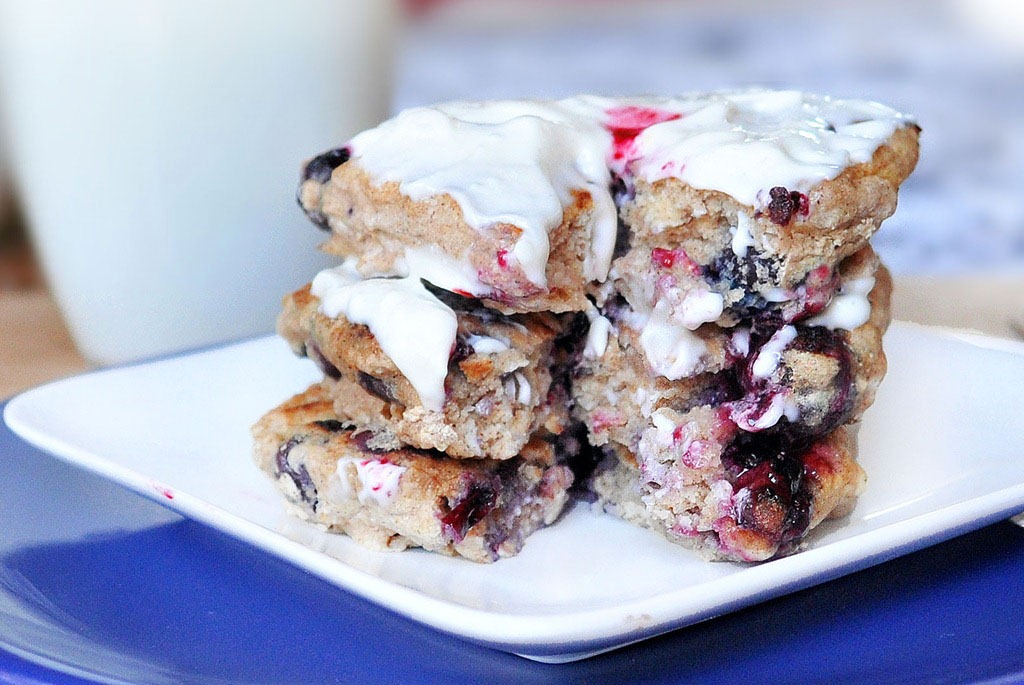
When everyone at work kept talking about how great the pancakes were I figured they were right...um, wrong!  The pancakes are kind of not good at all...thick, dense and just about tasteless.  I'll take my Daddy's please.  Thankfully, I have learned from him!  However, when I saw these pancakes on Jenna's site, I decided to try them out. 

They are definitely denser than the light, fluffy buttermilk variety...but they are good!  I've made them twice and decreased the amount of flour the second time because I like my pancakes a little less dense.  The whole wheat flour gives a nutty flavor that pairs nicely with the cinnamon and syrup.  For summer, the blueberries are great but I have a feeling that apples would be great in the fall!  Try them out...or, if you are in the mood for fluffiness, try my dad's!

Blueberry Pie Pancakes adapted from Jenna at EatLiveRun
1/2 cup blueberries
1/4 cup flour (ww pastry, white, spelt, Bob’s gluten-free, etc.) - I used whole wheat
2 T rolled oats
1/2 tsp cinnamon
2/3 tsp baking powder
1/8 tsp salt
1/2 tsp pure vanilla extract
1 T sugar or 1 packet stevia (omit if you don’t want sweet pancakes)
1/3 cup nondairy milk

If you want to add 1tsp-1Tbsp oil, you can...I did not and they were still great.

Combine dry ingredients in a bowl, then add wet. Mix, but don’t overmix. Cook on an oiled (or sprayed) pan, on low-medium, flipping each pancake once.  To know when to flip, watch the top of the pancake.  When you start to see bubbles throughout, you're ready to flip!  The second side will take less time.  Top with syrup and enjoy! 

For a fall flavor, try apples instead of blueberries.

Thursday, October 13, 2011

Fun at the Fair

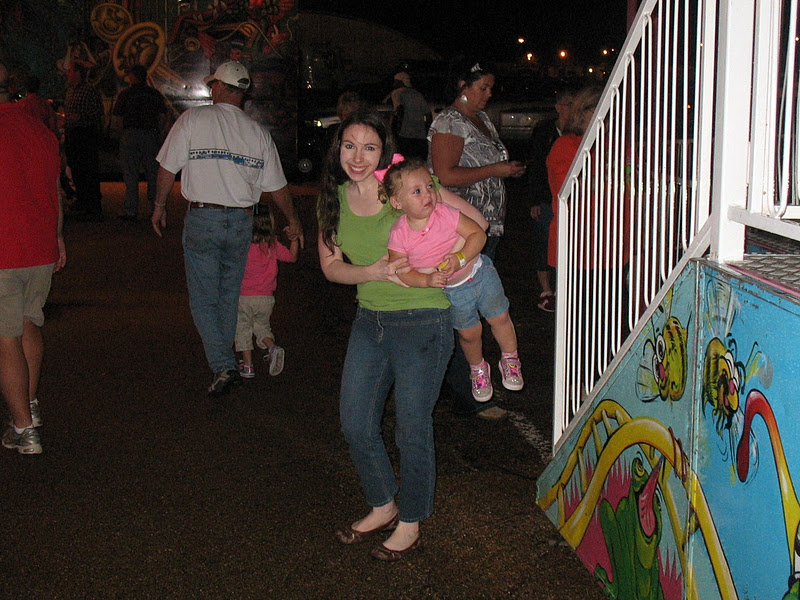
So, this is a "life" post!  Last night I went to the fair with a friend and his little girl.  I haven't been to the fair since I was a junior in high school - 11 years ago.

At first I was concerned that I wouldn't get to go due to a sudden rain storm, but we waited for about 15 minutes and it stopped...though my shoes DID get muddy and almost got stuck on the walk in.  We rode lots of the kiddie rides first...horses, bees, bears, the fun house X 5 (a slide!).  Our fun was stopped, though, when K was 1/2 inch too short for the caterpillar (really, come on!).  She was quite disappointed, so we did the fun house one more time and then went for food.

My food memories from the fair are free biscuits and elephant ears.  As you can imagine, the choices were endless - Burgers, pizza, hotdogs, corndogs (even chocolate dipped...ew?), nachos, gyros, sushi (?), roasted corn, Saratoga chips (apparently fresh cut potato chips loaded with chili and cheese), fried candy bars, funnel cakes, fish, chicken strips, cotton candy, etc.  There was even a donut burger - Krispie Kreme donuts as the bun with a big ole burger in between - WOW!

We ended up getting chicken on a stick and fish from Penn's (local fish place).  On the way back to see the circus (that ended up NOT happening due to the equipment being wet - boo!) and ride the big yellow slide (also closed due to wetness - BOO!) I got my elephant ear.  Oh, the goodness.  It's basically fried dough with cinnamon sugar on it - I think it' an un-funneled funnel cake!

Then we rode the ferris wheel, got K some "ice" (sno cone), rode the pony, and trecked back through the mud to the car.  It was a great night!