Showing posts with label candy. Show all posts

Sunday, May 05, 2013

A Quick Recipe Break

I'm having fun reliving our wedding day through the wedding posts, but I thought I'd give you a little break with a recipe. 
As has been established, K loves making things.  I realized this past weekend her entire motivation (well, maybe not ENTIRE but a big one).  We were making something and all that had been done was whipping some eggs and sugar.  I pulled out a spatula to be sure everything was off the bowl before adding more stuff and she says "Can I lick something?"  Good grief!  Anyway, a few weeks ago we made some M&M cookies (the ones that led her to ask for more "emmie m" cookies when we made peanut butter cookies.  I found this recipe on Picky Palate and know that any recipe with pudding in it is great!  It did not disappoint...except that my cookies didn't look nearly as good as hers. Maybe it was due to the fact that we used regular sized M&M's rather than mini.  Who knows!  Alas!  They are good....give them a try!

Perfect M&M Cookies from Picky Palate
  • 1 stick/1/2 cup unsalted butter, softened
  • 1/2 cup granulated sugar
  • 1/2 cup packed light brown sugar
  • 1 large egg
  • 1/2 teaspoon pure vanilla extract
  • 1 1/2 cups all purpose Gold Medal Flour
  • 3 tablespoons Instant vanilla pudding mix
  • 1/2 teaspoon baking soda
  • 3/4 cup chocolate chips
  • 1-1 1/2 cups M and M’s
Directions
  1. Preheat oven to 350 degrees F. and line a large baking sheet with a silpat liner or parchment paper.
  2. In a large mixing bowl cream your butter and sugars until well combined. Add your egg and vanilla mixing to combine. Add your flour, pudding mix, baking soda and salt, stirring to combine. Add chips and m and m’s stirring to combine.
  3. With a medium cookie scoop, place dough 1 inch apart from each other. Bake for 10-12 minutes until cooked through. Let cool on cookie sheet for 10 minutes before transferring to cooling rack. Enjoy!

Sunday, April 21, 2013

A Cookie Cake to Be Careful With

A coupe of weekends ago, we had a garage sale.  Two days before, we had a wedding shower for a girl at work.  I made a sugar cookie cake that I saw on Pinterest.  It was a fun spring cookie cake.  

I used Easter M&M's, Easter candy corn for the candy.  It turned out really good.  My favorite bites had candy corn!  :-)  I had some M&M's left over as well as a couple of pieces of cake.  I put both in the same container.  The morning of the garage sale, I got K's breakfast ready. 
A little while later, I went in the check on her and noticed that the container with the leftover cake was gone...hmmmm.  I found the cookie on her plate and an empty container....NO M&M'S!  Then I found an empty Christmas mini-M&M tube in her bed.  "K, did you eat this candy?!" (We had a big discussion about asking mama and daddy about candy before eating it the week before)  Wide eyes....wait....wait...very small nod.  Sigh.....long story short, she snuck candy and rolls and brownies three times that same day!  Oh my!  After a week of no treats, I hope she's learned her lesson!  We'll see!  :-)  All that said...try this cookie cake.  It's really good!  Just be aware that your little one might try to eat any leftovers without you knowing!


1  roll (16.5 oz) refrigerated sugar cookies
2  cups miniature marshmallows
1  cup spring-colored candy-coated chocolate candies
1/2  cup spring-colored miniature jelly beans (or candy corn!)
 
Heat oven to 350°F. Line 12-inch pizza pan with foil; grease foil with shortening. Cut cookie dough into 1/4-inch slices; arrange evenly in pan. With floured fingers, press slices to form crust.  Bake 16 to 20 minutes or until deep golden brown. Immediately sprinkle marshmallows evenly over warm base. Bake 1 to 2 minutes longer or until marshmallows just begin to puff. Cool 5 minutes. Enjoy!

Tuesday, April 16, 2013

Easter Bars

When we were scheduling March, D wanted to do some extra work.  I told him, okay...just not on our wedding (HA!), honeymoon (impossible), or Easter.  That left one weekend...the one after we got back.  It really was fine because I wanted him here for our first Easter as a family. 
I'm really used to making a "special" Sunday lunch for Easter but our church is 40 minutes from home and the service ends at noon.  K would not make it until after that.  So, we just had a laid back weekend. 
K dyed Easter eggs, played ballerina, had an indoor egg hunt.
We ate lunch at a new-to-us Mexican restaurant...it was pretty good.  Will add it to our Sunday rotation.  Later on Sunday, I made a "special" Easter dessert.  One of D's favorite candy is Cadbury eggs.  I had seen a recipe on Picky-Palate for a Cadbury Egg Cookie Bar....um, D would totally LOVE these! 
They were easy and he did love them...so did the rest of the peds residents.  Don't worry!  I left him some at home before taking the rest away to be devoured.  So, if you find yourself with leftover Cadbury eggs, try this one out!  That inside creme just melts into deliciousness in these bars.   


 (and now D is revealed!)


Cadbury Egg Cookie Bars adapted from Picky-Palate
1 stick/1/2 cup unsalted butter, softened 
1 box yellow cake mix 
1 large egg  
1 cup mini chocolate chips 
5 Cadbury Eggs, chopped
 
Preheat oven to 350 degrees F. and line a 9×13 inch baking dish with foil that’s been sprayed with cooking spray.  Place butter, cake mix, egg, oil and chocolate chips into a large mixing bowl, stirring to combine into dough. Gently stir in chopped Cadbury Eggs to combine. Transfer dough to prepared baking dish and press evenly. Bake for 25-30 minutes until baked through. Let cool for 30 minutes before cutting into squares. Enjoy!

Makes 24 squares (or about 72 tiny cubes....ha!)

Sunday, February 10, 2013

Swwwwweeeeet!

When I started getting ready for the wedding (which is now 4 weeks away!!!) I started a pinterest account.  I didn't think I'd use it much and was attempting to ONLY use it for wedding.  Yeah right!  That thing is great.  It's like a computerized filing system.  It's not just social network, it's USEFUL!  Now I have an easy way to keep recipes organized without clutter!  Score!  Over Christmas, I kept wanting to make this recipe I saw on Peabody's site but couldn't find the "special edition" oreos she used.  Then one day I was in the store and saw the ginger "Newman O's."  They are basically organic oreos and would work perfectly!  I made the fudge and man, was it good!  Good thing I planned to take it to work.  And it was soon gone.  Just know that it is sweet!  I didn't have the marshmallow creme so added just a bit more confectioner's sugar, which may be one reason it was so sweet...and i have a feeling it was a bit more "icing-y" than it would have been.  But still, I would totally make it again!  As always, thanks, Peabody!

Gingerbread Oreo Fudge

3 cups granulated sugar
3/4 cup unsalted butter
2/3 cup Evaporated Milk
2 cups white chocolate chips
1 cup marshmallow creme (optional)
1/2 cup finely crushed ginger flavored sandwich cookies
1 teaspoon vanilla extract
1 cup crumbled Gingerbread Oreos

Line 9-inch-square baking pan with foil.  Combine sugar, butter and evaporated milk in medium, heavy-duty saucepan. Bring to a full rolling boil, stirring constantly. Boil, stirring constantly, for 3 minutes. Remove from heat. Stir in white chocolate chips, marshmallow creme (if using), finely crushed cookies and vanilla extract.
Pour into prepared pan. Sprinkle crumbled cookies on top. Gently swirl cookies into fudge using a knife without touching bottom of pan.  Refrigerate for 1 hour or until firm.  Lift from pan; remove foil. Cut into 48 pieces. Store in airtight container in refrigerator. Peabody got 12 pieces…I actually got 48…they were very little but it was SOOOO rich!

Adapted from Nestle Toll House

Saturday, January 12, 2013

My Favorite Bite

The other snack dessert I made this Christmas was a snickerdoodle cookie dough bite.  The original recipe had rolos in the middle; however, I am a Reese's lover...so, I substituted Reese's for the rolos.  Um...YUM! My favorites all in one...snickerdoodles, Reese's, and cookie dough.  :-)  Now, to me, these had a better texture than the chocolate chip dough bites.  They had a bit more texture and were less "sticky." 

Reece's Stuffed Snickerdoodle Bites from Cooking Classy 
1 1/2 cups all-purpose flour
1 tsp cinnamon
1/8 tsp nutmeg
1/4 tsp salt
1/2 cup salted butter, softened
2/3 cup packed light brown sugar
1/4 cup granulated sugar
1/4 tsp cream of tartar
3 Tbsp milk
1 1/2 tsp vanilla extract
28 Reese's candies
3 Tbsp granulated sugar
3/4 tsp cinnamon

In a mixing bowl, stir together flour, 1 tsp cinnamon, nutmeg and salt, set aside. In the bowl of an electric mixer, cream together butter, brown sugar, 1/4 cup granulated sugar and cream of tartar until pale and fluffy, about 4 minutes. Stir in milk and vanilla extract. Add dry ingredients and mix until combine. In a separate small mixing bowl, whisk together 3 Tbsp granulated sugar and 3/4 tsp cinnamon. Scoop dough out 1 (even) TBSP at a time, then press one Reese's candy into the center of scooped dough and roll into a ball. Roll each dough ball into cinnamon sugar mixture. Chill or serve immediately. Store Cookie Dough Bites in refrigerator. Enjoy!

Friday, January 11, 2013

Dessert Bites

Yikes!  I didn't realize it had been so long since I posted.  I've made several different things for my residents at work but before that, we need to finish up Christmas stuff.  Next up, chocolate chip cookie dough balls.  When my dad tried these, his comment was "It's like eating dough..." Well....yes...thus, cookie dough balls.  I did feel like the texture was a little bit too "sticky."  I needed to keep them cool, which made the chocolate chips quite hard.  They were still good though.  I shared with the residents who were on schedule to work at Christmas and they enjoyed them.  Next post I'll share MY favorite, the snickerdoodle balls.  YUM!

Chocolate Chip Cookie Dough Bites from Cooking Classy 
1/2 cup salted butter, softened
3/4 cup packed light-brown sugar
1/3 cup granulated sugar
1/4 tsp salt
3 Tbsp milk
1 tsp vanilla extract
1 1/2 cups all-purpose flour
1/4 cup milk chocolate chips, chopped
1/4 cup semi-sweet chocolate chips, chopped

Topping

1/3 cup semi-sweet chocolate chips

In the bowl of an electric mixer, cream together butter, brown sugar, granulated sugar and salt until pale and fluffy about 3 - 4 minutes. Stir in milk and vanilla extract. Add in flour and mix just until combine (dough will seem dry at first but it will come together). Mix in chopped chocolate chips. Scoop dough out 1 equal tablespoon at a time and roll into balls. Place on parchment or wax paper. If drizzling with chocolate, place 1/3 cup semi-sweet chocolate chips in a microwave safe container and microwave on 50% power in 30 second intervals, stirring after each interval until melted and smooth. Pour melted chocolate into a small ziploc bag, seal bag and cut a very small tip off the corner of the bag. Drizzle chocolate over tops of truffles and allow to set.  For more firm cookie dough bites, chill 1 hour in refrigerator. Store in refrigerator in an airtight container.Enjoy!

Monday, December 31, 2012

Two Tone Fudge

Despite being on service (i.e., covering hospital patients) for the past week, I still had a great Christmas!  D came back from AL on December 24 so that we could have Christmas here together with K.  Santa delivered gifts late to his house (not sure what happened there!  ;-)  ) so, I was there when K saw her princess castle.  While they were gone to AL, I pretty much just stayed at my house, watched movies, and did a bit of Christmas treat making.  I made two different kind of cookie dough balls and some peanut butter fudge.  Mama's favorite was the fudge...mine, the snickerdoodle dough balls. 

I'll share the fudge today.  It's a recipe from Peabody, so you KNOW that it has to be good!  It ended up being pretty easy to make, though I'm not quite sure if I put enough sugar in the peanut butter portion.  Still good.  Try it out yourself!


Double Layer Fudge adapted from Culinary Concoctions by Peabody
 
Chocolate Layer
1 can (14oz) condensed milk
3 cups chocolate chips (of your choice I went semi-sweet)

In a medium saucepan heat up condensed milk over low.  Add chocolate chips and melt. Stirring often.
Mixture will start to get hard and lose its sheen. Spread into a buttered 13x9-inch pan lined with foil.

Peanut Butter Layer from Alton Brown Food Network.com
8 ounces (2 sticks) unsalted butter
1 cup creamy peanut butter
1 teaspoon vanilla extract
1 pound powdered sugar
chocolate chips and peanut butter chips to sprinkle on top about a 1/2 cup each

Soften butter and combine in mixer with peanut butter.  Add in sugar until well combined.

*(This may be where I messed up...obviously didn't read the instructions...This is how Peabody did it!):

Combine the butter and peanut butter in a 4-quart microwave-safe bowl and cover with plastic wrap.
Microwave for 2 minutes on high.  Stir and microwave on high for 2 more minutes. (Use caution when removing this mixture from the microwave, it will be very hot.)  Add the vanilla and powdered sugar to the peanut butter mixture and stir to combine with a wooden spoon. The mixture will become hard to stir and lose its sheen.*

Pour the peanut butter layer on top of the chocolate layer. Sprinkle chocolate and peanut butter chips and press down to help them stick to fudge.  Refrigerate until cool, about 2 hours. Cut into 1-inch pieces and store in an airtight container at room temperature for up to a week. Enjoy!

Saturday, December 08, 2012

Snack Time!

My family loves to snack, especially at family holiday get togethers!  An hour before lunch, you will find people standing around the counter eating cheese, hummus, dips, sausage, crackers...whatever we have.  I saw a snack mix on Recipe Girl one day and knew that I had to make it for Thanksgiving!  It has fritos and Chex...all loved by my fam.  It is covered in a sweet sugar mix to make it the perfect sweet and salty mix.  In fact, I just got an e-mail from my aunt asking for the recipe!  I'd say, it was a hit.  Try it out for yourself!


Frito Snack Mix from Recipe girl
10.5 ounce bag of Fritos
2 cups rice Chex cereal
2 cups pretzel twists
1 1/2 cups nuts
1 cup light brown sugar
1/2 cup butter
1/2 cup light corn syrup
1 cup mini M&M's

Preheat oven to 350.  Mix together the Fritos, cereal, pretzels, and nuts in a bowl.  In a small pan, melt the sugar, butter, and corn syrup over medium heat.  Bring to a boil and then boil for 4 minutes.  Remove from heat and pour over the frito mix.  Stir to coat evenly.  Pour the mix onto a large roasting pan and place in the oven.  Bake for 8 minutes.  Stir and bake for 8 more minutes.  Transfer the mix to wax paper on the counter and allow to cool.  Break into large clumps and place in a storage container.  Pour M&Ms over the mix.  Enjoy!

Tuesday, November 27, 2012

Daring cookies!

Holiday season is the time for sharing and Peta of Peta Eats is sharing a dozen cookies, some classics and some of her own, from all over the world with us.  I had grand plans of making several of these cookies; but I failed!  I only made one!  It's crazy how a month can get away from you.  The cookie I did manage to make, however, was amazing!  I made these turtle bars. 

It is very buttery - I actually sopped some of the butter off the base after baking it the first part.  I could eat just the base and be happy!  I took them to the ER when I worked earlier this month and the residents really liked them...one even asked for the recipe.  So, try them out for your holiday party! 


Truffle Bars
Base
2 cups (280 gm) (10 oz) all-purpose (plain) flour
1 cup (200 gm) (7 oz) brown sugar, firmly packed
1 teaspoon (5 ml) (6 gm) mixed spice
1 cup (240 ml) (225 gm) (8 oz) melted butter

Caramel Layer
¾ cup (180 gm) (6-1/3 oz) butter
1 cup (200 gm) (7 oz) brown sugar, firmly packed
1½ cups (200 gm) (7 oz) pecans chopped into 1/4 -inch (2/3-cm) pieces

Top Layer
1 cup plus 2 tablespoons (200 gm) (7 oz) dark eating chocolate or chocolate chips!
 toasted pecans (1 for each piece after cutting)

Directions:
Preheat the oven to moderate 350°F/ 180°C/gas mark 4.  Grease or line with bake paper a 13”x 9” x 2” (33cm x 23 cm x 5 cm) baking tin.  Mix the dry ingredients well in a medium size bowl and mix in the cup of melted butter. Press evenly into lined tin. Bake for 10 minutes.  Scatter the chopped pecans over the base. Bake for another 5 minutes.

While the base is baking melt the ¾ cup (180 gm) (6 1/3 oz) butter in a small pot over low heat. Add the brown sugar and stir until smooth.  Heat over a medium heat until the entire surface is bubbling.  Pour over the base and spread evenly.  Bake for 10 minutes or until the surface is covered with bubbles. 

While this step is baking break up the chocolate and chop or blitz in a food processor until the chocolate is in small ¼ “ (1cm) chunks.  Spread evenly over slice as soon as it comes out of the oven.  Let it sit for 2 or 3 minutes and then smooth the chocolate with a spoon.

Roast the pecans on a lower shelf for 5 minutes (or until they smell cooked) while the base is cooking then let them cool. Place the pecans evenly over the chocolate while it is still soft so when you cut the bake into pieces there is a pecan on each square. Or sprinkle chopped roasted pecans over the top.  Cool completely in the pan before cutting.

Monday, April 02, 2012

Treat Bars

I first made this treat last year...but then my hard drive crashed and I lost the picture.  So, I had to make it again!  I think I made it right before my birthday...just because I wanted to. 

The next morning they were all gone.  This is a simple treat made with granola, peanut butter, and butterscotch.  It would be a great treat to make with the kiddos.

 Once again, this is from the wonderful book from Southern Living.  I'm nearly finished with all the recipes...now I'm down to the ones that I didn't want to try as much! :-)  But try this one for sure...easy and yummy!

Triple Treat Bars from Southern Living Incredible Cookies
2 cups butterscotch chips
1/2 cup peanut butter
4 cups granola
1 1/2 cups M&M's

Spray a 13x9 pan with cooking spray then line with waxed paper.  Melt butterscotch chips and peanut butter.  You can do this in a saucepan over low heat or slowly in a microwave, starting with 1 minute and stirring then 30 second intervals, stirring between each, until morsels melt.  Combine the granola and M&M's in a large bowl.  Pour the butterscotch mixture over them and stir.  Spread this into the prepared pan and place pan in the refrigerator.  Chill until firm.  Remove and cut into bars.  Enjoy!

Tuesday, February 14, 2012

Better Than Starbucks

Happy Valentines Day!!!  I hope that everyone has had a good day.  Valentines Day is a day to celebrate everyone you love...and those that love you.  I'm so thankful for the love that my parents have given me since day 1...and for the love that they have exhibited to each other in front of me.  Such godly example for me!  I'm also thankful for the new Valentine in my life, D!  What a sweet encourager he is, kind to everyone, and such a great Daddy to Miss K.  He even brought flowers to my door this morning before he went to work.  :-) 

The most important love, though, that any of us can experience is the love that Jesus showed when He came to sacrifice Himself for us, so that we, even though separated from God by sin, could be reunited with Him. His love is full, complete, and unconditional...He wants us to come to Him as we are and trust Him for all we need.  The greatest love EVER!

I think that chocolate covered strawberries are great and decided that I should take a sweet treat to work today.  I decided to take chocolate covered strawberry cake balls.  They were very easy to make and quite well received by my co-workers.

 During a meeting this afternoon, one of the program directors ate something along the line of six of them!  One of the chiefs said I didn't let him down.  Then, before I left, a fellow resident grabbed one more.  She said that she had become addicted to Starbucks' cake pops...but that these were even better!  Woo Hoo!  I LOVE when my treats are well received.  These would be really fun to use for baby showers as well.  Since you are combining the cake with icing, you can use the low-fat version of the cake without any qualms.  Any way to lighten things up even just a little is good...and doesn't have to make the taste any different.  So, grab your favorite cake and icing and make some little treats for the ones you love!

Cake Balls
favorite cake mix, baked per package instructions (I used strawberry)
1 can ready to spread icing/frosting - choose a flavor to compliment your cake (I used cream cheese)
dipping chocolate (I stocked up on these after Christmas...still have 7 packages to use!)

Prepare cake per package instructions.  Feel free to use low fat version as you'll be adding plenty of sugar and fat with the icing.  Cool for about 30 minutes.  Crumble cake into a mixer bowl.  Add in icing and then mix for about two minutes.  Place into refrigerator for 2 hours.  Remove and roll into walnut sized balls.  Place on waxed paper on a cookie sheet. 

After forming all the cake into balls, place the pan into the freezer for about 1 hour.  When ready, melt the dipping chocolate and coat the balls in chocolate, replacing on the waxed paper.  The chocolate should harden quickly, but they are better when they are refrigerated some.  Enjoy!

Monday, February 06, 2012

Puppy Paws or Turtles?

When my parents came for Christmas, Mama brought some little treats with her.  We love snacks in my family...especially at Thanksgiving/Christmas! 

This year, instead of her typical toffee, she made a new candy...pretzel turtles.  I had seen this before but never made it.  Mama was super excited about them; and I must admit, they were pretty good...and simple.  You just take a pretzel, the traditionally shaped kind, and put a rolo on top.  Then you put those in the oven for just a few minutes, enough to soften the candy.

You remove it from the oven, then press a pecan half into the candy...allow to cool and you have pretzel turtle....or puppy paws, depending on how you look at them!  :-)

Pretzel Turtles
mini twisted pretzels
rolo candy
pecan halves

Preheat the oven to 300 degrees.  Take the desired number of pretzels and place them on a cookie sheet.  Unwrap the same number of rolo candies and place them on top of the pretzels.  Place the sheet carefully in the oven and bake for 4 minutes.  Remove from the oven and place a pecan half on each candy, pressing down slightly.  Allow the candy to cool and enjoy!!!

Monday, January 30, 2012

Alton's Fudge - the Peanut Butter version

After D's mom made fudge when she was here in December, I decided I wanted to make some fudge.  So, over New Years, I decided to make some peanut butter fudge; but it needed to be quick as I was working 12 hour shifts for six days in a row.  I found Alton Brown's recipe and it turned out to be great.  Very quick and easy. If you have any peanut butter lovers coming to your house for the Super Bowl, you should make this.  You could even top it with Chocolate to make it Reese's like.  Mmmmm!

Easy Peanut Butter Fudge
8 ounces unsalted butter, plus more for greasing pan
1 cup smooth peanut butter
1 teaspoon vanilla extract
1 pound powdered sugar (I guesstimated and  may have put a little more than necessary)


Combine the butter and peanut butter in a microwave-safe bowl and cover with plastic wrap. Microwave for 2 minutes on high. Stir and microwave on high for 2 more minutes. Be careful...it's hot! Add the vanilla and powdered sugar to the peanut butter mixture and stir to combine. The mixture will become hard to stir and lose its sheen. Spread into an 8 by 8-inch pan lined with parchment paper. Fold the excess parchment paper so it covers the surface of the fudge and refrigerate until cool, about 2 hours. Cut into 1-inch pieces and store in an airtight container at room temperature for up to a week. Enjoy!

Friday, December 16, 2011

Halloween (?) Squares

I'm making a list, checking it twice...my grocery list that is!  I think that I shall do some baking this weekend.  I haven't done much recently and my friends at work have noticed...but I've been busy!  These are some quick, easy chocolate treats that I made in October for the ER. 

They are called Rocky Road Halloween Squares, so I figured that they would be perfect for an October treat.  However, they would also be a perfect Christmas tray treat!  So, easy to make!  Just melt, pour, stir, pour, and cut...then enjoy!  All of the ER nurses, doctors, residents, and respiratory therapists enjoyed them.  I think they liked the combination of the sweet and salty...which I'm a bit partial to as well.  So, if you need a quick and easy treat, try these out!

Rocky Road Halloween Squares from my mom
1 12ox. package chocolate chips
1 14 oz can sweetened condensed milk
2 Tablespoons butter
2 cups dry roasted peanuts
10.5 oz. bag mini-marshmallows

Melt chocolate chips and butter (you can do this in the microwave slowly, or over a double boiler). Combine nuts and marshmallows.  Pour the chocolate over this mixture and stir until all is coated well.  Place waxed paper in a 13X9 pan then spread the nut/marshmallow mixture into the pan.  Chill 2 hours or until firm.  Remove from pan and cut into squares.  Enjoy!

Saturday, August 27, 2011

The Candy (Doc) Man Can

Do y'all know that song?  The Candyman Can?  It's from Willie Wonka.  :-)  The August 2011 Daring Bakers’ Challenge was hosted by Lisa of Parsley, Sage, Desserts and Line Drive and Mandy of What the Fruitcake?!. These two sugar mavens challenged us to make sinfully delicious candies! This was a special challenge for the Daring Bakers because the good folks at http://www.chocoley.com offered an amazing prize for the winner of the most creative and delicious candy!

We had to make two different kinds of candy, one of which had to involved tempered chocolate.  Sooo, off I went in search of candy recipes.
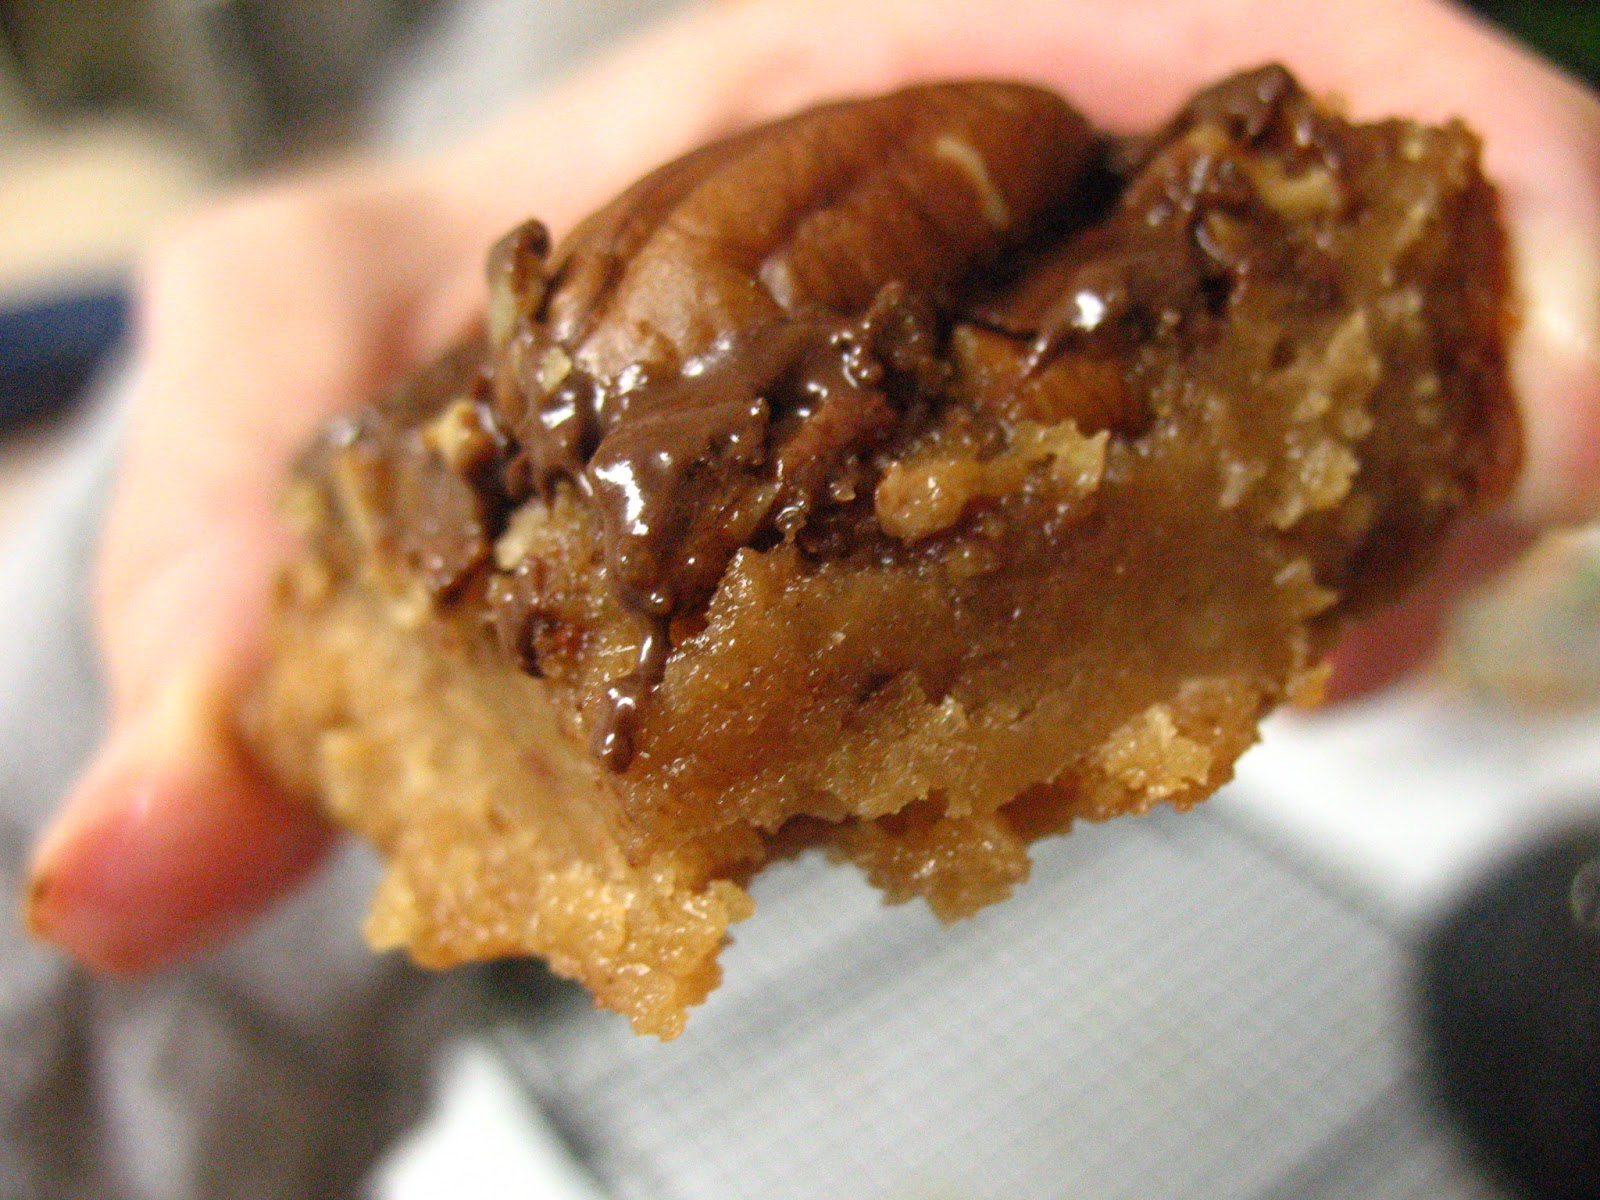
I found one here for homemade butterfingers.  Um, yes please!  I'm not so sure if the butterfinger part actually came out like it was supposed to.  It tasted good but the texture was...hard.  Interestingly enough, they were easier to bite straight out of the refrigerator.  Once they warmed up some, not only did the chocolate start melting, but it was nearly impossible to bite.  I'm not sure of the mechanism of that...but it happened!  That just meant that I couldn't take it to share with anyone else...too bad.  Ha!  I chose to use the tempering method of melting the chocolate and then cooling it with unmelted chocolate.  It was fairly simple...except that my candy thermometer didn't measure low enough, so I had to guess as to when the chocolate was at the correct temperature.  I think it still worked well! 

My next candy was the Southern classic...divinity!  My dad suggested this one when I visited them, and I decided it would be fun to try.  Of course, Mississippi in the summer is almost always humid, and divinity is a very stubborn candy!  Thankfully, it decided to work the day I decided to make it.  The recipe I used came from Southern Sideboards.  As much as I've heard about divinity, this actually was fairly simple.  The one thing that wasn't clear was how long to whip the completed mixture at the end.

  The recipe said until the glossy mixture becomes dull...hmmm.  So, I checked with some recipes online and found one that said the most common mistake is not whipping long enough.  It suggested 10-15 minutes...so I did about 15.  By that time the mixture was definitely "dull."  Oh goodness!!!  Divinity...ssoooooo good!  I took them to my clinic this past Thursday, and when I walked it one of the nurses said "Oh!  I was just saying I wanted something sweet!  These are just perfect." I felt like it was pretty sweet, but everyone who tried them said that they were great and NOT too sweet.  YAY!  Thanks for the challenge this month.  It was a fun one!

Butterfinger Candy adapted from Not Without Salt
1 cup smooth peanut butter
1 teaspoon vanilla extract
¼ teaspoon salt
1 cup sugar
⅓ cup light corn syrup
½ cup water

Butter an 8-inch square pan then set aside. In a small, microwave-safe bowl combine the peanut butter, vanilla, and salt. Set that aside.

In a very clean medium saucepan combine the sugar, corn syrup and water. Using clean hands combine those ingredients and remove any grains of sugar left on the sides of the pan with your fingers and a bit more water. On medium-high heat cook the sugar until it reaches 290*, just under hard crack. While the sugar cooks warm the peanut butter mixture in the microwave for 30 seconds to keep warm. This is important...I forgot to do this and it made the mixture firm up too quickly!

Once the sugar has reached 290* quickly add the peanut butter mixture and stir to combine. The mixture thickens quickly so once combined immediately put the mixture in the buttered pan. Let cool for about 7 minutes on a wire rack.  Remove from pan and cut into desired shaped pieces.  After you temper the chocolate, dip the pieces in the chocolate and allow to drip and set up on a cooling rack with waxed paper underneath.  Keep in refrigerator.

To temper chocolate:
Melt chocolate in a heat-proof bowl over boiling water (double boiler) until it reaches 45°C / 113°F.  Remove from heat and add tempered un-melted chocolate and stir until it brings the temperature down to 27°C/80.6°F. Then place the mixture back over heat and bring to its working temperature of 32°C/30°C/29°C /// 89.6°F/86°F/84.2°F depending on the chocolate you’re using (dark/milk/white). Now use it for molding, dipping and coating.

Divinity from Southern Sideboards (recipe halved)
1/2 cup boiling water
 3/8 cup (slightly less than 1/2 cup) light corn syrup
1 1/2 cups sugar
pinch salt
1 egg white
1/2 cup chopped pecans
1/2 teaspoon vanilla

Cook water, corn syrup and sugar to 234 F (soft ball stage). Meanwhile, whip egg white until starting to fluff.  Add half of the mixture a tablespoon at a time, beating constantly.  Continue to cook the remaining syrup until it is 270 F (crack stage).  Pour the syrup into egg mixture and continue beating on high.  Beat until "gloss changes to dull." This is about 15 minutes.  Fold in pecans and vanilla.  Drop by spoonful onto waxed paper.  Do this quickly.  This makes about 24 pieces.

Friday, December 10, 2010

My Favorite Candy

If you're looking for an easy and delicious treat to make for the holidays, this is one.  My favorite candy is Reese's...anything!  This is very similar to Reese's peanut butter but except in bar form.  I got it on a receipt from Kroger.  I guess it's because I bought Nestle's morsels.  When I made this, I misread the directions and didn't split the peanut butter, I put it all in the mixture.  This worked and I can't really see it being done another way.  Since I didn't have any peanut butter to put in the topping, I just used peanut butter and chocolate swirled morsels.  Worked well!  Once again, I took this to a shower, but this was a wedding shower.  I sent the rest home with my friend for her husband...he really enjoyed them, too!

No-Bake Chocolate Peanut Butter Bars from Nestle
2 cups peanut butter, divided (or not!)
3/4 cups butter, softened
2 cups powdered sugar, divided
3 cups graham cracker crumbs (you can get these already crushed at the store!)
2 cups chocolate chips

Prepare a 13X9 pan with cooking spray.  Bean 1 1/4 cups peanut butter (or all of it like I did!) and beat until creamy.  Slowly beat in 1 cup sugar.  Then stir in remaining sugar, graham cracker crumbs, and 1/2 cup of chocolate chips.  Press this into the prepared pan.

Melt 1 1/2 cups chocolate chips over low heat with 3/4 cup peanut butter (or add some peanut butter chips like I did!).  Spread over peanut butter mixture an refrigerate for at least 1 hour.  Cut into bars and enjoy!

Tuesday, November 30, 2010

More Candy Treats

Remember when I posted about the candy cookies that I made?  Well, when I bought that candy, I also bought some pretzel M&M's (they are SO good!).  After having those around for a while, I decided that it was time to get them out of the house. 

I remembered that Emily had created a yummy looking brownie using these little treats, so I decided to make those for my Bible studay.  Emily...I had several requests for the recipe!!!  These were great brownies topped off with a nice, dark chocolate glaze and bright pretzel M&M's.  Perfect!!!

M&M Pretzel Brownies from Emily at Sugar Plum

2/3 cup all purpose flour
1/3 cup unsweetened cocoa powder
1/2 teaspoon baking soda
1/4 teaspoon salt
3 large egg yolks
1 cup granulated sugar
1/2 cup unsalted butter, melted
1 teaspoon vanilla extract
1/2 cup chocolate chips
2/3 cup coarsely chopped pretzel M&M's, divided

Glaze
2 tablespoons unsalted butter, softened
2/3 cup confectioners' sugar
2 1/2 tablespoons unsweetened cocoa powder
1 tablespoon milk
1/2 teaspoon vanilla extract

Preheat oven to 375 degrees F. Line an 8x11-inch baking dish foil; coat foil with cooking spray or butter.
In a medium bowl, whisk together flour, cocoa powder, baking soda and salt. Then, in a separate bowl, using a mixer on high speed, beat egg yolks and sugar for 3 minutes, until light yellow and fluffy. Beat in melted butter and vanilla for 1 additional minute. Reduce mixer speed to low and beat in flour mixture until well combined - about 1 minute. Stir in chocolate chips and 1/3 cup chopped pretzels M&M's until combined. Spread batter evenly into prepared dish.  Bake 15-16 minutes or until well risen and set. Remove dish from oven and cool on a wire rack for 10 minutes.

Meanwhile, prepare the glaze. In a medium mixing bowl using a mixer on medium speed, beat butter until creamy; beat in confectioners' sugar cocoa powder, milk and vanilla, until well incorporated - about 2 minutes. Spread glaze evenly over warm brownies. Sprinkle remaining 1/3 cup M&M's on top. Cool completely in refrigerator before lifting out foil and slicing into bars.  Enjoy!

Sunday, October 18, 2009

Be-Twix-t and Between

When our college students returned to school, the Sunday school hosted a welcome back spaghetti lunch (eww...not a big fan!) and I offered to make spaghetti and a dessert. For the dessert, I decided to make something different because I knew that there would be a lot of chocolate chip cookies and brownies (which seemed to be the popular thing to bring). I went thumbing through Dorie Greenspan's Baking from my Home to Yours. Finally, I settled on what she calls "Snickery Squares." After making these, I think they are really more like Twix (with the addition of peanuts). Now, these bars are supposed to have a layer of caramel between the shortbread crust and the chocolate on top. Ummm...so, I didn't realize that dulce de leche is different from caramel sauce. Let me tell you...IT IS!!!! I basically had a soup of caramel. I put the bars in the refrigerator and it solidified some but after I cut the bars the caramel very quickly ran out. Even with this mistake...totally on my part!...the bars were delicious! I loved how the caramel kind of soaked into the shortbread. I could just eat the shortbread with caramel and be happy. YUM! I would make these again but get the right product for the caramel next time...or do that trick with sweetened condensed milk. Isn't there some way to cook it and make dulce de leche? I doubled the recipe and it seemed to work well. Anyway, with Halloween coming up, make your own candy with this recipe...Snickers or Twix...it's good. :-) Snickery Squares from Dorie Greenspan's Baking from my Home to Yours
Crust:
1 cup AP flour
1/4 cup sugar
2 T confectioners' sugar
1/4 teaspoon salt
1 stick unsalted butter, cut into small pieces and chilled
1 large egg yolk (I may not have used this...don't remember!)

Filling:
1/3 cup sugar
3 T water
1 1/2 cups salted peanuts
1 1/2 cups store-bought dulce de leche (oops... I used caramel)

Topping:
7 ounces bittersweet chocolate (I used semi-sweet chips)
1/2 stick unsalted butter, room temp

Preheat oven to 350 and prepare an 8-inch pan. For crust toss the flour, sugar, powdered sugar, and salt in a food processor. toss in cold butter pieces and pulse until the mixture looks like a coarse meal. Pour the yollk over the ingredients and pulse until clumps are formed. Turn into the prepared pan and press over the bottom of the pan. Prick with a fork and place pan into the oven, bake for 15-20 minutes or until slightly browned around the edges. For the filling you will candy the peanuts first. To do this, put the sugar and water in a heavy bottomed sauce pan and cook while stirring with a wooden spoon until the sugar dissolved. Continue cooking, without stirring, until it just starts to color (high heat). Toss in peanuts and start stirring right away. Stir until the peanuts are coated and begin to turn white and then turn amber colored. Remove from heat and pour over a silicone liner or parchment paper. Cool. When cool, break into small pieces. Spread the dulce de leche over teh shortbread base and sprinkle over half of the candied nuts.

For the topping melt the chocolate in a bowl (I used a microwave). When melted, gently stir in the butter until fully blended. Pour over the dulce de leche and smooth with an icing spatula. Then sprinkle the other half of nuts (finely chopped) over the top. Refrigerate about 20 minutes. May serve cold after refrigerating for 3 hours.