Friday, September 29, 2006

A Frozen Meal...is a Frozen Meal!


Last Friday a couple of friends came over for dinner and a movie. We watched Lucky Seven. If you haven't seen this movie, it is a must, especially if you're a fan of Patrick Dempsey! It also has Kimberly Williams Paisley (from Father of the Bride). VERY cute Family Channel movie. I found it at Movie Gallery. It's one of those movies I could watch over and over and never get tired of it. WARNING: this is a girly movie!

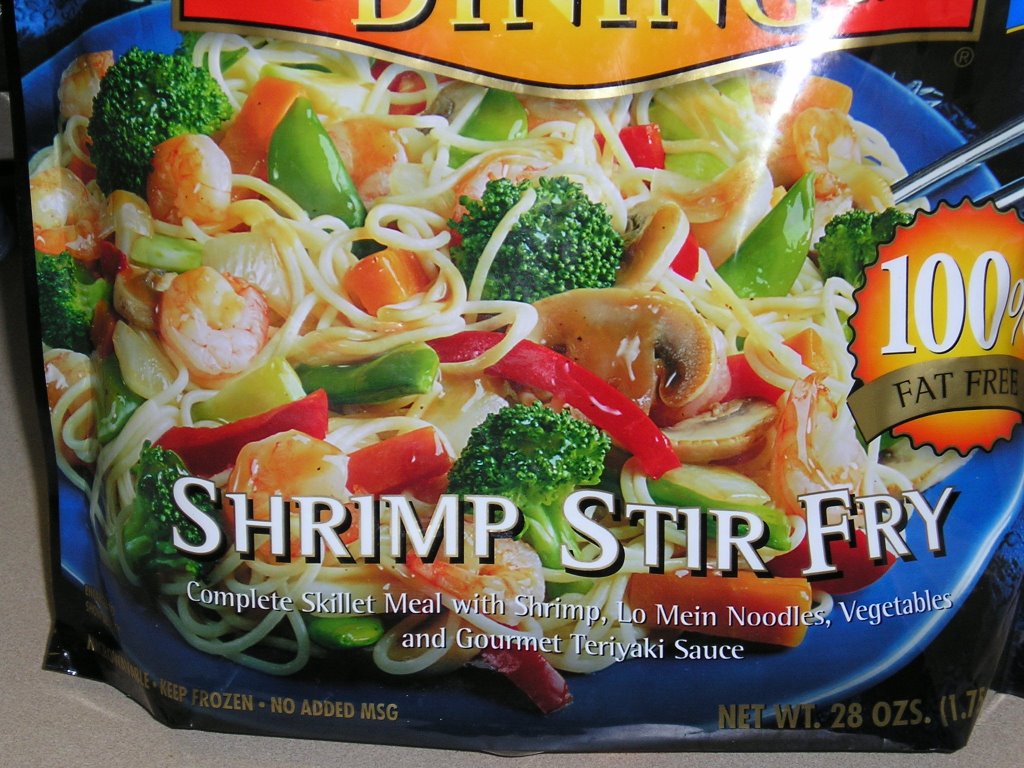
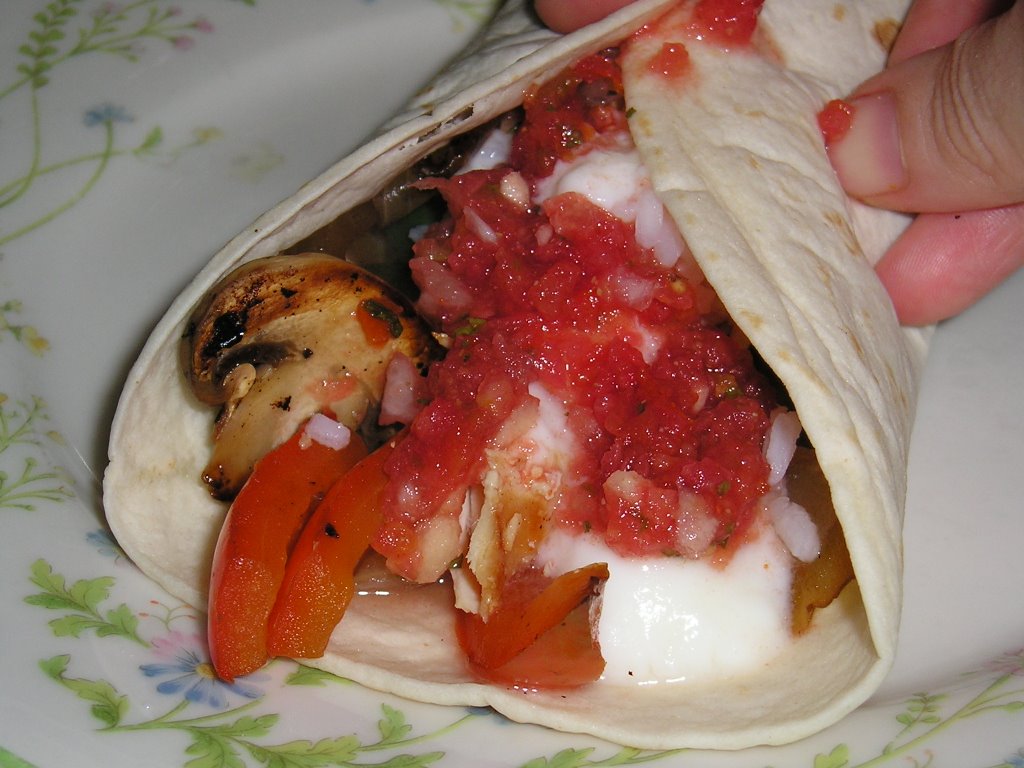
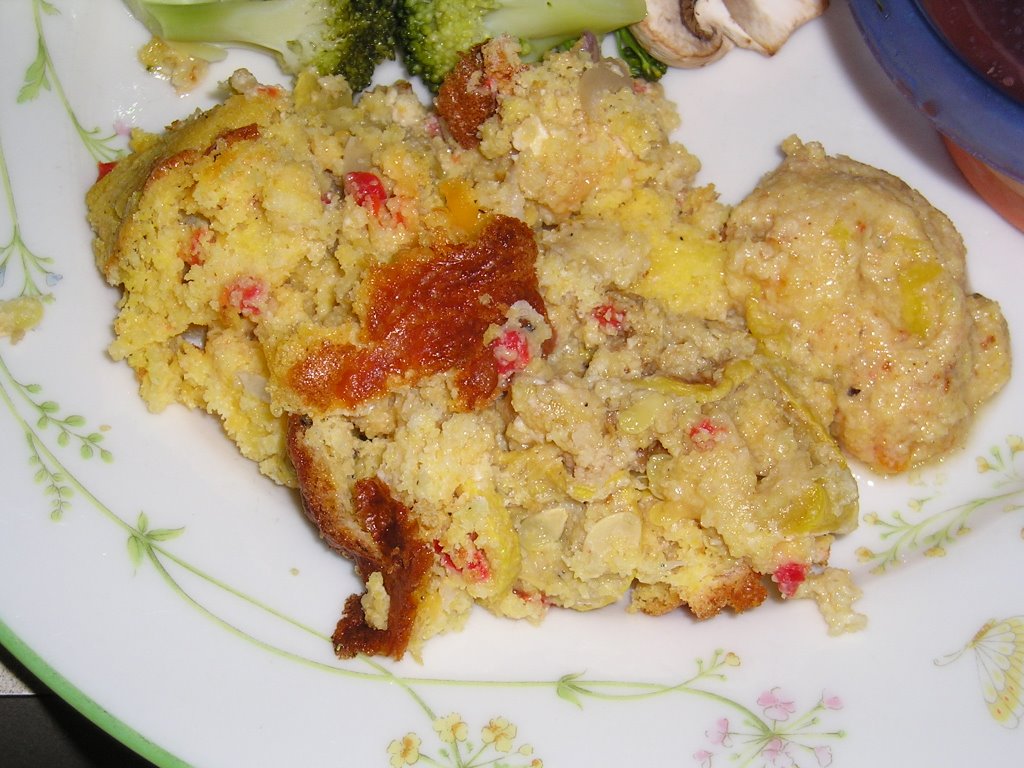
Anyway, I decided that I wanted to use a frozen meal that I bought last year some time, so I could free up some freezer space. It was one of those everything included type meals - shrimp, sauce, veggie, and noodles. WELL, there were not many shrimp and I don't think I saw a single mushroom (they were supposedly in there!). Overall the taste wasn't bad, but I think if I did get the dinner again, I would want to add more shrimp and veggies...so what is the point in getting it again? Maybe to have something quickly available for those busy, busy nights. My rating out of 5: 3, just average! Don't worry, we did have a good dessert that I will share later.
Frozen Meal :-)
Frozen Meal

Open bag. Heat pan. Follow instructions on the bad being sure to take the ingredients out of the smaller bags! (I had a friend who was cooking frozen broccoli and read the instruction to put broccoli in boiling water. She put it in the water and then wondered how she was supposed to read the rest on the instructions when they were in the water! WOW!)

Wednesday, September 27, 2006

Carrot Muffins


Several weeks ago I decided that I wanted to try carrot muffins. I did some researching for recipes and found one that looked REALLY good, but it was a little more dessert like than I wanted. So then I went to Culinary in the Country and found this recipe. It looked very promising, so I grabbed it up and tried. Let me say, Joe, that it is yummy. I did change a couple of things, but the flavor is great and does not need icing, although a cream cheese icing would still be a great addition.

Joe makes this in the form of a cake and adds crystallized ginger. I wanted muffins, so I did that form. I've never used crystallized ginger and didn't have any, although I found some in a local whole foods store! So, unfortunately my muffins lacked this. I ended up decreasing the sugar a bit without any dire consequences. I think if I ever get in the carrot muffin mood again, I would make these again. They lasted a good week without getting moldy tasting, which is good! Who wants a moldy muffin? My changes are in orange in honor of the wonderful carrot! BTW, the carrots turned green just like the apples did in my apple muffins. I guess it's a produce response to the high heat.

By the way, I have to take a breakfast food with fruit in it to Sunday School this week. Does anyone have any suggestions?

Carrot Spice Muffins
1 cup whole wheat pastry flour
1 cup all purpose flour
1 cup packed brown sugar (I used ~2/3 cup)
1/4 cup granulated sugar
2 teaspoons baking soda
1 teaspon cinnamon
1/4 teaspoon fresh ground nutmeg
1/4 teaspoon ginger (I didn't use because I don't have any!)
2 large eggs
1/2 cup applesauce (unsweetened) (I used one easy-serve pack. I'm pretty sure this is 1/2 cup)
1 teaspoon vanilla
1 1/2 cups shredded peeled carrots (I used pre-shredded carrots!)
3/4 cup golden raisins (Craisins for me!)
1/4 cup chopped crystallized ginger (I didn't use this)

Preheat oven to 350. In a large bowl, whisk together flours, sugars, baking soda, cinnamon, nutmeg and ginger until well combined. In a small bowl, whisk together eggs, applesauce and vanilla. Pour mixture into the dry ingredients and stir just until combined. Add in the carrots, raisins and crystallized ginger - stirring to evenly distribute them. Pour batter into a 9x13" baking dish coated with nonstick spray. If doing muffins, line the pan with muffin liners and spray with baking spray. Spoon batter into the cups (I use an ice cream scooper. It's the perfect size) until around 2/3 full. Bake for around 20 minutes. Check to be sure it springs back or a toothpick comes out clean. Bake until the center springs back when lightly touched, or a toothpick placed in the center comes out mostly clean - a few moist crumbs attached is okay. Remove and let cool on a wire rack before cutting.

Yield: 12 regular sized muffins + 6-9 mini muffins

Monday, September 25, 2006

Five a Day


I am writing the post at the same time as I am listening to a lecture to write the notes. Although this takes time, I'm getting paid to do it. I've had this recipe from Cooking Light for a while and have decided that I need to try it (along with many other recipes I've pulled from my magazines!). This is for roasted cauliflower. It uses lots of fresh herbs (which I had NONE of). I recently got a basil plant from a friend, so I used some of that along with dried herbs.

I think this has potential but I'm not sure I liked the addition of cheese and lemon juice at the END of the roasting. I might add the cheese and maybe lemon rind at the same time I add the herbs. In any case, this is a very healthful food and is fit for Sweetnicks ARF-Five-a-Day Tuesday. Check her sight for more delicious treats.

Roasted Cauliflower with Fresh Herbs and Parmesan
Cooking Light, holday season 2005
12 cups cauliflower flortest (about 2 heads ) I only used one and, thus, halved the recipe
1 1/2 tablespoons olive oil
1 tablespoon chiopped fresh parsley
2 teaspoons chopped fresh thyme
2 teaspoons chopped fresh tarragon
3 garlic cloves, minced
1/4 cup grated fresh Parmesan cheese
2 tablespoons fresh lemon juice
1/2 teaspoon salt
1/2 teaspoon pepper

Preheat oven to 450 degrees F. Place caluiflower in a large roasting pan or on jelly roll pan. Drizzle with oil, toss well to coat. Bake for 20 minutes or until tender and browned, stirring every 5 minutes (I didn't stir). Sprinkle with parsley, thyme, tarragon, and garlic. bake 5 minutes. Combine cauliflower mixture, cheese, and remaining ingredients ina large bowl. Toss well to combine. Yield: 8 servings of 1 cup each.

Calories 89; fat 3.5 g; Protein 5.2 g; Carb 12 g; Fiber 5.4 g; Chol 2mg; Iron 1.1 mg; Sodium 251 mg; Calcium 83mg

Saturday, September 23, 2006

Study Treats take 2

Well, Monday and Tuesday are test days for the M1's. So, being the good buddy that I am, I made them study cookies again! I had some Reese's BP cups, so I decided to make a recipes from The Cookie Bible. It is made to be giant cookies but I made normal sized cookies. They turned out all right but weren't my favorite.

One thing that I think is essential to making a good cookie is to cream the butter and sugar thoroughly. This takes several minutes. So, put them in the bowl, turn it on a medium speed and walk away. Just let it go for several minutes, like five to ten! It should produce a smooth, creamy mixture. Then you're ready to put everything else in. Do NOT mix for long with the flour. This can make the dough tough.

I'm trying to decide what I would do differently in these cookies. I might add more peanut butter to the dough or I might just make a sugar cookie dough or chocolate chip cookie dough and substitube the peanut butter cups instead. These were good, just not exactly what I prefer. I think they were still enjoyed, one of the guys told me that he actually got to eat all of them...last time he left the bag on his desk and returned to an empty HALF bag. Turns out his dog got ahold of it and ate the remaining cookies AND half the sandwich bag! OOPS!

Peanut Butter Cup Cookies , The Cookie Bible 2005
1/2 cup butter or margarine, softened
3/4 cup sugar
1/3 cup peanut butter
1 egg
1/2 teaspoon vanilla extract
1 1/4 cups AP flour
1/2 teaspoon baking soda
1/4 teaspoon salt
16 (I used more) Reese's Peanut butter cups miniatures, cut into fourths

Preheat over to 350 degrees F. Beat butter, sugar, and peanut butter in medium bowl until creamy. Add egg and vanilla. Beat well. Stir together flour, baking soda, and salt. Add to butter mixture; blend well. Drop by level 1/4 cup measurements onto ungreased cookie sheets, three cookies per sheet. Push about seven pieces of peanut butter cup into each cookie. Fatten cookie slightly.

Bake 15-17 minutes or until light golden brown around edges. Centers will be pale and slightly soft. Cool 1 minute on cookie sheet. Remove to wire rack cool completely. Makes 9 cookies.

OR

Follow above instructions through flour. Then add PB cup pieces to dough and stir in carefully. Drop onto cookie sheet by tablespoons. Bake for 13-15 minutes. Remove to wire rack to cool completely. Makes 36 cookies.

Thursday, September 21, 2006

Ole!


Last week I was in the mood for Mexican. So I decided that I would make chicken fajitas. I've recently discovered that I enjoy the flavor of red peppers. However, to buy those at the grocery store costs a crazy amount...$1.39 PER PEPPER. So, I was excited this week when the farmer's market actually had ONE red pepper. I snatched it and a green and orange pepper up quickly! Our farmer's market fare is dwindling here, so I figure I better enjoy it while I can. Anyway, Sunday (less than 24 hours after purchasing the pepper) I walked through the kitchen and smelled a strong pepper smell. I looked in the bag and there was a pool of liquid along with a deflated red pepper. It was as if the pepper was a water balloon and had been burst. So, after all that excitement, I lost my red pepper.

But, I still had my orange and green peppers. So, I pulled out a couple of chicken breasts from the freezer, seasoned them, and threw them on the trusty George Foreman Grill. I wasn't really sure how the chicken would turn out, but it worked. After cooking the onions, peppers, and mushrooms I put together some yummy chicken fajitas! I added a little rice, some salsa (home-made mide you!), and yogurt. I used the yogurt for sour cream. To me it tastes very similar and has more bacterial benefits. These fajitas...quick, easy, and healthy...faster than Rachel Ray!

Chicken Fajitas
2 boneless skinless chicken breasts
seasonings (I used salt, pepper, and season all)
one onion
one green bell pepper
one orange bell pepper
handful of mushrooms
rice
fat free yogurt/ sour cream
salsa
Tortillas

Season the chicken and place on a grill. Cook until cooked through. While chicken cooks, chop the onion and peppers. Place the onions, peppers, and mushrooms in a hot saute pan and cook until the onions are translucent and peppers are tender. Layer vegetables, chicken, rice, yogurt, and salsa on a tortilla and enjoy!

ALTERNATIVE: I did this the next night. Take some salad greens, place heated vegetables and chicken on top. Top with yogurt and salsa. Enjoy this as a chicken fajita SALAD since apparently we're supposed to eat a salad a day!

This can easily be made vegetarian by eliminating the chicken and increasing the vegetable amounts! Still YUMMY!

Monday, September 18, 2006

A Berry Good Muffin


Last week I decided to try a recipe from Conscious Cuisine by Cary Neff. He is a chef who works at the Mirival spa and has good tasting healthy recipes. I thought it was a pretty cookbook and that I might use it when I bought it. This is only the second recipe I have done from it, but both of them have been very good!

He gives a basic batter recipe for a low-fat muffin and then you can choose what you add in . I was in the bood for a fruit muffin but fruit has gotten expensive around here. So, I used some frozen blueberries and the few strawberries I had left (before they went bad, I think I had forgotten they were in there!). These muffins ended up being really good. I only made slight modifications because of what I had on hand. Because blueberries are full of antioxidants, this is my entry for Sweetnicks ARF Tuesday!

Low-Fat Muffins - Strawberry and Blueberry variety
Conscious Cuisine
1 cup whole-wheat pastry flour
1 cup unbleached all-purpose flour
1/2 teaspoon baking soda
pinch sea salt (I used regular)
1/4 teaspoon ground cinnamon
1/8 teaspoon nutmeg
2 large egg whites
2/3 cup fat-free milk
2/3 cup plain, fat-free yogurt (I used vanilla)
1 1/4 cups raw can sugar (I only used 2/3 cup)
1 tablespoon pureed banana (I didn't have this, so I omitted)
2 teaspoons canola oil
1/4 teaspoon pure vanilla extract (I probably used more)
1 cup blueberries
5 sliced strawberries (that's all I had!)

Preheat oven to 350 degrees F (175 C). In a mixing bowl, combine the flours, baking soda, salt, cinnamon, nutmeg. In a separate bowl, mix together egg whites, milk, yogurt, sugar, oil, and vanilla. Make a well in the center of the dry ingredients; pour in the egg mixture and stir until just moistened. Stir in blueberries and strawberries.

Scoop 1/3 cup batter into prepared muffin cups. Bake for 30-35 minutes (I checked at 25 minutes and they were ready) or until a wooden pick inserted in center comes out clean. Remove and let cool for 5 minutes.

Saturday, September 16, 2006

Sugar High Friday...on a Saturday


I've had this recipe in my on-line recipe box for a couple of years. I thought it would be perfect for Sugar High Friday. However, I didn't want to do it as instructed. I'm bad, I know. Anyway, I don't think the way I did it was the easiest, although it did work. So, if you want to be simple follow the instructions. If you want more typical cookies (in shape) do what I did.

This recipe is from the nestle baking site. They have some really fun recipes, of which I have many in my recipe box just waiting to try. I've already tried a couple that are REALLY good. I'll have to make them again and introduce you to the recipes! :-) Anyway, as I mentioned earlier, I changed the recipes some...okay, quite a bit! It instructs you to roll the dough out, spread the filling over, and cover with the other half of the dough. Instead of doing this, I scooped out the dough, put the filling on top, and rolled the dough over the filling. In addition to changing the method, I also changed the filling contents! After comparing their picture and my picture, they look VERY similar. They changes may work well! Anyway, the recipe will show two directions of assembly. My changes will appear in red.

Aunt Helen's Filled Cookies

Ingredients:
2 cups all-purpose flour (I used 1 cup AP and 2/3 cup whole wheat)
1/3 cup granulated sugar
1/2 teaspoon baking powder
1/4 teaspoon baking soda
1/2 cup (1 stick) butter
1 large egg
3 tablespoons milk (I used 2 T)
1 teaspoon vanilla extract
1 cup (12 1/2-oz. can) almond cake and pastry filling, divided (I used apricot All-fruit, probably about 1/2 cup, but if using their instructions, use the full cup)
2 cups (12-oz. pkg.) NESTLÉ® TOLL HOUSE® Premier White Morsels, divided (I really don't know how much I used! Maybe 2/3 - 1 cup)
2/3 cup slivered almonds, toasted and finely chopped, divided (I used chopped pecans. Once again I don't know how much. Probably 1/2 cup)
Sifted powdered sugar

Directions per Nestle:
PREHEAT oven to 350° F. Grease baking sheet. COMBINE flour, granulated sugar, baking powder and baking soda in large bowl; cut in butter with pastry blender or two knives until mixture resembles coarse crumbs. COMBINE egg, milk and vanilla extract in small bowl; mix well. Add to flour mixture; stir with fork just until moistened. Form a ball with dough; divide dough in half. Cover; refrigerate for about 1 hour or until dough becomes easy to handle. ROLL each half of dough on floured surface to 12 x 6-inch rectangle. Spread each rectangle with half of pastry filling to within 1-inch of edge. Top each filling with 1 cup morsels and half the nuts. Brush edges of each rectangle with water. Bring two long sides of each rectangle together over filling; seal seams and ends of each rectangle. Carefully transfer each rectangle, seam side down, with a pastry cloth or long metal spatula to prepared baking sheet about 3 inches apart.BAKE 15 to 18 minutes until golden brown. Remove to wire racks to cool completely. Sprinkle with powdered sugar. Cut each loaf into eighteen 1/2 inch-thick slices.

OR

Directions per Claire: Preheat oven to 350 degrees F. Cream butter and sugar. Add dry ingredients and mix until crumbly. Add egg, vanilla, and milk. Mix until dough comes together. Place in refrigerator for 30 minutes - 1 hour. Meanwhile, mix together all-fruit, morsels, and nut. Using a medium cookies scoop (or tablespoon), drop dough onto baking sheet. Wet fingers with water and flatten the dough and put a small amount of filling on the dough. Using wet fingers again, gather the dough around and over the filling. Bake for 10 minutes. Remove and allow to cool on a cooling rack. Yield: about 2 dozen cookies. If you don't feel like filling the cookies, just place the filling on top! This works as well. Here is a picture of a cookie done that way. It's not as pretty, but it tastes good!

Sorry that I didn't measure the filling amounts. This is a really nice cookie. The cookie itself isn't very sweet, a lot like a shortbread; but the filling adds a nice fruity and sweet taste. I thought the combination of apricot, white chocolate, and pecans was great. I may do this again later as Nestle instructs, just to see how it turns out. If you do it their way, or have made this before, let me know what it is like, please!

Thursday, September 14, 2006

Study Cookies


A couple of weeks ago, the M1's (first year medical students) had their first tests. As M2's, we have an M1 buddy. I have a girl from my college. There are also a couple of guys from MC there, but their buddies are guys. SO, I decided to give all of them some study cookies the week befroe their test! I decided to do something idfferent from chocolate chip cookies...oatmeal scotchies! I looked and looked for a different recipe, but NO cookbooks (at least that I've seen), not even my cookie book!, have a recipe for these cookies. So, I used my general recipe with a few changes that ended up being good.

I've noticed that these cookies tend to be a little dry. I do use margarine because I don't like the way butter bakes. It tends to make the cookies really flat, and I DON'T like that! Anyway, I decided to use a combination of fats...and it worked! These were NOT flat, NOT dry, and didn't stick to the pan/stone! So, if you think the recipe looks strange, it's because of the modification I made in this area!

Oatmeal Scotchies
1 stick margarine (1/2 cup)
4 T butter
2 T shortening (no trans-fat version)
1 1/2 cups brown sugar
2 eggs
1 T water (if using all margarine I skip this, but used it here and it worked)
2 cups unsifted flour
2 teaspoons baking powder
1 teaspoon baking soad
1 teaspoon salt
1 teaspoon cinnamon (optional, this was my addition)
1 1/2 cups quick oats (I used old fashioned and it worked fine)
2 cups (I use a little more than 1 cup, 2 is just too much) butterscotch morsels

Preheat oven to 375 Degrees F. Cream butter, sugar, eggs, and water. Let this go for a few minutes to make sure all the sugar disolves. This is ESSENTIAL to good cookies! Combine dry ingredients. Gradually add flour mixture. Stir in oats and morsels. Drop onto pan or stone about 2 inches apart. Bake for 10-12 minutes.

YIELD: about 4 dozen

Tuesday, September 12, 2006

Broccoli Salad...Good for your health!


I actually made this several weeks ago for my girls' prayer group, but have made other things that I wanted to post. I just decided to save this for a week such as this when I'm not able to cook much that is postable! If you're like me, you love those yummy broccoli salads. Some have mayonnaise dressings while others have a sweet vinegar marinade. Either way, they contain lots of fat and/or sugar, which, to me, takes away from the benefit of eating broccoli. ANYWAY, I found this recipe at www.allrecipes.com and changed it just a tad (it's not bad to start with!).

The salad turned out to be both good to eat and good to see. The green of the broccoli and red from the cranberries made an eye popping salad! You know they say you eat with your eyes first. This makes me want to eat it! Because of the great healthfulness of broccoli AND cranberries, this is my entry to Sweetnicks ARF/5-A-Day Tuesdays. Stop over at her site and check out the other delicous entries. I already know of one that is wonderful looking and is on my to try list!!

Broccoli Salad (serves 6)

4 cups broccoli florets or broccolini (I used three heads)
1/4 cup red onion, minced
2 tablespoons SPLENDA® No Calorie Sweetener, Granular
2 tablespoons cider vinegar
2 tablespoons light mayonnaise
2 tablespoons sunflower seeds, roasted and salted (optional, I used almonds)
3 tablespoons seedless raisins (I used craisins!!!!)

DIRECTIONS:
Discard broccoli stems and finely chop florets or broccolini. Set aside. (I then put in boiling water, about 1/2 inch, for 2 minutes to crisp the broccoli and bring out the green color)
Place remaining ingredients in a medium mixing bowl. Mix well. Add broccoli florets or broccolini. Toss until coated. Chill until ready to serve. THis salad is GREAT served cold.
Exchanges per serving: 1 vegetable, 1 fat
Calories (according to allrecipes) 60 per serving

Saturday, September 09, 2006

Experimenting

I took a little break from studying tonight to make cookies. I'm planning on entering the Quaker Oats recipe contest. I've never done anything like that, although I have created my own recipes before. This time, I decided to do it correctly, i.e. write down what I did instead of trusting my brain to remember it! It's kind of fun. I think I have the base of the recipe just about right but timing is a bit of an issue along with other things that must be worked out to make it "just right." Needless to say, there may be some people getting to try some cookies (all the same) within the next couple of weeks!

Friday, September 08, 2006

Pluots


I have done no cooking this week. My roommate cooked Thursday and all other days I've had leftovers that I brought from my trip home. I haven't really had time to cook as I've been studying for my tests next week and have had several LONG days of class. Just wanted to let you know about a yummy hybrid fruit that we bought at Sam's this weekend. If you've been to Sam's, you know that they always have samples in the food section. This day, they had a fruit to sample. I tasted it as the lady was explaining that it's a hybrid between a plum and an apricot. It is SOOOO good. Now, I've never had a fresh apricot, so I don't know what those taste like; but this did taste a lot like a plum. Try one it you get a chance...it's called a Pluot!

Wednesday, September 06, 2006

Recipe Poll...Lemon Grass


Just a quick post during my lunch break. One of the items that I purchased at the Farmer's Market this weekend was lemon grass. I saw this dry looking plant and didn't know what it was. I thought maybe some aberrant variety of sugar can or something. So, I asked the lady at the stand and she told me it was lemon grass. Upon rubbing the pieces together, it gives off a strong lemon scent...refreshing! I couldn't resist it and got some, not knowing how to use it. THe only hint I had was that the vendor uses it on chicken, fish, and in soup.

I used it on fish Sunday night not really knowing how. I just broke it to release the oils and place a piede under, inside, and on top of the fillet and baked. It was really good. Gave a nice lemon flavor without the stickiness of lemon juice!

Anyway, here is my poll...Do you have any recipes that use lemon grass? If so, could ya give me some ideas? If not, find one, try it out, and let me know how it goes! I really want to use this in more than just fish!

Tuesday, September 05, 2006

Another Salsa


When we went to the Farmer's Market, I decided that I wanted to make salsa. This time, I used a recipe given to us by a neighbor in our first neighborhood. This recipe has an immediate spicyness to it rather than a lingering punch, which I prefer. I'd rather taste the spice, not live with it!

As tomatoes have lycopene, they are great for you! This is my entry for Sweetnicks ARF Tuesday! Check her site for other healthy recipes. Load up on this salsa. It's great on meats, salads, veggies, and, of course, chips!

Salsa
1 14.5 oz can Del-Monte tomatoes Mexican recipe (I used 3 chopped fresh tomatoes!)
1 10 oz. can of Rotel
1/2 medium onion
1/4 bunch cilantro, take the leaves off the stem, it will blend better
1 T garlic (I used 3- cloves, minced)
1 t salt, pepper (I didn't have black, so I used 1/3 teaspoon Cayenne)
1 1/2 teaspoon ground cumin (ESSENTIAL!)

Put all ingredients into food processor and blend! Put salsa into a jar and refrigerate...or enjoy right away!

Monday, September 04, 2006

Farmer's Market in Jackson, TN

I went to visit my parents this weekend in Jackson, TN, their new home. Mama found the Farmer's Market and we made a little trip out there Saturday morning. They have a few more interesting things than my local market. Here is the entrance. It is an open air market, but Saturday was GREAT weather (highs in the 70's!).

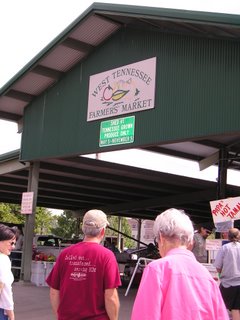
At the entrance to the market, just before you get to the veggie stands is a little tamale vendor.
We tried some, but when we reheated them, they got tough, so I don't know how they tasted!

They have a lot of good looking veggies here. Instead of selling by the pound, they sell by the basket. Most baskets were $2. However, judging from the hanging scales, which I though were SO neat, they weight the produce before they put them in the baskets.

We decided to extend my eggplant experiment and try some white eggplant. According to the vendor, they are not bitter and are a bit sweet. I don't know that I agree but will tell you about them later.

This is just a sampling of the beautiful peppers that were available through the entire market. There were also stands with plants, watermelons, and baked goods as well as jellies, sauces, and aprons (I saw a really cute one. It was just a half apron.).

Many of the vendors also have their own pea shellers! I though this was really neat! The peas go through the machine, the hull goes into the bad, and the peas come out the front so they can put them into a bag to sell. Talk about fresh!

On the outside of the covered area, there was an Amish/Quaker/Menonite (sorry, I don't know which) family selling homemade preserves (regular and sugar free, all which looked GREAT!), sorgham, jellies, cheese, and milk. There was a line for their fare. The milk was sold for $1.75 for a half gallon (which is a good price, cheaper than the stores here). They had whole, 2%, chocolate, strawberry, and buttermilk. They were also selling butter. Talk about fresh!

On the other end of the market from the tamales, was a guy selling Chicago style hot dogs. Sorry that the picture is of his back. Right when I took the picture, he turned away from me!

This is what we ended up with: 4 white eggplants, 4 zucchini, tomatoes, "spice" tomato salsa, lemon grass (!), and okra. Yummy stuff!

Sunday, September 03, 2006

Tagged


I have been tagged for the oh so popular Five Things to Eat Before You Die project by Melissa at The Traveler's Lunchbox. Thanks to VeuveClicquot at Sugar Delirium for tagging me! This is making me really think about the foods that I love and/or am grateful that I have tasted. These come in no particular order.

1. Bacon, Lettuce, and Tomato sandwich with HOMEGROWN tomatoes! - This is one of those summer lunches that is built in to my genetics, I think. My grandfather had a garden, so during the summer we always had fresh veggies. If you don't know, there is NOTHING like a homegrown tomato. Even "farm grown" tomatoes don't measure up! To make this sandwich get two pieces of wheat bread, put some mayo on it (I don't usually use mayo, but it is NECESSARY for a good BLT), add 1.5-2 pieces of bacon, a piece of lettuce, and at least two slices of tomato! Sit down and enjoy!

2. Homemade Raspberry Preserves - This is something that I was blessed to live with for one year. I lived in Bishkek, Kyrgyzstan in 1993-1994. During the first month we were there, my family and I went with two local ladies to the market to purchase tomatoes to can and freshfruits to make preserves with. The strawberry was good but the raspberry...oh my goodness...DELICOUS! They stayed at our apartment ALL day canning and making jams. They never stopped until they were finished. Maybe that is part of the reason that it tasted so good. If you ever get the chance to taste homemade raspberry preserves, do it!

3. My Daddy's Homemade Pizza - I may be a little bit biased, but this is the best pizza. Daddy makes his own dough, which I have learned how to make. As long as I can remember, he has been making pizza. We started with rectangular pizza because he made it on cookie sheets. Then, after months of trying to get him to try a Pampered Chef baking stone (he wouldn't do it because "my pizzas are rectangular!"), we transformed to circular. Apparently the stone was far superior to the cookie sheet. The toppings used to consist of cheese and pepperoni. Now we usually do supreme (which MUST include mushrooms) or a chicken, tomato, and mushroom pizza. No matter what, this is the best pizza!

4. Sharpe Cookies - These are the BEST chocolate chip cookies I have ever tasted. The recipe is from my mom's best friend, Joanie. She has several secrets that she has shared with us that make these cookies great! I've compared the recipe to other chocolate chip recipes trying to figure out why they are so much better than the others. The recipe is very similar to most I've seen. I guess the secret is the shape, they are squished! That's all I'll say right now. I just can't bring myself to post the recipe yet!

5. Vegetable Dinner - As mentioned earlier, my grandfather had a garden. One of my memories from his house is having vegetable dinners. I think this may be a Southern thing, but it should be done by everyone! You really could have an combination of vegetables...corn, black eyed peas, fried (or boiled) okra, fried eggplant, squash and zucchini, TOMATOES!, green beans, you name it. My favorites are squash, green beans, and tomatoes. I might have a few okra but try to stay away from fried food, although they taste great! To round off the meal, serve freshly made corn bread (or corn bread sticks as I posted about earlier!)

I hope that this makes your taste buds tingle! I tag Stacy at Exceedingly Mundane, Gail at Hambones, Jennifer of Weekly Dish, and LizzyAnne at Domestic Amour. Back tomorrow with a report from the Jackson, TN farmer's market (I can't get away from them!)!

Saturday, September 02, 2006

Red Raspberry Velvet Cake

Last Sunday, my SS class was asked to make desserts for the college ministry. They have started to have SS after lunch that they offer to the students for free! So, I decided to take a Cooking Light recipe, Red Raspberry Velvet Cake! It is a really good dessert; I think it is MADE by the raspberry between the layers. It is a tad dense and light on chocolate flavor (so I added more) but it is still good for a lightened cake.

I also took boiled cookies! The last two times I've made these, they haven't turned out the same way I remember by Aunt's turning out during my childhood. We think that maybe something is different about the margarine now. Who knows!

Red Raspberry Velvet Cake
Cooking Light, Dec. 2004

Cooking spray
3 cups sifted cake flour
2 tablespoons unsweetened cocoa
1 teaspoon baking soda
1 teaspoon baking powder
1/2 teaspoon salt
1 2/3 cups granulated sugar
1/2 cup butter, softened
4 large egg whites
2 cups fat-free buttermilk
1 (1-ounce) bottle red food coloring
1 teaspoon vanilla extract

Frosting:
7 ounces 1/3-less-fat cream cheese
1 teaspoon vanilla extract
2 3/4 cups powdered sugar

Remaining ingredient:1/2 cup seedless raspberry jam

Preheat oven to 350°. Coat 2 (9-inch) round cake pans with cooking spray, and line bottoms of pans with wax paper (I didn't do this)

Lightly spoon 3 cups cake flour into dry measuring cups; level with a knife. Combine flour, cocoa, and next 3 ingredients (through salt). Set aside.

Beat granulated sugar and butter with a mixer at medium speed 4 minutes or until well blended. Add egg whites to sugar mixture; beat at medium speed 5 minutes or until fluffy.


Combine buttermilk, food coloring, and 1 teaspoon vanilla in a small bowl; stir well with a whisk. Add flour mixture to sugar mixture alternately with buttermilk mixture, beginning and ending with flour mixture; mix just until moistened.

Pour batter into prepared cake pans. Sharply tap pans once on counter to remove air bubbles. Bake at 350° for 28 minutes or until a wooden pick inserted in center comes out clean (do not overbake). Cool in pans 10 minutes; remove from pans. Cool cake layers completely on wire racks.

To prepare frosting, combine cheese and 1 teaspoon vanilla in a medium bowl; beat with a mixer at high speed 3 minutes or until fluffy. Add powdered sugar, and beat at low speed just until blended (do not overbeat).

To assemble cake, place 1 cake layer on a plate. Spread with jam; top with second cake layer. Spread frosting over top and sides of cake. Store cake loosely covered in refrigerator. Yield: 18 servings (serving size: 1 cake slice)

NUTRITION PER SERVINGCALORIES 308(23% from fat); FAT 7.9g (sat 4.9g,mono 2.1g,poly 0.3g); PROTEIN 3.9g; CHOLESTEROL 22mg; CALCIUM 29mg; SODIUM 269mg; FIBER 0.5g; IRON 1.3mg; CARBOHYDRATE 56.7g

Boiled Cookies
2 cups sugar
1 stick butter*
1/2 cup milk
1/4 cup cocoa
1/2 cup peanut butter
3 cups uncooked oatmeal
1 teaspoon vanilla

Combine sugar, butter, milk, and cocoa in a saucepan. Bring mixture to a boil over medium heat. Cook for 1 minute. Add peanut butter and vanilla. Cook for additional minute. Remove from heat and stir in oatmeal. Mix well.

Drop by teaspoons onto wax paper. Allow to cool. These can be stored in the refrigerator.

*(I think that these have too much butter in them! They left tiny grease spots/pools on the wax paper after cooling. You might want to try decreasing the amount of butter.)

Friday, September 01, 2006

Maybe Not


I'm supposed to tell you about things that worked AND things that didn't...right? Okay, here's something that didn't quite work. My mom has a recipe for spoon bread and chili. I really enjoy, for some strange reason, the texture of the "spoon bread." Maybe it's because I'm from the South and a grits texture is something the "everyone" likes. Anyway, I saw a recipe in cooking light for a roasted squash pimento cheese spoon bread. Decided to try it. I mean, I like eating the pimentos out of green olives (!), I like spoon bread, and squash...I could eat it every day!

Well........I didn't so much like the flavor of this recipe. Honestly, I've decided that it's the flavor of the pimentos that I don't quite relish. I think I may have put too much garlic powder on the squash as well. It was an interesting idea, and I might use the base again with different veggies or meat, but it wasn't quite my cup of tea...which must be spiced as I don't like any other tea!
:-)

In honor of the Labor Day weekend, I may let you see the famous chocolate chip cookie recipe. We'll see how I feel after my drive and Saturday with my mom! If not this weekend, then later! Keep your eyes peeled.

Pimento Cheese Spoon Bread with Roasted Squash
Cooking Light, July, 1995

1 cup water
1/2 cup yellow cornmeal
1/2 cup 1% low-fat milk (I used skim)
1/2 cup (2 ounces) shredded extra-sharp cheddar cheese
1/4 cup grated fresh onion
1/4 teaspoon salt
1/8 teaspoon ground red pepper
1/8 teaspoon black pepper
2 garlic cloves, minced
1 (2-ounce) jar diced pimento, drained
3 egg whites (at room temperature)
1 tablespoon sugarRoasted Summer SquashVegetable
cooking spray

Combine water and cornmeal in a medium saucepan; stir well. Bring to a boil, and cook 1 minute, stirring frequently. Remove from heat; stir in milk and next 7 ingredients (milk through pimento). Set cornmeal mixture aside.


Beat the egg whites at high speed of a mixer until foamy. Add sugar, beating until stiff peaks form. Gently stir one-fourth of egg white mixture into the cornmeal mixture; gently fold in the remaining egg white mixture. Fold in the Roasted Summer Squash. (At this point I added some extra cheese on the top.)

Spoon mixture into a 1 1/2-quart casserole dish coated with cooking spray. Bake at 375° for 50 minutes or until set.

Note: Prepare the Roasted Summer Squash first.
Yield: 4 servings
NUTRITION PER SERVINGCALORIES 182(33% from fat); FAT 6.7g (sat 3.4g,mono 1.8g,poly 0.8g); PROTEIN 4g; CHOLESTEROL 16mg; CALCIUM 164mg; SODIUM 371mg; FIBER 3.2g; IRON 1.2mg; CARBOHYDRATE 22g