Showing posts with label Mexican. Show all posts

Saturday, March 25, 2017

Zucchini Enchiladas

Not only has it been a long time since I've posted, but it's been AGES since I did a recipe post.  But we had a really unique and YUMMY meal last night (and I'm getting requests for the recipe); so, here it is!  I saw this on one of those random recipe videos on facebook and thought it looked good.  After a whole WEEK of sickness at our house, I was finally able to make it...but it was worth the wait!  It's chicken enchiladas but instead of tortillas, you use zucchini as the wrap.  Once it cooks, you really can't even tell that it's zucchini - which for some people is a plus!  Kate devoured it and said that it should be on kids' menus in restaurants!  Caleb ate it all and David said it was good.  WIN!!!  This is good for us, too, because it makes an easy gluten free option.  We will be doing this again.  Here is the link to the original recipe (which I didn't even look at before making mine, LOL!) with a helpful video for technique (I did everything based on the video): http://www.delish.com/cooking/recipe-ideas/recipes/a51783/zucchini-enchiladas-recipe/

Zucchini Enchiladas
 1onion, chopped
1 orange bell pepper, finely chopped
1/2 tsp dried garlic (or 1 tsp fresh, minced)
1 tsp chili powder
1.5 teaspoons cumin
1 pre-cooked Rotisserie chicken (I used Kroger's - you could also use your own chicken breasts that you cook and shred - probably about two)
1 can red enchilada sauce
3 zucchini, sliced VERY thinly (I used a vegetable peeler - my mandolin made slices that were slightly too thick)
fresh grated (or bought) cheese
cilantro (optional)

Preheat oven to 350 degrees.  Chop veggies.  Add onion, peppers and garlic to a saute pan (prepared with olive oil OR cooking spray).  Saute until translucent.  Add in chili powder and cumin.  Stir.  Shred chicken and stir into the onion mixture.  When well mixed, pour about half the can of enchilada sauce into the mixture and stir.  Set aside.

Cut the ends off the zucchini.  Slice in half lengthwise.  Using a vegetable peeler - something like this-

 (or mandolin OR if you're REALLY good just a knife), cut very thin and long slices of zucchini.
For each "enchilada" you will use three slices.  Three zucchini made about 12-13 "enchiladas" for me.  On a cutting board, lay out three slices of zucchini.  Place a spoonful of the chicken mixture across the slices.  Roll up down the length of the zucchini.
Place each "enchilada" into a 13x9 baking dish.  Once pan is full or all zucchini or chicken is used, pour remainder of enchilada sauce on top of the rolls.
Top with freshly grated cheese.  Place pan in over and bake at 350 for 20-30 minutes (I did about 35 due to kid issues and it was fine!).  Top with freshly cut cilantro.  Enjoy!

Wednesday, March 12, 2014

Fajita Casserole

During January, I bought a rotisserie chicken on clearance at the grocery store.  Nothing on my "menu" used chicken but I decided to alter for frugality sake.  I decided to do a Mexican fajita casserole. 
At first I was going to use tortillas on the top and bottom, but once I got into making it, decided that it only needed the bottom layer.  I think I was correct.  I used tomatillo salsa, refried beans, sauteed onions and peppers, and cheese.  It turned out GREAT!  I will definitely make this again!  I think my little taste tester enjoyed, too!

Chicken Fajita Casserole by me!
4 corn tortillas
refried beans
rotisserie chicken, meat pulled off the bone
tomatillo salsa
1 onion
1 pepper
cheese, shredded (variety of your choice though I'd do cheddar or monterey jack)
salsa (If desired)

Cut peppers and onions into long pieces.  Saute until translucent; place in a bowl and set aside.  Pull chicken meat off the bone.  Warm in saute pan along with enough tomatillo salsa to coat the chicken. 

Preheat oven to 350.  In a casserole pan (11x8 or 13 x9), pour a small amount of tomatillo salsa.  Place the tortillas over the bottom of the pan.  Spread refried beans over the tortillas.  You may need to warm the beans slightly.  Place chicken over the beans.  Place the vegetables on top of the chicken.  Cover with cheese.  If you want some traditional salsa you can place some over the cheese.  Place the casserole in the over and bake until cheese is bubbly, about 20 minutes.  Enjoy!

Wednesday, January 01, 2014

New Year and New Recipe

Happy New Year!  I hope everyone had a great Christmas and New Years with family.  We enjoyed time with both of our families and had Christmas morning with just our little family of three.  I'll share that later.  K is with family.  David is on service this week and hasn't been feeling well, so we didn't do anything last night. 
After clinic, I came home and we got an estimate on floors for the house (oh the joys of getting ready to sell).  Then I spent 4 plus hours putting away the Christmas decorations while David did notes from work.  I "watched" the MS State game while I worked.  Hail State!  Then we watch the Duke game.  I made macaroni and cheese for David and heated up my crab cake.  Yum!  Then I made a dessert for the residents who are on the New Years portion of holiday schedule.  I think we were in bed around 1130...but our lovely neighbors were shooting fire works.  Today, I've enjoyed "Gifted Hands" about Ben Carson.  I HIGHLY recommend it!  We'll see what the rest of the day bring. 
And now for your tasting pleasure, a recipe to start off the new year.  I made this back in October when my family came for homecoming and David wants me to bring it back.  It was actually in a Kroger coupon mailout.  It does call for 2 cups of tortilla chips but I'm pretty sure I used about 1 cup.  It is called Chilaquiles.  It calls for ground chicken but you could use ground pork, turkey, or even beef.  Everyone really enjoyed it and it was easy and quick to make.  Try it out for a new recipe this year.

Chicken Chilaquiles
1 medium onion, chopped
3 cloves garlic, minced
1 pound ground chicken (or other ground meat) - or 2 cups shredded chicken, cooked
2 cans diced tomatoes and chiles (10oz. cans, could use any brand)
15 oz. black beans, rinsed and drained
2 cups broken tortilla chips (I used LESS)
1 cup cheese
2 T fresh cilantro, chopped

Cook meat. Drain.  In heated pan, cook onions and garlic.  When softened and browned, add meat, tomatoes, beans and 1/4 cup water or broth.  Stir then reduce heat to medium; cover and cook for 8-10 minutes.  Stir in the chips and cook for 5 minutes.  Add cheese and cook about another minute.  Sprinkle with cilantro and ENJOY!

Friday, September 27, 2013

Tres Leches...but which ones?!

I changed divisions within the pediatric department in July.  It's not what I originally thought I'd be doing but it was definitely an opportunity given to be by God!  I have been working in the pediatric neurology clinic and the people I work with are great!  My division chair is so helpful and encouraging, always available to help me and so supportive of family.  One of the other physicians I had worked with in the past and so was excited to work with him again.  He is a great teach, hilarious, and helpful.  The whole department is like a family...see my crazy and fun co-workers?!
  So, when it was Brad's birthday, we all got together for lunch.  I decided that was the perfect time to make my Daring Baker challenge for the month...a Tres Leches cake!  Inma of la Galletika was our Sept. 2013 Daring Bakers’ hostess and WOW did she bring us something decadent and delicious! Pastel de Tres Leches or Three Milk Cake, creamy yet airy, super moist but not soggy.. just plain delish!

The cake was very easy to make and turned out great.  I used a springform pan rather than a regular cake pan.  I think this just makes it easier to remove and cut.  When I told everyone that I made a tres leches cake I was immediately asked what the three milks were.  Brad's guess:  goat, cow, and...well, something wrong!  The recipe calls for evaporated milk, sweetened condensed milk, and milk (though I used almond milk).  Be careful, though, when you make the syrup....THIS is what happens if it overflows!
 I decided to use cinnamon to flavor the cake, but I was a little unsure about what to use for the filling.  All the examples I saw used fruit but I didn't know what people would want...and was using this for Brad's birthday cake.  So...I decided to make a nutella cream filling.  I just took a half cup of nutella and mixed it with some of the whipped cream I made for the outside.  I thought it turned out good. Of course, David's comment was that you couldn't taste the nutella.  Alas! 
Everyone at the office liked it.  The description was "like tiramisu without the coffee."  Brad even said that, after having five cakes that day, this cake was his favorite!  Thanks, Inma, for such a delicious challenge!


Classic Three Milks Cake:

Servings: 12
Ingredients for the vanilla sponge cake
5 large eggs (separated)
½ cup (120 ml) (4 oz) (125 gm) sugar
2 teaspoons (10 ml) of vanilla extract
1 cup (240 ml) (5 oz) (140gm) all-purpose (plain) flour (sifted)
For three milks syrup
1 can (14 oz) (400 gm) sweetened condensed milk
1 can (12 oz) (340 gm) evaporated milk
1 cup (240 ml) heavy cream (about 35% fat) or 1 cup of half & half or 1 cup milk
1 cinnamon stick
2 teaspoons (10 ml) rum (or other flavoring)
Topping and filling
2 cups (500 ml) of whipping cream (about 30% fat)
½ cup (120 ml) (4 oz) (125 gm) sugar
Canned or fresh fruit (to fill and decorate the cake)
Directions For the Sponge Cake:
  1. Preheat oven to moderate 180°C/350°F/gas mark 4. Prepare a square 9”x9” (23cmx23 cm) pan or 9” (23 cm) round cake pan
  2. Separate the egg whites from the yolks.
  3. Beat the egg whites on medium speed, 3 - 5 minutes.
  4. When soft peaks form slowly add the sugar in small batches.
  5. Whip until stiff peaks form about 5 minutes. Set aside.  
  6. In a medium bowl beat egg yolks at medium-high speed for about 5 to 6 minutes, or until the egg yolks become pale colored, creamy and puffy. (OR hand beat...yes sir I did!)Stir in vanilla.
  7. Pour the egg yolks over the egg whites, gently fold until just combined trying not to lose any volume from the mixture.
  8. Fold in the flour little by little in the form of rain. Mix until just combined (over-beating will result in a denser, flatter cake).
  9. Pour the batter into the prepared 9”x9” (23cmx23 cm) square cake pan or 9” (23 cm) round cake pan.
  10. Bake in the preheated moderate oven for 25 minutes or until the toothpick comes out clean
  11. Let it cool.
Three milks syrup
  1. In a saucepan add the sweetened condensed milk, evaporated milk, heavy cream and cinnamon stick, bring to a boil, reduce the heat and continue boiling for 5 minutes. Remove it and let it cool.
  2. Once it is cool, add the rum or any other flavoring you are using
  3. Gradually brush all the milk soaking liquid into all sides of the cake (including the cut surfaces) until all absorbed. Best to rest the cake in the fridge overnight to complete the soaking process. 
Topping
  1. Whip the cream, when soft peaks form add the sugar little by little, continue whipping until stiff peaks form about 2 mins. 
Assembly:
Cut the cooled cake in half and place the bottom half on a cake plate.  Poke with a fork to allow the cake to absorb the milk syrup.  Spoon the syrup over the cake so that it is soaked!  Top the bottom layer with your desired filling.  Top with the second layer of cake.  Poke holes in that layer and spoon with syrup until soaked!  Cover with whipped cream topping.  Refrigerate for at least an hour...longer is better!  Enjoy!

Thursday, September 19, 2013

Burrrrrrrrrrr-ito!

We love Mexican dishes around here...especially David and K.  I think they would eat Mexican daily if I'd let them.  I mean, I like Mexican but three weeks of Sunday Mexican out AND me making Mexican during the week is enough.  I definitely prefer the Mexican at home. 
I found a recipe for Chicken Verde Burritos the other day and thought it sounded really good.  I thought I pinned the recipe but then later I couldn't find it; so, I just made my own!  It turned out REALLY good.  I think I'll likely repeat this in the future.  Despite K's face here...she LOVED this.  Devoured it!
 And you can easily make it vegetarian if you want to.  I actually used a Rotisserie chicken that was on sale at Kroger, which made the dish super quick and easy...perfect for ballet nights!

Chicken Verde Burritos
1 rotisserie chicken (breast meat only)
8 flour tortillas (we used low carbs...K picked them out)
1 jar tomatillo salsa
1.5 cans beans (I ran out with two tortillas to go!)
1 can sliced mushrooms (this was for me)
cheddar cheese

Preheat oven to 350.  Open one can of beans.  Stir in 1/2 cup of tomatillo salsa.  Pull the breast meat off the chicken. 
Then place the ingredients in each tortilla as follows: chicken, beans, cheese.  (Omit chicken and add mushrooms for vegetarian)
Do this on the side of the tortilla closest to you.  Then wrap the tortilla by folding the tortilla towards the center, then fold the edges in (toward the center), then keep rolling into the closed burrito.  By folding the edges in, that keeps the chicken filling in.  Do this with all the tortillas.  Then pour the remaining tomatillo salsa over all the tortillas and top with more cheese.  Bake for 15-20 minutes or until everything is bubbly.  Enjoy!

Saturday, August 24, 2013

Mexican in a Minute

Well, maybe a few minutes but still quickly!  David and K both LOVE Mexican.  I like it, too but usually not the same form as they do.  The thing about Mexican is that is can be super quick if you need it to be...which is helpful on the days when I have clinic all day.  This day, I decided to make quesadillas on our Le Cruest grill pan. 

We've done this before but I decided to change things up a little by adding refried beans.  The good thing about this that you can tailor it for each person's taste.  On David's and K's I put beans, chicken (Tyson grilled strips - nice occasionally for convenience sake), cooked peppers and onions, and cheese.
  On mine, I put MORE refried beans, peppers and onions, and cheese.  Enjoyed with some salsa for dipping it was a great quick dinner.
Minute Quesadillas
tortillas
grilled chicken strips/chunks
grilled peppers/onions
cheese
refried beans
salsa

Preheat grill pan so that it is HOT.  Spray with cooking oil.  Put tortilla on pan then top with the fillings you want.  Fold tortilla over and place grill top on to keep the tortilla folded.  Cook until cheese is melted and tortilla "marked."  Enjoy with salsa and sour cream.

Sunday, February 24, 2013

Adios, February

This month has been so long!  Yes, it's the shortest month but it doesn't seem like it.  Not only is the wedding drawing near but D has been on a call month.  The good thing is that he doesn't take overnight call.  The bad thing...you never know how late he'll have to work.  I'd rather know that I'll be staying with K rather than wondering if I'll be with her or back at my place.  Sigh...so frustrating.  Anyway, right before this month started, K was staying with D's parents and I had D pick what he wanted for dinner.

  I kind of figured he'd pick the Mexican casserole.  He loves ground beef...I do NOT like the flavor of it!  So, I used ground pork.  It is much better to me and I don't think anyone else really knows it's not beef.  The recipe calls for quite a bit of cheese and chips.  I didn't use nearly as much as called for and I don't think there was anything lacking.  D really liked it and I actually enjoyed it, too.  A good, easy dish that I think would please the whole family.

Mexican Casserole adapted from Plain Chicken
1 pound lean ground pork
 1 can Ranch Style beans
 tortilla chips, crushed
1 can Ro-tel tomatoes
1 cup shredded cheddar cheese, divided (not really sure how much I used - original recipe said 2 cups, I know I didn't use this much)
1 package taco seasoning
1 can cream of chicken soup
1/2 cup water

Preheat oven to 325 degrees. In a large skillet, brown meat and drain off fat (I did this the night before). Stir in beans, tomatoes, onion, taco seasoning, soup and water. Simmer over medium-low heat until everything is well combined and heated through.

Grease a 9×13 casserole dish. Put down a layer of crushed tortilla chips, followed by a layer of the meat/bean mixture, then half of the cheddar cheese. Repeat layers. Cover with foil and bake for 20-30 minutes, or until bubbly.

Let sit for 5-10 minutes before serving.  Enjoy!

Sunday, December 23, 2012

Soup's On!

We've been having the typical MS winter weather...3 days of "cold" weather followed by 3 of 70+ temps and back again.  When it gets cold (or even when it's not!) I like to have soup.  K went to see her grandparents last week, so D and I were alone.  We had a couple of parties to go to but several days in between.  I told D that I thought about soup or Mexican for dinner; so, he went and found a Mexican soup recipe after his clinic was over.  :-)  We ended up not having enough time to make it that night; so, I changed it to make overnight in the crockpot.  At first, we weren't so sure about it...but it turned out really good!  The recipe calls for 2 quarts of chicken broth, which I think was a little too much and I added an extra can of rotel tomatoes and red kidney beans.  YUM!  I still have some in my refrigerator and can't wait to have it for lunch.

Mexican Bean and Squash Soup adapted from AllRecipes
2 cups butternut squash - pealed and cut into 3/4-inch cubes
1 small yellow onion, chopped
2 stalks celery, chopped
2 Chipolte peppers (canned in adobo sauce) seeded, and minced
2 teaspoons basil
1 teaspoon cumin
2 15-oz cans diced tomatoes
2 quarts chicken broth (maybe 6 cups next time?)
1 can cannellini beans
1 can red kidney beans
1 can corn

For serving:
limes
tortilla chips
cheese
sour cream
green onions

Put all ingredients into crockpot and cook on high for 6-8 hours or low for 10 hours.  When ready to serve, squirt lime juice on each bowl and top with desired toppings.  Enjoy!

Thursday, September 27, 2012

Empanada...Impanato...Spinado...whatever!

I planned to make these a lot earlier in the month but things kept coming up...board review, a spur of the moment dinner with friends, working in the peds ER...but K and I finally made them.  So glad she enjoys cooking...such a good helper! 
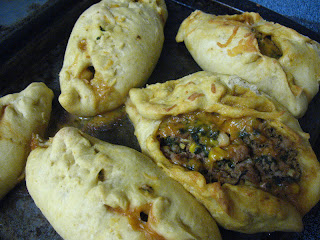
 Patri of the blog, Asi Son Los Cosas, was our September 2012 Daring Bakers’ hostess and she decided to tempt us with one of her family’s favorite recipes for Empanadas! We were given two dough recipes to choose from and encouraged to fill our Empanadas as creatively as we wished!  I decided to fill them with ground turkey mixed with corn, tomato sauce and cheese, seasoned with cumin (YUM!). 
I used less of this in my empanadas and added zucchini and squash.  K called them different things throughout the night.  First it was spinado.  Then it was impanato.  Cute either way!  She finally decided that she liked it.  D initially wasn't sure because I think he expected it to taste more Tex-Mex than it did...but then said that he liked it. 

Turns out these make great leftovers to take to work.  :-)  We both felt that they were a little to "bready" but I think that can be attributed to the fact that I used the wheat recipe AND didn't have a rolling pin at D's house to use...so I used a spaghetti-o's can wrapped in foil to roll it out.  Innovation I tell you!  ;-)  A fun challenge that I'm glad I got to do.

Empanada Dough

(a recipe using wheat flour from “La Empanada Gallega”)

Servings: 6

Ingredients:

3½ cups (500 gm) all-purpose (plain) or bread flour
1 cup (240 ml) warm water
½ cup less 1 tablespoon (100 ml) of liquid fat (oil, margarine, lard)
1 satchel (1 tablespoon) (15 gm) dry yeast or (1 oz) (30 gm) fresh yeast
1 teaspoon (5 ml) (6 gm) salt
1 teaspoon (3 gm) sweet paprika

Directions:

  1. Shift the flour into a bowl, make a well in the middle and add all the ingredients (you should break the fresh yeast as much as possible).
  2. Mix with a wooden spoon until all the ingredients have been incorporated
  3. Turn dough onto your counter and knead for 8 minutes
  4. Make a ball and allow to rise covered with a cloth for about half an hour before using. 
  5. Once risen, turn the dough back into a floured counter and tear off in small pieces (I got eight).
  6. Roll each piece out to desired size
  7. Place about 1/4 cup filling on each and top with a little cheese.  
  8. Pull edges of dough over filling in the middle and roll closed.  Then work your way out to the ends until it is completely closed around the filling.
  9. Place empanadas on a baking sheet and place into a preheated 350 degree oven.  Bake for 20-25 minutes. 
Filling:
1 pound ground turkey (Probably used about 1/2 of this eventually)
1 can corn
1 can tomato sauce
cumin
cheese

Cook turkey.  Then allow to cool.  Mix together turkey, corn, sauce and add cumin (about 1 tsp).  Fill empanadas.

Saturday, June 30, 2012

Enchiladas for All

I've been wanting to make enchiladas for a while but D kept saying that he didn't like the sauce.  I've been looking for recipes despite this! 

Well, I came across a recipe for beef enichiladas with zucchini in the filling - compromise is key here!  D likes ground beef, I don't really...I like zucchini, D doesn't really. 
We'll just have both!  Along with this recipe was a recipe for homemade enchilada sauce that "doesn't taste like the metallic store-bought sauce."  Hmmmm....ingredients were all things that D likes.  I decided to give it a whirl. 
Now, the recipe calls for you to mix the beef and zucchini together; but, because of our differing tastes, I just decided to put the components together individually.  This gives you the ability to make each enchilada with more or less of a certain ingredient.  I made D's with more beef and less zucchini and mine just the opposite.
 Miss K ended up picking out the filling and eating it without the tortilla (and then later wouldn't eat the filling of quesadillas but only at the tortilla...go figure!).  I'd say it was a successful try at enchiladas that could be repeated.

Beef and Zucchini Enchiladas from Recipe Girl
1 pound lean ground beef
1 1/2 cups diced onion
1 1/2 cups (about 2 medium) finely diced zucchini
12 corn tortillas, slightly heated to soften
2 1/2 cups enchilada sauce (see below for recipe!)
About 1 cup cheese
Serve as desired.
Preheat oven to 350 degrees F. Spray a 9x13-inch pan with nonstick spray.

Heat a large skillet. Add ground beef; break apart with a spoon or spatula to crumble the meat. Saute the meat on medium heat until browned (about 5 minutes). Tilt the pan and spoon the fat out of the pan; discard. Remove cooked meat to a bowl.

Return pan to medium heat and add onion and zucchini. Saute until just soft.  Now you're ready to prepare the enchiladas.

Add 1/2 cup of sauce to the prepared 13X9 pan. Spread it around so it coats the entire bottom of the pan.
Place tortilla on a work surface. Spoon the desired amounts of meat and zucchini on top of the tortilla. Sprinkle a small amount of cheese the meat and zucchini. Drizzle 1 Tablespoon of sauce on top. Wrap the tortilla around the filling tightly and place it seam-side-down in the pan. Repeat with remaining tortillas and filling until you have finished filling 12 tortillas. Place the tortillas side-by-side in the pan- it's okay if they are all snuggled in there tightly. Pour remaining enchilada sauce over the top of the stuffed enchiladas. Cover the dish with foil and bake for 30 minutes.

Remove pan from the oven and take off the foil. Sprinkle1/2 cup cheese on top; return to the oven and let the cheese melt (about 5 minutes).  Serve immediately with desired condiments.  Enjoy!

Enchilada Sauce
1-2 Tablespoons olive oil
2 Tablespoons all-purpose flour
2 Tablespoons chili powder
1 (8 ounce) can tomato sauce
1 1/2 cups low-sodium chicken broth
1/2 teaspoon ground cumin
1/2 teaspoon garlic powder
1/2 teaspoon onion salt
1/4 teaspoon salt
 
Heat oil in a large skillet to medium heat. Whisk in flour and chili powder. Reduce heat to medium and continue to whisk until lightly browned. Gradually whisk in tomato sauce, chicken broth, cumin, garlic powder, onion salt and salt. Stir until smooth, and continue simmering over medium heat about 10 minutes, or until slightly thickened. Serve immediately, or keep in a covered bowl in the refrigerator for up to 3 days.
 
Source: RecipeGirl.com

Monday, May 14, 2012

Easy Salsa Chicken

When I go to D's to make dinner (or he comes here - a little less frequent) we usually look for something quick to made since our schedules don't allow us to start making dinner prior to about 6 or a little after.  The other night, D came here and we had decided to make chicken.  He bought tenders, which turned out great!  He told me he wanted something "spicy."  Basically, I took the tenders and seasoned them with Tony's Chachare's original seasoning.  I browned one side (3-5 minutes) then turned the chicken over.  Once the other side was browned, I poured some salsa on top and then placed half a piece of Sargento's swiss thins on each piece.  I was afraid that it would be dry but it actually turned out perfectly.  I served it with mashed cauliflower (which D said was tolerable...glad of this!) D took the leftovers to work for lunch the next day.  I'll definitely try this one again...hopefully, K will eat it!

Salsa Chicken
1 package chicken tenders
salsa - your choice, we used medium thick and chunky (I like this kind, D prefers restaurant style...so kind to give me my choice of salsa :-)  What a guy!)
seasoning
cheese - swiss, mozzarella, colby-jack (mmm, that would be good, too)

Heat a skilled on the stove.  Sprinkle seasoning on one side of tenders.  While browning one side, season the other. When browned, flip tenders to other side and brown.  After they are browned (not completely cooked) pour salsa on top of chicken (1/2-1 cup but you can do how ever much YOU want!).  Top each piece with a small piece of cheese.  Now, cover the chicken with a top and allow to cook for 5 more minutes until cheese melts.  Be sure the chicken is cooked through and enjoy!

Thursday, April 05, 2012

Park and Nachos

A couple of weeks ago we had some really pretty weather.  Actually, we've had several weeks of really pretty weather, I just haven't been able to enjoy it due to my rotation.

 However, this time, I met K and D at the park and we played for a little before going to D's house for supper.  I knew there was some precooked and cubed chicken in his refrigerator, so I suggested chicken nachos.  His response..."Ooo, what are chicken nachos?"  My response..."I don't know, I'd just make it up!"  :-)  We had fun at the park.  K enjoyed the swings and running up the grassy stairs. 

Then when we got to the house, I made dinner.  Just mixed together some of the cubed grilled chicken, a can of black beans, and a can of rotel tomatoes. 

Then I put a layer of tortilla chips on the pan, topped it with the bean mixture and then cheese.  Cook until cheese melts and enjoy.  D said "Mmmm. Like what you'd get in a restaurant."  Nice!  K picked the beans off...I'll take that.

  I had a couple and then topped my salad with the chicken/bean mixture.  YUM!  A good meal for all.

Chicken Nachos
1 package Tyson cubed, grilled chicken (no compensation made for this...hehe!)
1 can black beans
1 can rotel tomatoes
tortilla chips (about 1/3 cup)
cheddar cheese
sour cream (optional)
salsa (optional)

Preheat oven to 350 degrees.  Place a layer of tortilla chips on the pan.  In a bowl mix together then cubed chicken, black beans, and rotel tomatoes.  Top the chips with this mixture.  Then sprinkle this with cheddar cheese.  Place pan in oven for about 10 minutes or until cheese melts.  Remove from oven and enjoy!

Friday, March 09, 2012

Fajita Soup

A few weeks back, I got off early and decided to go ahead and make soup for dinner for me and D.  The night before I grilled some chicken on my George Foreman grill.  It worked surprisingly well!  I think it looks like actual grill-grilled chicken, especially when it's cut.  Anyway, I wanted a Mexican flavored soup and had gone in search of a fajita soup. 

I found one that looked good here at Maria's site.  She always has great food and I know I can trust her recipes.  The soup was easy to make and tasted great.  D liked it and brought it to work the next day for lunch....I had my leftovers for dinner on call that weekend.  He did wish there was more chicken and I thought maybe a bit more beans would have been good.  Once again, a great recipe.  Served it with the buttermilk bread I made.  All went well together though you could serve it with cornbread or chips just as easily.  Top with sour cream, salsa, or avacado for some extra yumminess!  (Sorry for the poor quality pictures...I forgot and this is the end of my leftovers.)  Try it out. For a veggie entree, forego the chicken and add another can of beans.

Chicken Fajita Soup from Two Peas and a Pod
2 boneless chicken breasts
Salt and pepper, to taste
1 tablespoon olive oil
1 yellow onion, diced
1 tsp minced garlic
1/2 jalapeño, minced
1 small red bell pepper, cut into strips
1 small orange red bell pepper, cut into strips
1 small yellow bell pepper, cut into strips
2 (15 ounce) cans diced tomatoes
1 (15 ounce) black beans, drained and rinsed
2 (15 ounce) cans vegetable broth (or chicken broth)
1 teaspoon ground cumin
1 1/2 teaspoons chili powder
1/2 teaspoon garlic powder
several squirts key lime juice


Heat a grill or grill pan to medium-high heat...or the one setting on your George Foreman! Season chicken breasts with Season All and put on grill. Grill, turning chicken breasts until cooked through, about about 10 minutes, depending on thickness. Remove chicken from the grill and let cool. When cool enough to handle, cut into thin strips. Set aside.

In a large pot, spray with cooking spray and add the onion and peppers, cook until tender, about 5 minutes. Add the garlic and jalapeño.  Cook until tender, about 5 more minutes. Stir in the diced tomatoes, black beans, and broth. Add the cumin, chili powder, garlic powder, lime juice, and cilantro. Season with salt and pepper, to taste. Let soup simmer for 20 minutes, stirring occasionally. Stir in the chicken strips. Cook for an additional 5 minutes. Serve warm with garnishes, if desired.  Enjoy!

Sunday, February 19, 2012

Taco Salad - How you Like it

Here's another "satisfy everyone" meal.  One of D's favorites is tacos...or taco "salad."  My version of salad and his version, however, are quite different!  In my version, the base is lettuce...green stuff.  His version...chips! (This would be my dad's and brother's version as well!) 

I made basic taco meat with beef and taco seasoning.  Then I also heated up some beans and seasoned them with cumin and seasoning salt.  Then you just top it with whatever you want.  I put some avacado, tomato, sauteed pepper and onions, beans, and salsa on mine. 

D had meat, cheese, peppers, and...a few pieces of lettuce!  K ate beans, meat, and lettuce.  She tried some avacado but wasn't a fan.  We can keep trying...it took me years before I realized I liked it!  I was just excited that she tried...big deal for a two year old!

Taco Salad for All
1 pound ground beef (85/15)
1 pack taco seasoning
1/2 yellow, red, and orange bell peppers - sliced
1 onion - sliced
1 can beans, your favorite variety
cumin
seasoning salt
lettuce
tomatoes
sour cream/yogurt
salsa
avacado
cheese
chips

Brown beef.  Add taco seasoning as instructed on package.  At the same time, saute the peppers and onions; add some cumin for a bit of seasoning.  After the peppers are done, remove and place the drained beans in the pan.  Season with cumin and seasoning salt to taste.  Cook until warm.  When all this is ready - make your salad!  Start with lettuce or chips - depending on which type salad you want and build from there.  Above all, enjoy your dinner and company!