Sunday, December 30, 2007

Nueces Toffee

One of the treats my mom makes every Christmas is called Nueces Toffee. To me, it has the perfect texture...not too peanut brittle-ish and not too soft. It is also super easy to make. When I got home, Mama was getting ready to make some for the neighbors. I asked if I could make it and was given the go ahead. This is another good one to involve the kids in...AFTER you have cooled it. They can help break the toffee into pieces. I think this is one of Mama's go-to recipes. If you're looking for something to take to a New Year's party...try this. I guarantee it will be enjoyed!

Nueces toffee
1 cup chopped pecans (use less)
3/4 cup brown sugar
1/2 cup butter
1/2 cup chocolate chips

Butter 8X8 pan. Sprinkle with pecans. Cook sugar and butter to 300 degrees (hard crack). Pour over pecans, sprinkle with chocolate chips. Spread when melted. Refrigerate until the chocolate hardens. Remove from pan. Wash your hands and break toffee into small pieces.
Place on your cutest plate and enjoy with friends!

Friday, December 28, 2007

Jeweled Cookies

I hope that you all had a wonderful time celebrating with your families and being off of work (if you were able to be off!). If you haven't noticed, there is still one recipe from my Christmas tins that I haven't given. I guess that it's better late than never! This recipe was one of the Food Network 12 Days of Christmas cookies. I thought it looked pretty and would be something fun and different, so I gave it a try. These bar cookies called Mazurkas are from Poland. The wonderful shortbread crust is topped with a delicious glaze filled with dried fruits and pistacios. They are easily packaged and would be a good addition to a bake sale...something a little more nutritionally redeemable, ;-)! One of my tin recipients commented specifically about these, so I think they were a success. I don't know if I'll directly do these again, but I think I probably WILL use the shortbread recipe. It was perfectly tender. So, with no more ado...here are the Mazurkas...the last cookie in my (apparently international) cookie tin, with a few changes (for the original recipe, use the link).Cookie:
2 cups all-purpose flour
1/2 teaspoon baking powder
1/4 teaspoon fine salt
1 cup unsalted butter, soft, but still cool
1 cup sugar
1 large egg
1 1/2 teaspoons pure vanilla extract
Fruit:
4 teaspoons cornstarch
4 teaspoons sugar
1 cup orange juice
3/4 cup dried apricots, quartered
3/4 cup craisins
1/2 cup raw peeled pistachios

Preheat oven to 375 degrees F. Coat a 9 by 13-inch baking pan with butter or nonstick spray. Line the bottom of the pan with parchment paper (this will make it easy to lift out of the pan and cut later on)
For the cookie: Whisk the flour, baking powder and salt in a bowl. Beat the butter and sugar in a large bowl, with an electric mixer, at medium-high speed until creamy, about 2 minutes. Scrape down the sides and add the egg and vanilla extract. Beat well, and then scrape down the sides.
While mixing on low speed, add the dry ingredients in 3 batches. Scrape down the bowl between each addition, and mix until just blended.
Transfer the dough to the prepared pan and spread evenly with a spatula. Bake until light golden brown with spots of darker golden brown and darker edges, about 30 minutes. Cool completely, about 45 minutes.
While the crust cools, prepare the fruit. Whisk the cornstarch and sugar together in a small saucepan. Whisk in orange juice until mixture dissolves. Stir in the fruits. Bring to a simmer over medium, stirring often; continue to cook, stirring until thickened into a compote, about 3 minutes more. You should be able to draw the spoon along the bottom of pan and see the pan with no liquid seeping back. Remove from heat and transfer to a bowl. Stir in the nuts. Spread fruit evenly over the top of the cooled crust.

Heat oven to 350 degrees F. Bake mazurkas until golden brown around edges and fruit sets but is still slightly glossy and jewel-like, about 10 minutes. Cool in pan on rack.
Cut, using an oiled knife, into 24 bars. Serve.
Busy baker's tips: When double-wrapped, the cookie base keeps at room temperature for 3 days or frozen for 1 month. The fruit compote can be made up to 1 week ahead and refrigerated. Store completed cookies in an airtight container, layers separated with parchment paper, for up to 5 days.

Tuesday, December 25, 2007

Happy Birthday, Jesus!

Just wanted to wish everyone a Merry Christmas. Today my family will come together and enjoy good food, time together, and giving and receiving gifts. But most of all, we celebrate the birth of our Savior, Jesus Christ. Many, many years ago, God send His only Son to be born into our world in order to be the perfect sacrifice for our sin. He took the punishment for our sin so that we can be with God, righteous and pure...all you have to do is believe that Jesus is the way to forgiveness and you will saved. So, as families celebrate Christmas today, remember why we celebrate...Jesus!

Saturday, December 22, 2007

A "Log" of Firsts

I must admit that when I saw the challenge for Daring Bakers this month was a Yule Log, I was a bit disappointed. It just didn't excite me, even though one of my kitchen goals for the year (of which I miserably failed!) was to make a cake roll. I also didn't know when I would make it. To make it for my family would be the best, but I wasn't going home until the weekend we were to post...too late! Hmmm...can't just make it for myself. Thank goodness one of my friends has an annual Christmas party. I made it for that. I'm glad that I made the cake, but I don't think I'll ever do it in this form again. Why? Well, I'm just not a fan of eating logs! No, really...I think I may have overcooked the genoise by about 2 minutes and the buttercream, though delicious, is too heavy for me. Because of this, I chose to fill my cake with CoolWhip...I know, I know...it's fake, but who cares! One of the major questions I had at the party was "How long did that take to make?" Honestly, though it took hours in total, it didn't require that much hands on time. I was amazed at how quickly the genoise cooked and how easy it was to put together. The buttercream...I did have trouble with it curdling, but as soon as I put it back over the water, it smoothed right up...perfect! So, now that I can make a buttercream...I probably won't do it anymore! The thing that captured the most attention was the mushroom meringue. A classmate was just amazed...he kept telling people to go try the mushrooms. His girlfriend even said "Get me a mushroom....you'll never hear me say that again!" Apparently , she doesn't like the real thing! All in all, this was a good challenge...again, something that I wouldn't have done if left to my own devices. Thanks, Ivonne and Lisa! This led me to a Yule "Log" of firsts! First buttercream, first cake roll, first meringues, first genoise, and first Yule log! Check out the other Logs here. Plain Genoise:
3 large eggs
3 large egg yolks (reserve the whites for the meringue mushrooms or buttercream)
pinch of salt
¾ cup of sugar
½ cup cake flour - spoon flour into dry-measure cup and level off (also known as cake & pastry flour)
¼ cup cornstarchone
(1) 10 x 15 inch jelly-roll pan that has been buttered and lined with parchment paper and then buttered again

1.Set a rack in the middle of the oven and preheat to 400 degrees F.

2.Half-fill a medium saucepan with water and bring it to a boil over high heat. Lower the heat so the water is simmering.

3.Whisk the eggs, egg yolks, salt and sugar together in the bowl of a heavy-duty mixer. Place over the pan of simmering water and whisk gently until the mixture is just lukewarm, about 100 degrees if you have a thermometer (or test with your finger - it should be warm to the touch).

4.Attach the bowl to the mixer and, with the whisk attachment, whip on medium-high speed until the egg mixture is cooled (touch the outside of the bowl to tell) and tripled in volume. The egg foam will be thick and will form a slowly dissolving ribbon falling back onto the bowl of whipped eggs when the whisk is lifted.

5.While the eggs are whipping, stir together the flour and cornstarch.

6.Sift one-third of the flour mixture over the beaten eggs. Use a rubber spatula to fold in the flour mixture, making sure to scrape all the way to the bottom of the bowl on every pass through the batter to prevent the flour mixture from accumulating there and making lumps. Repeat with another third of the flour mixture and finally with the remainder.

7.Scrape the batter into the prepared pan and smooth the top.

8.Bake the genoise for about 10 to 12 minutes. Make sure the cake doesn’t overbake and become too dry or it will not roll properly.

9.While the cake is baking, begin making the buttercream.10.Once the cake is done (a tester will come out clean and if you press the cake lightly it will spring back), remove it from the oven and let it cool on a rack.

Coffee Buttercream:
4 large egg whites
1 cup sugar
24 tablespoons (3 sticks or 1-1/2 cups) unsalted butter, softened
2 tablespoons instant espresso powder
2 tablespoons rum or brandy (or vanilla)

1.Whisk the egg whites and sugar together in the bowl of an electric mixer. Set the bowl over simmering water and whisk gently until the sugar is dissolved and the egg whites are hot.

2.Attach the bowl to the mixer and whip with the whisk on medium speed until cooled. Switch to the paddle and beat in the softened butter and continue beating until the buttercream is smooth.

3. Dissolve the instant coffee in the liquor (or vanilla) and beat into the buttercream. If your buttercream curdles, place bowl back over the simmering water and whisk. It will come together nicely.

Meringue Mushrooms:
3 large egg whites, at room temperature (use the whites from the yolks used to make the genoise)
¼ teaspoon cream of tartar
½ cup (3-1/2 ounces/105 g.) granulated sugar
1/3 cup (1-1/3 ounces/40 g.) icing sugar
Unsweetened cocoa powder for dusting (or hot chocolate mix)

1.Preheat the oven to 225 degrees F. Line 2 baking sheets with parchment. Have ready a pastry bag fitted with a small (no. 6) plain tip. In a bowl, using a mixer on medium-low speed, beat together the egg whites and cream of tartar until very foamy. Slowly add the granulated sugar while beating. Increase the speed to high and beat until soft peaks form when the beaters are lifted. Continue until the whites hold stiff, shiny peaks. Sift the icing sugar over the whites and, using a rubber spatula, fold in until well blended.

2.Scoop the mixture into the bag. On one baking sheet, pipe 48 stems, each ½ inch (12 mm.) wide at the base and tapering off to a point at the top, ¾ inch (2 cm.) tall, and spaced about ½ inch (12 mm.) apart. On the other sheet, pipe 48 mounds for the tops, each about 1-1/4 inches (3 cm.) wide and ¾ inch (2 cm.) high, also spaced ½ inch (12 mm.) apart. With a damp fingertip, gently smooth any pointy tips. Dust with cocoa (or hot chocolate mix!). Reserve the remaining meringue.

3.Bake until dry and firm enough to lift off the paper, 50-55 minutes. Set the pans on the counter and turn the mounds flat side up. With the tip of a knife, carefully make a small hole in the flat side of each mound. Pipe small dabs of the remaining meringue into the holes and insert the stems tip first. Return to the oven until completely dry, about 15 minutes longer. Let cool completely on the sheets.

Assembling the Yule Log:
1.Run a sharp knife around the edges of the genoise to loosen it from the pan.
2.Turn the genoise layer over (unmolding it from the sheet pan onto a flat surface) and peel away the paper.

3.Carefully invert your genoise onto a fresh piece of parchment paper.

4.Spread with half the coffee buttercream (or whatever filling you’re using).

5.Use the parchment paper to help you roll the cake into a tight cylinder.

6.Transfer back to the baking sheet and refrigerate for several hours.

7.Unwrap the cake. Trim the ends on the diagonal, starting the cuts about 2 inches away from each end.


8.Position the larger cut piece on each log about 2/3 across the top.

9.Cover the log with the reserved buttercream, making sure to curve around the protruding stump.

10.Streak the buttercream with a fork or decorating comb to resemble bark.

11.Transfer the log to a platter and decorate with your mushrooms and whatever other decorations you’ve chosen.

Friday, December 21, 2007

A Truly International Cookie!!

Can you tell I'm not working right now?! I have time to post! This is the next cookie in the tin. Some people call them Russian Tea Cakes. Some people call them Mexican Wedding Cakes. Some people call them Snowballs. The recipe I used (from Food Network) calls them Kourabiedes, from Greece. All in all, I guess these are just an international cookie! I ended up making two batches of these so that the recipients of my tins could have more than four cookies. This recipe calls for orange flower water, which I didn't have (surprised?!); so, I used mandarin orange juice that I had in the refrigerator. I think this is a great cookie to make with kids because it involves rolling the dough into balls...anything hands-on, kids love! If you have trouble with the dough sticking to your hands, just sprinkle some water on your hands and all will be clear! I love the sandy texture of these along with the sweet taste lended by the powdered sugar. So, gather round the kitchen counter, call all the family into the kitchen, and make some cookies! Kourabiedes
3/4 cup walnuts (I used pecans)
1 1/2 cups all-purpose flour
1/2 teaspoon baking powder
1/4 teaspoon salt
1/2 cup (1 stick) unsalted butter, softened
1/2 cup confectioners' sugar
1 large egg yolk
1 tablespoon brandy (I omitted)
1 teaspoon pure vanilla extract
1 to 2 tablespoons orange flower water
3/4 cup confectioners' sugar

Preheat the oven to 350 degrees F.
Toast the nuts until golden brown and fragrant, about 6 minutes. Let cool, then chop about half of the nuts (you should have about 1/2 cup chopped). Pulse the remaining nuts in the food processor until finely ground (about 1/4 cup ground).

Stir the flour, baking powder, salt and nuts together in a medium bowl. Set aside.

In your mixer's bowl, beat the butter, sugar, egg yolk, brandy (if using), and vanilla extract together with an electric mixer on medium-high speed until the mixture gets light and fluffy, about 10 minutes. At low speed, stir the nut mixture into the butter mixture to make a crumbly dough. Cover the bowl and set dough aside at room temperature for 1 hour.

Preheat oven to 350 degrees F. Line two baking sheets with parchment or coat with nonstick spray. With a tablespoon, scoop out 1-inch pieces of dough and roll into balls between the palms of your hands. Pinch the ends of the balls to make a football shape. Place the cookies on the prepared baking sheets. Bake until the cookies set and start to brown, about 16-18 minutes.

Remove cookies from the oven and immediately sprinkle them lightly with the orange water. (If you don't have a brush, simply dip your fingers into the water and flick it over the cookies a few times.) Take care not to douse them, just enough for them to carry the scent of flowers.

Put the confectioners' sugar in a bag, and add 5 to 6 of the warm cookies to it. Very gently toss the cookies to coat with sugar. Remove them from the bag and cool cookies on a rack. Repeat with remaining cookies. Serve.

Busy baker's tips: Dough can be frozen for up to 2 weeks. Store baked cookies in an airtight container for up to 1 week. Baked cookies can be wrapped in plastic, then aluminum foil, for up to 2 weeks. To serve, let cookies come to room temperature before dusting with confectioners' sugar.

Thursday, December 20, 2007

Fudge

ust a quick personal note...the friend that I have mentioned was pregnant found out today that she miscarried. I cannot imagine what that must be like. Please keep her and her husband in your prayers. Now, on to another Christmas recipe. This is one that I got from Cate. Just as the title says, it is very easy peanut butter fudge. At first I was concerned that it was just going to taste sweet, which it does; however, it is definitely peanut butter fudge. Thanks, Cate! Try it out for yourself.

Easiest Peanut Butter Fudge
1/2 cup butter
2 1/4 cups brown sugar
1/2 cup milk
3/4 cup peanut butter (I admit, I did swirl about 1/4 cup more in after everything was mixed in)
1 teaspoon vanilla extract
3 1/2 cups confectioners' sugar

In medium saucepan, melt butter over medium heat. Stir in brown sugar and milk. Bring mixture to a boil and boil for 2 minutes. Remove from heat and stir in peanut butter and vanilla. Pour over confectioners sugar in a large mixing bowl. Beat until smooth; pour into an 8x8 inch dish lined with tinfoil and buttered. Chill until firm and cut into squares. Yield: a lot!

Wednesday, December 19, 2007

Mint Brownies from Mama

Well, my gift tins have been put together and just await delivery! 
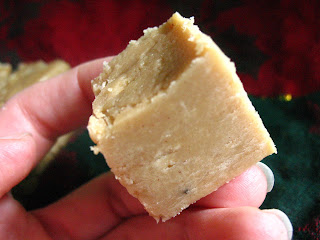
The first recipe I will share is one that my mom does. She calls it Christmas Mint Brownie. It is a layered dessert that any chocolate lover will really want to eat and it even adds some color to your dessert plate. The brownie base is a dense, fudgy, cakey (I know...HOW can it be all three...I don't know, it just is!!!) brownie. The recipe doesn't say cake flour, but for some reason, I thought it did...SO I used cake flour. It turned out fine, so if you wanted to use AP flour, go for it; if you wanted to use cake flour, go for it! Just make the brownies!!!! Okay, back to this wonderful and rich dessert. After allowing the brownie to cool, you top it with a mint flavored icing type topping. This is then spread over the brownie and then cooled. After cooling, a chocolate topping is spread over and chilled again. When you cut these brownies, you have a wonderful layered brownie with just a punch of green! It's the perfect combination of chocolate and mint. Hey, it can serve as your chocolate and after-dinner mint! WooHoo! Since it's so festive and green, this is a great dessert for Christmas...so I'm sending it to FoodBlogga and her Christmas cookie event. Check out the MANY cookies and bars that are there. You may find what you want to make....if you don't make this first! :-) Christmas Mint Brownie
Cake:
1 cup flour
1 cup sugar
1/2 cup softened margarine/butter (1 stick)
4 eggs
1 1/2 cups (16 oz.) Hersheys syrup ( this does come in a can)

Mix, beat until smooth. Pour in a greased 13X9 pan. Bake at 350 for 25-30 minutes. Cool COMPLETELY. MINT:
2 cups confectioner's sugar
1/2 cup softened margarine (NOT the light version...this will NOT work, it separates!!!)
1 Tablespoon water
1/2-1 teaspoon peppermint extract
3 drops green food coloring

Mix until smooth. Spread over cooled cake and CHILL. Topping:
6 T butter/margarine
1 cup chocolate chips

Melt over low heat and let cool. Pour over filling, cover, and chill for at least an hour. After you make this, you can chill until ready to serve. Cut in small squares or even triangles for something different!

Tuesday, December 18, 2007

Good but a Bit of a Disappointment

You know that really yummy sesame chicken they serve at Chinese restaurants but it's really not good for you? Well, I saw a recipe for light sesame chicken. I thought...yes! Must try this. Well, it's good but it's definitely not what I expected or comparable to the restaurant-bad-for-you version. It kind of reminded me of a simple chicken and broccoli stir fry. I found this on a relatively new blog, ...and a Cookie for Dessert. I changed the recipe a little, but you can find the original version here. Another good thing about this recipe is that the leftovers a great put in a LaTortilla Factory tortilla. Yum! Try it out. This is my entry for Sweetnicks ARF Tuesday. Check out her site for more great recipes! Lighter Sesame Chicken
3 tablespoons honey
2 tablespoons sesame seeds
2 tablespoons soy sauce (low salt)
1tablespoon minced (jarred) garlic
2 large egg whites
1/4 cup cornstarch
1 1/2 pounds boneless, skinless chicken breast halves, cut into 2-inch chunks (I just used 2 breasts, which is less than this calls for, I'm sure!)
Coarse salt and ground pepper
2 tablespoons vegetable oil, such as safflower
1 1/2 pounds broccoli, cut into large florets (I used 3 small bunches)
Steam broccoli in a large saucepan by putting broccoli in the pan, placing water (about an inch) in the pan, and bringing the water to a boil. Turn the heat down and cover with a top. Remove from heat when broccoli is fork tender. Drain.

Meanwhile, make sauce by combining honey, sesame seeds, soy sauce, and garlic in a small bowl; set aside. In a large bowl, whisk together egg whites and cornstarch. Add chicken; season with salt and pepper, and toss to coat. In a large nonstick skillet, heat 1 tablespoon oil over medium-high. Add half the chicken; cook, turning occasionally, until golden and opaque throughout, 6 to 8 minutes. Transfer to a plate; repeat with remaining tablespoon oil and chicken. Return all the chicken to skillet; add reserved sauce and toss to coat. Add broccoli to chicken and stir. Serve with rice and mandarin oranges.

Monday, December 17, 2007

Gingerbread House

The first week of my internal medicine rotation, we had to do this (horrible) 2-day course on how to run a code in the hospital (i.e., when someone goes into cardiac arrest). During that course, my friend Sarah and I decided to make a gingerbread house after work on Friday. That day we were at the hospital MUCH longer than we should have been but we returned to my apartment and put our frustrations to work on the little gingerbread house. I think it turned out well. Sarah was the expert window creator, I did the roof, and we even had a stack of firewood ready and waiting. Such fun...something makes me think that only pediatricians (of those in medical school) could have such a good time doing this with no kids around!!!

Saturday, December 15, 2007

All Gingered Up

First of all, if you are in the Jackson, MS area and are looking for some good Christmas music I'd like to invite you to my church Christmas music...Prince of Peace. It is tonight at 7 pm and Sunday at 6 pm at Morrison Heights Baptist Church just off I-20 in Clinton! Okay, onto the baking!!!

I am now out of school for Christmas break!!!! SO ready for it as I've worked everyday except one since Thanksgiving. I haven't started Christmas baking, but Ive decided what I'm making....a Christmas mint brownie my mom made, Russian tea cake type cookie - except it's a Greek recipe, a fruit topped shortbread from some foreign country, and peanut butter fudge. I bought the ingredients today...so be sure to stop by over the next few weeks for the results!

Meanwhile, I have done some baking for my medicine team...the Green team! We are on a q4 call schedule which means that every fourth night, we're on call. I've baked twice for call days - when it was on the weekend. The first time I made some ginger molasses cookies. 
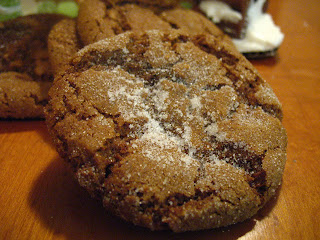
Part of my reason for making these is that my medicine partner was pregnant and had been having some morning/evening sickness, and ginger is supposed to be an anti-nausea herb. Another reason I wanted to try this recipe (from Baking Bites) is that they use oil instead of butter. I did make a couple of minor changes but they actually turned out well...not too flat or too crispy and the black pepper (in my opinion) adds a good amount of spice. Our resident really liked them and so did Sarah...I think you will, too! Spiced Up Ginger Cookies
2 cups all purpose flour
1 tbsp ground ginger
2 tsp baking soda
1/4 tsp salt
1 tsp ground cinnamon
1/2 tsp each allspice and black pepper
1 cup granulated sugar
2/3 cup vegetable oil
1 egg
1/4 cup molasses
1/4 cup sugar, for rolling
Preheat oven to 350F. In a medium bowl, whisk together flour, spices, baking soda and salt.
In a large bowl, beat together sugar and vegetable oil. Beat in egg and molasses until smooth. Stir in flour mixture until well combined. Shape dough into 1 inch balls, roll in coarse sugar (or scoop the dough directly into the sugar...that's what I do) and place on baking sheet. Bake 7-8 minutes until very lightly browned. Let cookies cool for 3-5 minutes on cookie sheet, then remove to a wire rack until cool.
Makes 3 dozen.

Tuesday, December 11, 2007

Shrimp Florentine-ish Soup

Last week before the weather turned crazy warm, we had some great, cool soup weather. I told my internal medicine partner that I was going to go home and make soup and cornbread. I actually followed through on that! I just had to decide what kind of soup to make. I knew I had a frozen vegetable soup starter (peppers, corn, onion, and okra!!!) in the freezer as well as some spinach. Hmmmm....shrimp florentine? So, I stopped by the little grocery store near my house on the way home from the gym and picked up a can (they had no frozen except for big bags) of shrimp and a can of cannelini beans. Put all these flavors together and it's a lovely little soup! I didn't put enough chicken stock, but that's easy to fix when you warm up another bowl. Because of all the veggies, this is the perfect recipe for Sweetnicks' ARF Tuesday. Drop by her site for more great recipes. Shrimp Florentine-ish Soup
1 bag frozen veggie soup starter
1 10 oz (or half a 16 oz bag) frozen spinach
1/2-1 can cannelini beans
1 can shrimp 4-6 cups low sodium chicken stock*
1 can chopped, stewed tomatoes
1 can rotel (I didn't use this this time, but would next time)
garlic powder, to taste (I LOVE this stuff!)
salt, to taste (I didn't use any, as I'm trying to be a good example to my heart failure patients, even if they can't see me!!!)
pepper, to taste
parsley
parmesan cheese
1/4 cup quinoa, if desired (I just had this on hand and wanted to get rid of it!)
Place soup starter veggies and 2 cups chicken stock in a large soup pot. Cook until tender. Add the spinach and quinoa (if using) and cook until spinach is no longer frozen. Add shrimp, tomatoes, beans, and remaining chicken stock. Add garlic powder, salt, pepper, and parsley here. Cook until soup gently boils and simmer for 5 minutes. Serve with fresh grated parmesan cheese, if desired. Goes great with Triscuit thin crisps (LOVE these!) or cornbread.

Saturday, December 08, 2007

The First Meme of the Season

This is a food free post, but I love these little questionaires. If you'd like to do it as well, feel free to copy and try it out!

1. Wrapping paper or gift bags? Wrapping paper, though bags are easier.
2. Real tree or artificial? Artificial. I took the top two sections of our old tree and use it. My miniature one just depressed me!
3. When do you put up the tree? the weekend after Thanksgivig
4. When do you take the tree down? sometime soon after the new year
5. Do you like eggnog? never tried it but my guess is no!
6. Favorite gift received as a child? Hmmm...I guess my bike
7. Do you have a nativity scene? I've got two...one that my mom got me and stays up all year, and another that I got at Kirklands last year.
8. Hardest person to buy for? my brother
9. Easiest person to buy for?mom
10. Worst Christmas gift you ever received? ummm...I can think of one but I'm not going to say what it was...I never used it, though. I can also think of my brother's worst gift, but I wont say it either.
11. Mail or email Christmas cards? Mail if I send them
12. Favorite Christmas Movie? The Santa Clause
13. When do you start shopping for Christmas? whenever I know what I want to get and find it!
14. Have you ever recycled a Christmas present? don't think so
15. Favorite thing to eat at Christmas? the wheat squares and nuts from Trash (i.e. chex mix!)...and squash casserole. BUT I LOVE baking for Christmas treats.
16. Clear lights or colored on the tree? Both. My tree has clear, our den tree has colored, and the themed tree has clear.
17. Favorite Christmas song? hmmm...I dont know. I like O Holy Night and Silent Night. Birthday of a Kin is good too.
18. Travel at Christmas or stay home? Now I travel since my parents live in TN.
19. Can you name all of Santa’s reindeer? Dasher, Dancer, Prancer, Vixen, Comet, Cupid, Donner, Blitsen, and Rudloph (!)
20. Angel on the tree top or a star? Angel or weird Kyrgyz thing
21. Open the presents Christmas Eve or morning? Christmas morning
22. Most annoying thing about this time of year? lines, traffic
23. What I love most about Christmas? Of course, we celebrate because Jesus came to give us life but I'll go outside of that and say giving. It's so much fun! I just bought a lot of toys for the children at our hospital and just love it!!!

Tuesday, December 04, 2007

Muffins for the A-Team

A couple of weeks ago, while I was on my psychiatry rotation, we had to round earlier than normal, so I decided to make muffins to take to my team. I searched and finally decided to try a new recipe from the cookbook of the Junior League of Lynchburg, VA: In Good Company. It's a banana chocolate chip muffin. I don't really go for chocolate chips in muffins but wanted to try the recipe...so it was a great time. All the guys enjoyed them; in fact, one asked me to give this recipe along with my chocolate chip cookie recipe to his girlfriend. They came out with a nice "crisp", i.e. not mushy or sticky, top and tender inside. I'd recommend them. AND, because of the bananas and even the chocolate, these are a great entry for Sweetnick's ARF Tuesday. Stop by and check out the other recipes. Banana Chocolate Chip Muffins
1/2 cup (1 stick) butter or margarine, softened
3/4 cup sugar
2 eggs
1 cup mashed banana (about 2)
1 teaspoon vanilla
2 cups flour
1 teaspoon baking soda
1 teaspoon salt
3/4 cup chocolate chips
Preheat oven to 350 degrees F. Cream the butter and sugar until fluffy. Add the eggs and mix until smooth. Then mix in the banana and vanilla. Combine the flour, soda, and salt. Stir into the banana mixture. Stir in the chocolate chips but don't overmix. Spoon batter into grease muffin tins. Bake for 25 minutes or until browned.

Monday, December 03, 2007

Welcome Home, Peabody

Peabody just got a new house!!!! How exciting! I just love new houses...especially the kitchens...and her's looks awesome. To celebrate, she is hosting an open house covered dish. Typically, I 'd bring a dessert to something like this, but this time it'll be a main dish. Poppyseed chicken is one of my mom's favorite company dishes, and I enjoy it, too! However, I don't use it much because it does use two condensed soups and some sour cream...ack! Hint: be sure to put the poppy seeds on...it really does make a difference in the way it tastes! Happy House, Peabody!!! Poppy Seed Chicken
4-6 boneless, skinless chicken breasts, boiled and cubed
1 can 98% fat free cream of chicken soup
1 can 98% fat free cream of mushroom soup
16 oz low fat sour cream (I used fat free b/c that's what I had and it worked; you could also use yogurt)
2 Tablespoons poppy seeds
1 sleeve or less Ritz (or other butter style) crackers, smashed
1/2 stick melted margarine (OR just spray the top with cooking spray, this is what I do now) Preheat oven to 350 degrees F. Prepare chicken as directed - I've found the best way to boil chicken is to put it in the water, bring to a boil for a few minutes (less than five), turn off the heat, and let it sit (covered) for a couple of hours; this produces a VERY tender chicken.
In a 13X9 pan, place the chicken. Stir soups and sour cream together in a bowl. Pour this mixture over the chicken. Sprinkle the crackers over the chicken. Now pour the margarine over the crackers or spray with Pam. Sprinkle the poppy seeds over the dish. Bake for 30-35 minutes or until bubbly. You can also prepare and freeze...just wait to put the crackers and poppy seeds on when you are ready to serve it!