Showing posts with label Baking. Show all posts

Friday, June 05, 2015

Miner Muffins

After her birthday, Kate was enamoured with the Princess cookbook from Philip (and whenever she finds it these days, she is again!). Pretty soon after the Abu Bread, we made Miners Muffins. 
The original recipe is for mini muffins and is regular flour.  We modified these to make regular sized muffins and used gluten free flour.  Kate was pretty excited! 
We did this without a mixer, so she got to stir. 
Then, I let her try out the muffin dispenser.  She is quite the little baker. 
These turned out pretty good.  I think I'd like to try them mini at some time.

Miners' Mini Muffins
1 cup GF flour (or regular)
1/2 cup brown sugar
1 tsp baking powder
1/4 tsp cinnamon
1/4 tsp salt
1 egg
1/2 cup milk (or buttermilk or almond milk)
2 Tbsp butter, melted
1/2 cup blueberries

Preheat oven to 375.  Stir together flour, sugar, baking powder, cinnamon and salt.  In another bowl, whisk together egg, milk and butter.  Stir the flour into the butter mixture.  When it is all "just wet" fold in the blueberries.  Spoon into prepared muffin pan (mini or regular).  Put the pan into the oven and allow to bake for 12 (mini) or 15-17 minutes (regular).  It is ready when a toothpick comes out clean.  Remove from oven and allow to cool.  Remove from pan and enjoy!

Wednesday, May 27, 2015

Lamingtons - May Daring Baker

For the May challenge Marcellina from Marcellina in Cucina dared us to make Lamingtons. An Australian delicacy that is as tasty as it is elegant.  I was immediately excited about this recipe, because it is already gluten free.  I'm all for any conversion-free challenges!!!  However, I let this one sneak up on me.  In fact, I had almost decided that I wouldn't participate until Kate decided that we should make David a "chocolate cake" this weekend.  My only "problem" was what to dip the lamingtons in.  You see, David doesn't like coconut; so, that wasn't going to work for the coating.  I settled on a few options: rice krispies, crushed chex, almonds, and cookie decorations (for Kate!).
 Kate did a great job of cracking eggs and even had fun guessing and then seeing what color eggs turn when you beat them.  She also thought it was fun to dip the cakes.
 I ended up not dipping them all completely.  The cakes were falling apart when they had that much chocolate icing on them.  I think David has enjoyed them...he had one two nights in a row.  :-)

Traditional Lamingtons
Ingredients:
5 large eggs, at room temperature
1 cup (240 ml) (225 gm) (8 oz) castor (superfine) sugar
Pinch salt
1 teaspoon (5 ml) vanilla extract
1 ¼ cups (300 ml) (200 gm) (7 oz) cornflour (cornstarch)
1 ½ teaspoons (8 gm) baking powder

  1. Preheat oven to moderate 180°C/350°F/gas mark 4.
  2. Prepare a 4 ½ cm (1¾ inch) deep, 23cm x 33cm (9”x 13”) baking pan by lining with non-stick paper.
  3. In a stand mixer bowl place eggs, sugar and salt. Using the whisk attachment, beat on high for 15 minutes. 
 While the eggs and sugar are beating sift the cornflour and baking powder at least 3 times.  Sift flour mixture over the egg mixture. I like to use a whisk but you can also use a large metal spoon to lightly fold the flour in.
Spread mixture into your prepared pan and smooth out evenly.  Bake in preheated moderate oven for 22-25 minutes. The sponge will rise quite a lot but then settle back down. Don’t be tempted to open the oven to peak. I also warn the family to walk gently past the oven! When baked the sponge will have shrunk very slightly from the sides and should feel springy when pressed gently.  Turn the sponge out immediately onto a wire rack to cool and reverse sponge so as not to mark the top. Allow to cool. It is best to keep the cake for a day before making the Lamingtons as the cake will be easier to handle.

Chocolate icing
Ingredients:
3 ¼ cups (780 ml) (400 gm) (14 oz) icing (powdered) sugar
1/3 cup (80 ml) (40 gm) (1-1/3 oz) cocoa powder
1 tablespoon (15 gm) (15 gm) (½ oz) butter, melted
½ to ¾ cup (120 ml to 180 ml) milk

Sift the icing sugar and cocoa into a heatproof bowl. Stir in the butter and ½ cup milk. Set the bowl over a pan of hot water. Stir until icing is smooth adding more milk to thin the icing if needed. I find I need more than ½ cup but not quite ¾ cup of milk.

To assemble the Lamingtons:
Cut the sponge cake into 24 rectangular pieces – 6 across and 4 down. To be particular you can trim the crusts.  Dip each piece in the chocolate and then dip in your chosen topping.  Place back on wire rack and allow to harden for 2 hours.


Saturday, April 11, 2015

Caramel Chocolate Bars

Y'all, I realized today that I am nearing a whole year behind on posting.  Guess that's what having a five year old, full time job, new house, husband, new baby, church activities, and trying to stay active will do to you.  Ha! 
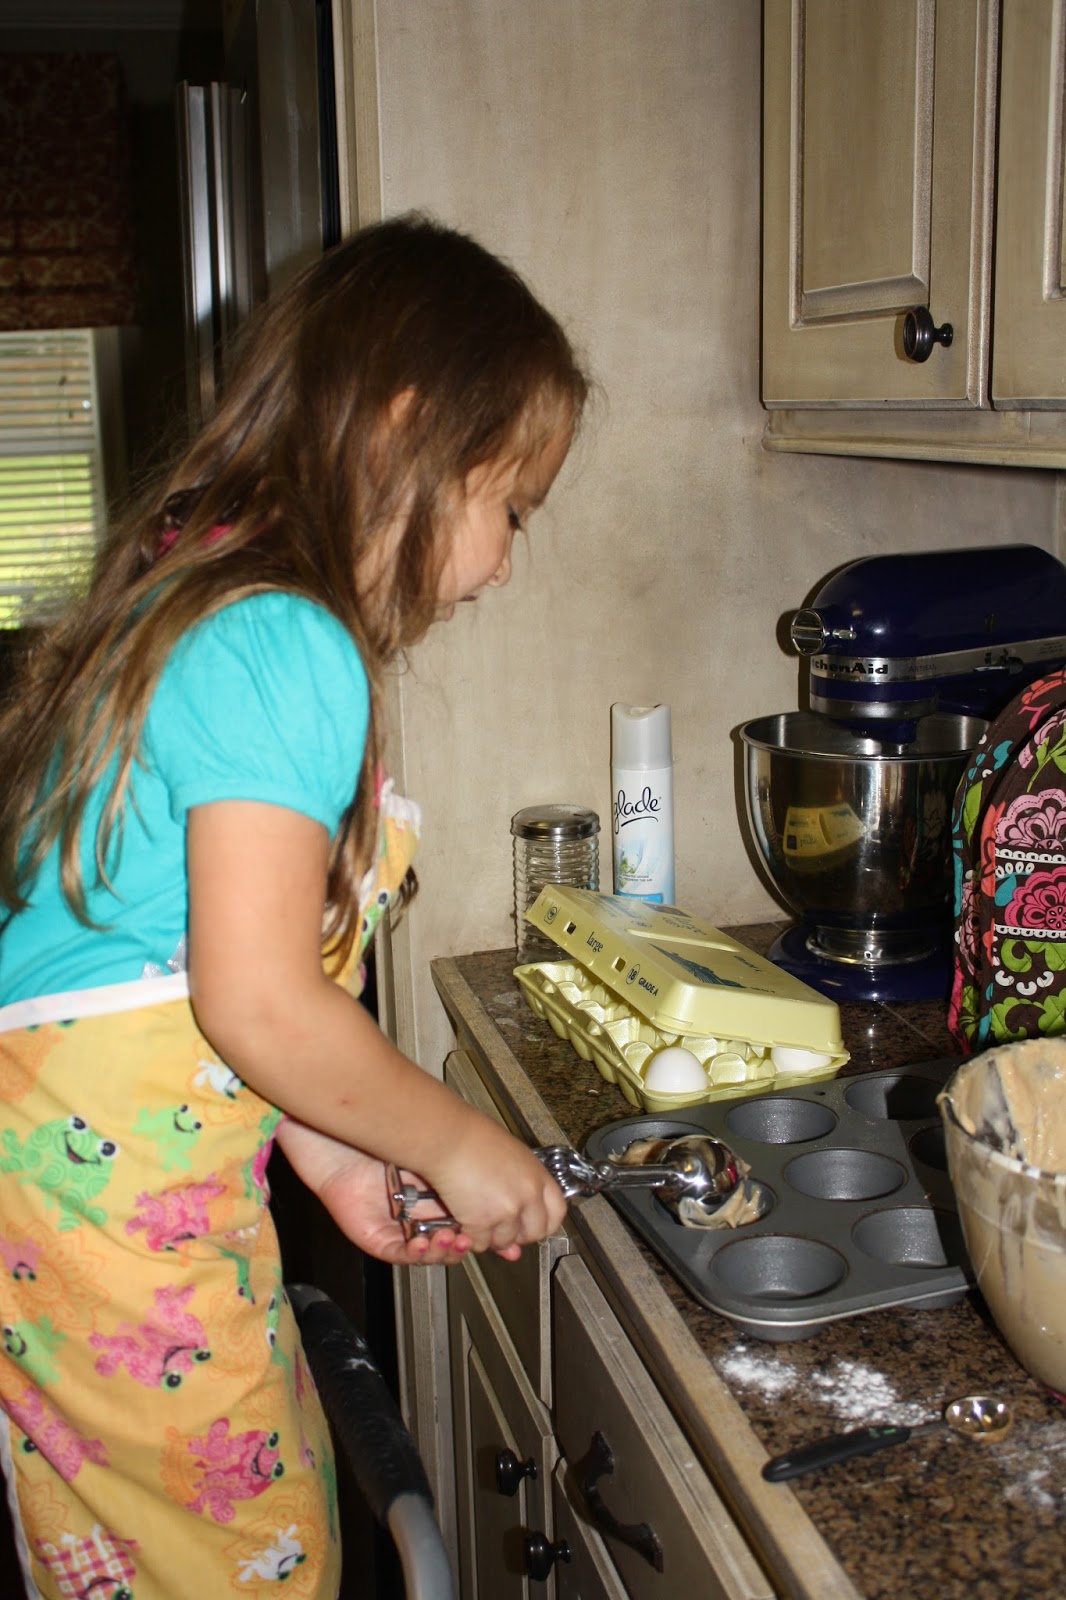
One random weekend in June, David decided to take on a baking project with Kate.  I think by midway through this is how he felt...

They had a lot of fun, though; and the result was SO good!  It turned out to be a really good recipe for cooking with a preschooler.  Kate enjoyed unwrapping the caramels. 
You could even use it as a counting/math lesson but having them count out the correct number or asking "How many more?" 
They can also help by stirring while the caramel melts (with adult supervision, of course!).

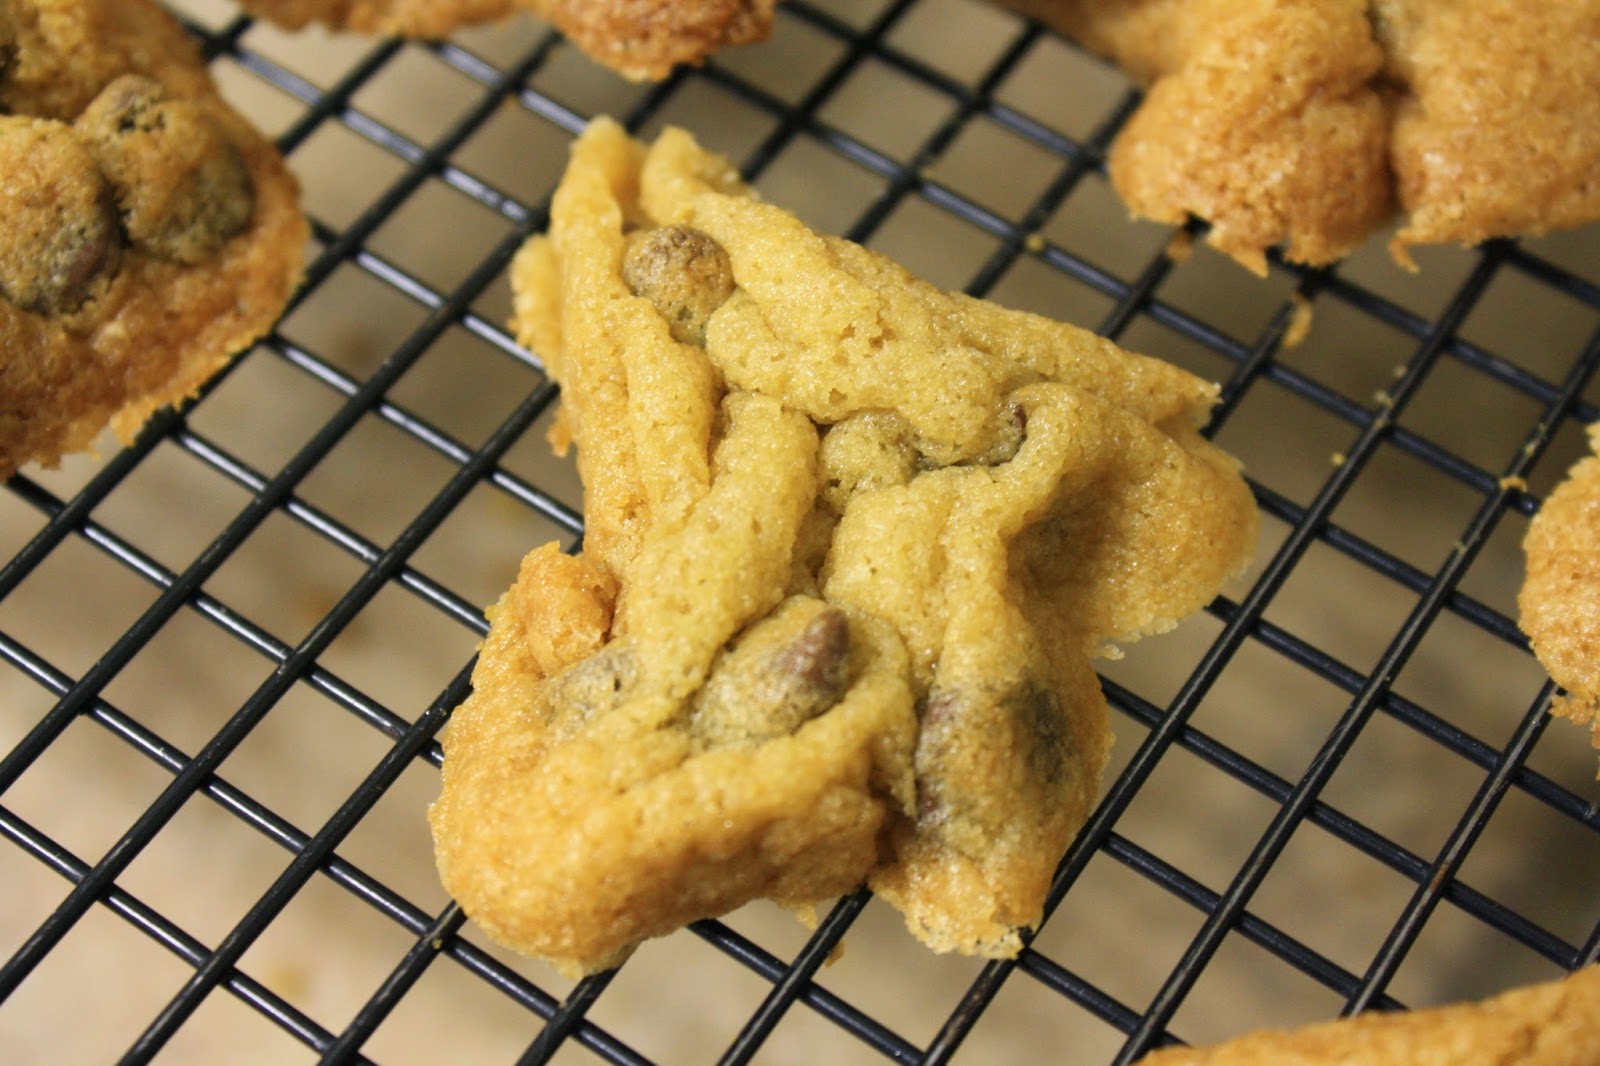
I really love a good, ooey gooey dessert and this definitely qualifies! 
I guess you could even claim that they would help milk supply for a breastfeeding mom with the oats...anything for an excuse to eat dessert, right?!  :-)  Oh, and don't forget to practice your whistling!


Caramel and Chocolate from Averie Cooks

Ingredients:

3/4 cups butter, melted
1 1/2 cups whole rolled oats
3/4 cup brown sugar, packed
1 teaspoon baking soda
1 teaspoon vanilla extract + 1 teaspoon vanilla extract
1 cup chocolate chips
35 caramel squares (or 2 cups caramel sauce)
2/3 cup half-and-half or cream

Directions:

Preheat oven to 350F and line an 8 x 8-inch baking pan with aluminum foil, allowing for overhang (do not make this recipe unless you line your pan with foil) and spray the foil down very well with cooking spray. In a large microwave-safe bowl, melt the butter. To the melted butter add the oats, brown sugar, baking soda, one teaspoon vanilla, and stir to combine. Pour just over half the oat-butter mixture (about 60%, eyeball it) into the bottom of the prepared baking pan, spread it evenly with a spatula, and bake for 9-10 minutes. The mixture will bubble up and foam considerably while baking. Watch it closely and the sides will show a bit of browning at about 9-10 minutes. Remove pan from oven and let it rest and cool for 3 minutes, and then sprinkle the chocolate chips over the top in an even layer.

While the mixture is baking, unwrap the caramels and place them in a medium-sized saucepan that's been sprayed with cooking spray. Add the cream to the caramels and melt over medium-high heat, stirring nearly continuously to prevent scorching or boiling. It may take 5 minutes for caramels to completely melt. After mixture has melted, is smooth and combined, turn off the heat and add one teaspoon of vanilla, using caution because the vanilla will likely bubble up a bit, and stir to incorporate.

Pour the melted creamy caramel mixture over the top of the oat mixture that has been topped with chocolate chips. It will be very soupy, this is fine. Take the remaining half (40%) of the oat-butter mixture and sprinkle it as evenly as possible over the top, using a spatula to gently spread the oats within the "caramel soup". Place pan on top of a cookie sheet as a precaution for spill-over and bake for 14-16 minutes more, or until sides of the mixture are beginning to brown (Look closely in order to discern "browning edges" from the overall brown color of the caramel mixture when it's baking; they're very similar but distinct enough to differentiate). Remove pan from the oven and allow it to rest and completely cool on the countertop before attempting to slice the bars (at least two hours) or you can expedite the process by placing the pan in the freezer or refrigerator until sufficiently cool enough to slice (but not frozen).

Enjoy!

Saturday, January 03, 2015

Delicious Gluten Free Brownies!

I typically try to keep David with snacks and desserts.  He can't just go get anything from vending machines these days.  When I saw these brownies I thought they looked so good! I mean, anything with chocolate and peanut butter is gonna be good, right?  Well, they were.  Just look at that fudginess!!! 

They do use almonds as the "flour" but you really cannot tell.  Unfortunately, if you are a nut-free house, you cannot use this recipe.  However, if you can eat nuts, I would highly recommend that you try this brownie.  Also, the coffee just brings out the chocolate flavor...so don't skip it!

Gluten Free Chocolate and Peanut Butter Swirl Brownies from Kitchen Mason
310g Icing Sugar, Sifted
200g Ground Almonds
80g Cocoa Powder, Sifted
Pinch of Salt
1 tsp Coffee Granules, Dissolved in 1 tbsp Cold Water
4 Egg Whites
2 tsp Vanilla Extract

For the Topping
100g Smooth Peanut Butter
35g Milk Chocolate Chips

Preheat the over to 350.  Lightly grease and line the base of an 8x8 baking pan.  In a very large bowl, whisk together the icing sugar, ground almonds, cocoa powder & salt until everything is evenly mixed.  Pour into pan.  Beat the peanut butter until smooth & loose then dot blobs all over the top of the brownie batter.  Run a knife through the batter, swirling the peanut butter around. Lastly, top with a scattering of the milk chocolate chips.

Bake in the preheated oven for 30-35 mins until an inserted skewer comes out almost clean.
Allow to sit in the tin for a few minutes then remove & place on a wire rack to cool completely.

Friday, January 02, 2015

Cinnamon Roll Cake

Our Sunday School class typically has breakfast during the class.  Most often, it is not gluten free.  So, whenever I sign up, I take something David can eat.
I will also, sometimes, take something on days when I don't sign up.  Hey!  Any excuse to bake...though that has slowed down a LOT over the last 3 months.  Hopefully, I'll be able to do more as Caleb gets older.  Anyway, I made this cinnamon roll cake back in May.  It was really good and reminded me of a recipe that my mom has made a few times.
Cinnamon Roll Cake from USA Silly Yaks
Cake:
3 c. Gluten Free Flour Mix
1/2 tsp. Xanthan Gum
1/4 tsp.salt
1 c. sugar
4 tsp. baking powder
1 1/2 c. milk
2 eggs
2 tsp. vanilla
1/2 c. butter, melted

Cinnamon Swirl:
1 c. butter, softened
1 c. brown sugar
2 T. Gluten Free Flour Mix
1 T. cinnamon

Preheat oven to 350.  Mix everything together except for the butter. Slowly stir in the melted butter. and pour into a greased 9x13 pan.

For the cinnamon swirl, mix all the ingredients together until well combined. Drop evenly over the batter and swirl with a knife. Place pan in oven and bake at 350 for 28-32 minutes.

Glaze:
2 c. powdered sugar
5 Tbsp. milk
1 tsp. vanilla

Mix together and pour over cake while still warm.  Enjoy!

Sunday, November 16, 2014

Oatmeal Cookies

 For some reason, I feel constrained by the descriptor "gluten free."  I don't feel like I can be as creative.  So, I kind of got stuck doing chocolate chip cookies and peanut butter (because there are lots of flourless versions of that) cookies.  However, one day, David requested oatmeal.  I was surprised but that's what he wanted.  
Now, oats are typically gluten free but I guess can't be guaranteed gluten free due to processing.  We don't buy special oats but Chex now has a gluten free version that, I think, is a little less expensive than your typical gluten free oats.  Anyway, I found this recipe and it turned out great.  They were nice and puffy.  David said they were "really good."  Try them out for yourself!

Gluten Free Chocolate Chip Oatmeal Cookies adapted from Mom, What's for Dinner
3/4 cup butter
3/4 cup firmly packed brown sugar
1/2 cup sugar
2 eggs
1 tsp vanilla
1 1/4 cups multipurpose Gluten Free Flour
1 tsp baking soda
1 tsp ground cinnamon
1/2 tsp sea salt
3 cups old fashioned oats
1 cup chocolate chip


Preheat oven to 350 degrees.
In a large bowl, beat butter and sugars on medium speed of electric mixer until creamy.
Add eggs and vanilla an beat until well blended.
Add flour, baking soda, cinnamon and salt and mix well.
Add oats and mix well, if you are choosing to add raisins or chocolate chips, add them now.

Scoop your dough onto a pre-heated baking stone prepared with parchment paper.
Bake 10-12 minutes. 
Makes about 4 dozen.

Saturday, September 27, 2014

Gluten Free Sharpei

One of the things that David misses being gluten free is cookies.  Well, I've taken it upon myself to try and make many different kinds for him.  One of the things I miss with him being gluten free is just making up recipes AND making the best cookies EVER! 
You've seen them before on this blog.  So, I had to try them gluten free.  They definitely aren't the same but they are still very good.  Kate thought they deserved a little inspection while we were making them but I thought they passed. 
Gluten Free Sharpei Cookies
2 sticks (one cup) butter
1 cup brown sugar
1/2 cup granulated sugar
1 egg
1 tsp vanilla
2 cups AP Gluten free flour mix
1 tsp baking soda
1-1.5 cups chocolate chips

Preheat oven to 350 degrees.  Cream butter and sugars together in a mixing bowl until very smooth.  Add egg and vanilla.  Mix together.  Add in the dry ingredients and mix until incorporated.  Stir in the chocolate chips.  Place 2 tablespoon sized balls on the pan.  When pan is filled, place it into the oven.  Bake for 11-12 minutes (will be slightly undercooked).  Remove from pan and immediately squish the outside of the cookies toward the center of the cookie using the backsides of two spoons.  This gives the cookie its "sharpei" appearance.  Allow to cool for 2-3 minutes then remove to cooling rack.  Enjoy!

Wednesday, September 24, 2014

Fashion and Flourless Peanut Butter Cookies

Today (Monday), I am making my grandmother's peanut butter cookies to send to Kate's school for a teacher lunch.  I will probably send some to my dad's favorite car mechanic/friend as well.  He loves them.  However, David can't have them as I didn't modify for gluten free. 
These cookies, however, he could have and loved.  They are flourless peanut butter cookies.  Isn't it weird how you can make flourless cookies and they WORK!? 
I'm going to have to do these sometime soon with the Hershey's kiss in the middle.  David has actually asked for that recently. 

Anyway, as you can see, I had my little helper to make these with me and she was strutting her fashion stuff in full glory that day.  Gotta love seeing what a 4-5 year old thinks looks good.  :-)  I'm pretty sure she just put the tights on and then decided she was playing doctor.  Ha!  Just as Kate adapted her look, we adapted this recipe. 
I didn't use Reece's Pieces (though they are my FAVE!).  I'm pretty sure we used peanut butter cups and chocolate chips but peanut butter would be way good!

Flourless Peanut Butter Cookies adapted from Pies and Plots

1 cup creamy peanut butter
1 cup packed light brown sugar
1 large egg
1 teaspoon baking soda
1 teaspoon pure vanilla extract
½ cup peanut butter or chocolate chips
½ cup peanut butter cups, cubed

 
Preheat oven to 350 degrees F.  In a large bowl, stir together peanut butter, sugar, egg, baking soda, and vanilla until well combined. Add the chips and candy and mix until incorporated. Using a cookie scoop, scoop the dough onto the prepared sheet pan. Cookies do not have to be spaced too far apart, as they will not spread much. Flatten cookies slightly with your hand (This is important!), as they will not flatten much during baking.  Place the prepared pan into oven and bake for about 15 minutes, until cookies have cracked and are almost set. Enjoy!

Tuesday, September 23, 2014

Pop Tarts - Gluten Free

Honestly, I'm really surprised that there hasn't been a gluten free pop tart to make an appearance yet.  I can't say that we would be frequent buyers, but I probably would get them occasionally as a treat for David. I think that's one of the things he misses the most - Le Sigh!
To me, the hardest thing it going out to eat but I think he misses the snacks the most.  This is probably a good thing, except for the fact that I make him stuff all the time and send it with him.  Anyway, one week, I decided to surprise him and make poptarts.
He really enjoyed them.  I was a bit frustrated with them because I missed my timer and left them in longer than needed; which means that the jam started cooking out of the pastry.  Oh well!  He still liked them and everyone was impressed that he had homemade pop tarts for breakfast as work!  :-)  Guess I should make these again sometime.

Gluten Free Pop-Tarts from Desserts with Benefits
Ingredients
160g (1+1/3 cup) Oat Flour (plus ~1/2 cup for rolling)
160g (1 cup) Brown Rice Flour
3/4 tsp Salt
168g (~3/4 cup) Non-Hydrogenated Vegetable Shortening*, soft (Earth Balance or Spectrum Organics)
 1/4 cup sugar

Filling:
Jam or fruit spread

Icing:
1/2 cup powdered sugar
1 tbs Unsweetened Almond Milk
1 tsp Vanilla Extract (Do not use if you want it to be white!)

Instructions
    For the Dough:
    In a large bowl, whisk together the oat flour, brown rice flour and salt. Dump the shortening into the center of the bowl. Fold together until a dough forms (the dough should be too dry or too moist, you should able to form it into a ball without it sticking to the bowl).  Knead this dough then flatten into a disc, wrap in plastic wrap and chill for an hour. When ready, preheat oven to 350.
    Break off 1/4 of the dough disc (put the rest back in the fridge).  Place some wax paper, parchment or dough cloth on the counter and dust with some oat flour.  Roll to 1/8" thickness. Use a pizza cutter to cut into rectangles.  Then use a thin/sharp pie server to transfer rectangles to the prepared baking sheet. Add the fruit spread to the dough rectangles, leaving 1/4-1/2" border, then top with another dough rectangle.  Press on the edges with your fingers or fork (I like a fork) to seal the pop tart and use a toothpick to poke holes into the surface (you can kind of see the holes in the post photos). When you have used all the dough, place the pan into the oven and bake for ~12-16 minutes or until the edges have browned slightly.  
    Make icing by mixing all ingredients.  When the poptarts have cooled, drizzle on.  Enjoy!
Notes
*She states that you can probably use 1/4 cup of unsweetened applesauce in place of 1/4 cup of the shortening if you want a lower fat recipe. She has apparently had success previously just not when used for the Pop Tart.

Monday, September 22, 2014

Almonds Make Caramel Healthy, Right!?

This was one of the first cakes I tried gluten free and I was REALLY excited about it because it used almond flour.  Plus, it was caramel!  I took it to Sunday school and then to work.  I'm pretty sure everyone liked it...though I'm not sure about David.  He really is more of a chocolate person.  We're really pretty much opposite in what we like food-wise, except that we both really like fish.  Crazy! 
Anyway, this is a great cake for anyone.  It does have a nutty texture since it's made from almond meal, but it's not distracting.  I actually modified this a good bit, now that I look back at the recipe.  It calls for "Swerve" sweetener, which I have never even heard of.  I honestly can't remember if I used Splenda or regular sugar, but either would work.  I also didn't make my own caramel sauce.  I cheated!!  I used caramel ice cream topping.  Worked pretty well if you ask me.  :-)  I also added a basic glaze to make it "pretty."  Try it out - even if you're not gluten free. 

Caramel Pecan Coffee Cake adapted from All Day I Dream About Food (original recipe with link)
    Cake:
    3 cups almond flour
    1 ½ tsp baking powder
    1 tsp baking soda
    1/2 tsp salt
    1/2 cup butter, softened
    3/4 cup sugar or Splenda
    3 large eggs
    1 tsp vanilla extract
    1/2 cup almond milk
    1/2 cup chopped pecans
    Preheat oven to 325F and grease a bundt pan well (this could also be made in a 9-inch springform pan).  In a medium bowl, whisk together almond flour, baking powder, baking soda and salt. Set aside.  In a large bowl, beat butter until smooth. Add sugar/sweetener and beat until lighter and well-combined, about 2 minutes. Beat in eggs, scraping down beaters and sides of bowl with a rubber spatula as needed. Beat in vanilla extract.  Beat in half of the almond flour mixture, then beat in almond milk. Beat in remaining almond flour mixture until well combined.  
     
    Spread half the mixture in the prepared pan and use the back of a spoon to create a channel in the center of the batter, all the way around the bundt pan.  Pour some caramel sauce into the channel.  Sprinkle with 1/4 cup pecans. Top with remaining batter and spread evenly with offset spatula to cover caramel and pecans. Place the pan into the preheated oven and bake 35 to 45 minutes, or until cake is golden brown and just firm to the touch. A tester inserted in the center should come out clean (except for some caramel sauce!). Remove and let cool 10 minutes (IT MUST cool!) then flip out onto a wire rack to cool completely. Drizzle with remaining caramel and pecans.  Enjoy!

Thursday, September 18, 2014

The Key to Baking Gluten Free Cookies... (HA!)

...is to wear the right head gear!

I have honestly made so many "different' chocolate chip cookies since David went gluten free that I don't really know the actual recipes for all of them, which means they won't all get posted.
 However, this was from a recipe that I pinned.  David liked these pretty well (but I think he liked one I made up recently a little better).  These were of the soft variety, which I know is one of the things David misses.
He occasionally says he misses the soft batch chips a'hoy version.  I think these were pretty close.  Kate did a great job helping and even put a few of the cookies on the pans.
It's still a little hard for her to squeeze the scooper but she put great effort into it.  Who couldn't with a sticker on her forehead?!  :-)

Gluten Free Chocolate Chip Cookies From Nerd Family
Ingredients
1 1/4 cups White Rice Flour
1/2 cup Brown Rice Flour
1/4 cup Cornstarch
3/4 cup (or 1 1/2 sticks) Softened Butter
1/4 cup White Sugar
3/4 cup Brown Sugar (packed)
2 Eggs
2 teaspoons Vanilla Extract
 2 cups Chocolate Chips

Preheat over to 350 degrees.  Cream butter and sugars together. Add eggs 1 at a time, followed by the vanilla. Stir all the dry ingredients together in a separate bowl.  Slowly blend the dry ingredients into the wet ingredients by adding the dry ingredients in small batches. Stir in the chocolate chips. Scoop the dough onto baking stones or pans.  Place the pan into the oven and bake for 12 minutes.  If they spread, you can add a little more flour.  Remove from the oven and allow to cool.  Enjoy!

Wednesday, September 17, 2014

Nutella Bars

Most of my baking these days is gluten free.  However, sometimes I just NEED to bake regular without worrying about "is this gluten free" or "will this work?"  Usually when I do that, I try to make something that David wouldn't really prefer.  He likes chocolate but I don't think he's a big fan of Nutella, so I decided to make nutella shortbread bars.  Um, can we say YUM!  Unfortunately, something happened and they were VERY crunchy.  David took them to the peds lounge and, despite the firmness, they were still all eaten.  If they heated them a little, it helped with the texture.

Nutella Sugar Cookie Bars from Cookies and Cups
Ingredients
  • 1 lb. salted butter room temp
  • 1 cup sugar
  • 1½ cups powdered sugar
  • 2 Tbs vanilla
  • 4 cups AP flour
  • 1 cup Nutella

    Preheat oven to 325. Grease a 9x13 baking dish with butter or cooking spray. Set aside.

    Cream butter and sugars.  Add the vanilla and beat until combined. Slowly add the flour into the butter mixture and stir until dough combines together.  Press about one-third of the dough evenly into the pan to form a bottom crust. Wrap remaining dough in plastic wrap and chill in refrigerator.

    Bake crust until firm and the edges are a pale golden brown approx 12-14 minutes. Transfer pan to a wire rack and let cool about 15 minutes. Spread Nutella evenly over crust, about 1/4 inch away from the edge of the crust.  Remove remaining dough from refrigerator and crumble remaining dough on top. Finish baking 20-25 minutes until top is set and lightly golden.  Cool and cut into squares.  Enjoy!

Monday, July 21, 2014

Chocolate Donuts

We have a new donut shop in our town.  I haven't tried it yet but someone mentioned the blueberry cake donuts and now I really want one!  I think that is one of the things that David has missed being (essentially) gluten free - donuts, especially powdered sugar ones.  I did recently make some of those for him but way back in February I found a chocolate version.
K and I made them one night.  She enjoyed the facts that we were making donuts and David enjoyed the donuts. 
They were fairly easy.  The biggest problem I have with making homemade donuts is that I haven't figured out how to get the icing to work right.  I guess I just need to specifically find a "donut icing" recipe.  It just tends to be good the first little bit and then disappears over a day or so.  All in all, these were good and David enjoyed them for his "second breakfast" that week.

Gluten Free Chocolate Baked Donuts from Serious Eats
  • 3/4 cup (2 1/2 ounces) gluten-free oat flour
  • 1/2 cup (4 ounces) granulated sugar
  • 1/4 cup (1 1/4 ounces) potato starch or tapioca starch
  • 1/4 cup (3/4 ounce) cocoa powder
  • 1/2 teaspoon baking soda
  • 1/4 teaspoon xanthan gum
  • 1/2 teaspoon vanilla extract
  • 1 large egg
  • 6 tablespoons yogurt
  • 1/4 cup milk
  • 1/4 cup vegetable oil
  • nonstick cooking spray
  •  
  • For the Glaze
  • 1 1/2 cups powdered sugar
  • 6 tablespoons whole milk
  • 1 teaspoon vanilla extract
  • 1/2 teaspoon lemon extract, optional

Procedures

Preheat oven to 375°F. Whisk together oat flour, granulated sugar, potato starch, cocoa powder, baking soda, and xanthan gum in a medium bowl. Add egg, yogurt, milk, and vegetable oil. Whisk until batter is smooth. Allow batter to stand for five minutes. Lightly coat donut pan with nonstick cooking spray. Fill cavities about halfway with batter. Place the pans in the oven and bake for about 10 minutes or until the donuts spring back to touch.  Turn them onto a cooling rack and cool completely
 Whisk together powdered sugar, milk, vanilla, and lemon extract in small bowl. Dip doughnuts, one at a time, into glaze. Shake off excess glaze. Place dipped doughnuts onto wire rack. Enjoy!!

Wednesday, July 09, 2014

Gluten Free Cinnamon Rolls

Last month, the Daring Bakers challenge was for cinnamon rolls.  I knew that David would be super excited about it as soon as I saw it.  What a great opportunity to "have" to try a gluten free cinnamon roll recipe.  
Now, I know I am late posting this; but, we have been moving and had a bit of trouble getting internet set u and reliable.  So, I'm posting now...about two weeks late!   Soooo....This month the Daring Bakers kept our creativity rolling with cinnamon bun inspired treats. Shelley from C Mom Cook dared us to create our own dough and fill it with any filling we wanted to craft tasty rolled treats, cinnamon not required!
 
These actually turned out really good.  They were much better when heated.  David liked taking them for his "second breakfast" at work.  He said that warming it made the microwave made the icing run off some.  I guess one way to avoid this would be to reapply icing after you heat the cinnamon rolls if you don't eat them all at the first sitting.  I did make smaller rolls than the recipe instructed, so they lasted for more days.  The dough wasn't too difficult to work with but it did break a little bit when rolled.  All in all, I'd say it was a pretty good recipe and was quick.  If you need to make gluten free treats, try this one out!
 
Gluten Free Cinnamon Rolls from Recreating Happiness
Ingredients
DOUGH:
  • ⅔ cup milk
  • 1 tablespoon butter
  • 1 packet yeast
  • ¼ cup granulated sugar
  • ½ cup (83 g) potato starch
  • ½ cup (80 g) brown rice flour
  • ¼ cup (29 g) finely ground almond flour
  • ¼ cup (34 g) tapioca starch plus more for flouring your surface
  • ½ teaspoon baking soda
  • 1½ teaspoon xanthan gum
  • 2½ teaspoon baking powder
  • ½ teaspoon salt
  • 1 large egg
  • ¼ cup olive oil
  • ½ teaspoon vanilla
  • good quality plastic wrap for rolling out (and up!) the dough
FILLING:
  • ⅓ cup butter, softened
  • ½ cup brown sugar
  • 2 tablespoons cinnamon
*FROSTING:
  • 3 tablespoons butter, softened
  • 2 tablespoons cream cheese, softened
  • ¾ cup powdered sugar
  • ½ teaspoon vanilla
  • dash of salt
*I just made a simple icing with no cream cheese but this would be good.
Instructions
  1. Preheat oven to 350 degrees. Grease and lightly flour a pie plate.
DOUGH:
Combine yeast and sugar in large mixing bowl.  Microwave milk and 1 tablespoon butter to approximately 110-115 degrees. Whisk into yeast mixture and set aside to proof.
 
Meanwhile in small bowl whisk together potato starch, brown rice flour, tapioca starch, almond flour, baking soda, xanthan gum, baking powder, and ½ teaspoon salt.  Once yeast is proofed add in egg, oil, and ½ teaspoon vanilla. Mix for a moment and then slowly add in the flour mixture. Turn the mixer up to medium-high and beat for 1½ minutes - beating long enough is essential, GF flours are "thirsty," the dough will thicken & lose it's stickiness as you beat it.
 
Roll out the dough: this is a sticky dough that you'll want to roll out to approximately a 13" x 10" rectangle. I placed tapioca starch on a pastry cloth but you can also use plastic wrap.  Place dough in the center and cover with a bit more tapioca starch (and another sheet of plastic wrap if using). Roll out to the needed size and then carefully peel off the top layer of plastic wrap.  Using a knife or spatula gently spread the ⅓ cup softened butter over the dough evenly leaving ½" space around the edges. 
 
FILLING:
In a small bowl combine brown sugar & cinnamon. Sprinkle evenly over dough.  To roll your dough: start on one of the shorter sides and gently begin rolling your dough into a log form. Use the pastry cloth (or plastic wrap) to help you "lift and roll" the dough as you go along. Try to make it a nice tight roll, however do not try to unroll it and re-do it. You'll end up with a sticky mess.
 
Sprinkle lightly with tapioca starch again. Dip a sharp knife into tapioca starch then cut the rolls into desired number or size pieces.  Place the rolls, cut side down, in the prepared pie plate*. Cover with plastic wrap and a towel, place in a warm spot, and let them rise for 15 minutes.  Bake 22-27 minutes until tops are golden brown. 
 
ICING: (Instructions for the cream cheese version are here)
 
Meanwhile, in mixing bowl, beat 3 tablespoons softened butter, cream cheese, and powdered sugar until smooth. Beat in vanilla and a dash of salt.  Drizzle over the tops of cinnamon rolls as soon as they come out of the oven.  Enjoy!
 

Tuesday, July 08, 2014

Birthday Dessert

So, this is how far behind I am on posting.  Back in February when I turned 31, David made me a really yummy frozen strawberry dessert. 
I picked it because he had said he thought it looked good, it was (roughly) gluten free, and sounded good to me, too.  Um, can we just say I LOVED this!  I think I ate it almost every night until it was gone.  one night I had it for supper.  And one night I had two pieces.  I blame being in first trimester of pregnancy on that one!  :-)
 I say "roughly" gluten because we did use Nature Valley granola bars which are labeled gluten free but also don't have wheat as an ingredient.  This works for us, though it may not work for you.  I think K had a good time banging the bars!  :-)

Frozen Strawberry Crunch Cake from Tablespoon
  • 1 box Nature Valley Granola Bars
  • 1/3 cup brown sugar
  • 1/2 cup flour (gluten free if needed)
  • 6 tablespoons melted butter
  • 2 egg whites
  • 1/2 cup sugar
  • 1 cup heavy whipping cream
  • 1 lemon, juiced
  • 4 ounces cream cheese
  • 1 1/2 cups freshly chopped strawberries
  • Directions

    Preheat oven to 350.  Unwrap all granola bars.  Place them in a bag and bang to a course crumb (or use your food processor ut kids love the slamming part!). In a large bowl, add the crumbs, brown sugar, flour and melted butter and mix together. 
    Then spread into an 8x8-inch pan that has been covered with parchment paper. Bake at 350ºF for 20 minutes. Let cool. Then divide in half and set aside.
     
    Meanwhile, in a mixing bowl, combine eggs whites and sugar and mix on high. Add the heavy cream and continue mixing for another 5 minutes.  After this, add the lemon juice and cream cheese then mix on low until well mixed.  Fold strawberries into this mixture.
     
    In a buttered glass pan, press half crumbs on the bottom.  Top with strawberry mixture and then press the remaining crumbs on top.  Cover and place in freezer for 3 hours or more.  Enjoy!