Sunday, January 27, 2013

Return to the Daring

I skipped last month's Daring Baker's Challenge...there was just so much going on...and I have a lot going on this month, too!  Getting ready for our wedding on March 9, work, moving, etc.  But in the midst of keeping K while D was moonlighting, I was able to do this month's challenge.  Francijn of Koken in de Brouwerij was our January 2013 Daring Bakers’ Hostess and she challenged us to make the traditional Dutch pastry, Gevulde Speculaas from scratch! That includes making our own spice mix, almond paste and dough! Delicious!  I made this over several days.  The dough was actually easy to work with.  I had some trouble with the almond paste when I formed the bars...it stuck to the wrap when I tried to transfer it.  The flavor was good in the cake and my co-workers enjoyed them.


Recipe Speculaas Spices
Speculaas spices can be bought in a store. But it's more fun to make your own mixture, so that you can adjust the flavor. Here is a representative recipe from the extensive Dutch tradition.
Mandatory:
cinnamon 40 to 60 % of the total amount
ground cloves 1 or 2 parts
ginger ½ or 1 part
nutmeg 1 or 2 parts
A convenient way to mix the spices is as follows:
Take at least 1 or 2 teaspoons of ground cloves,  1 teaspoon of ginger. 1 or 2 teaspoons of nutmeg.
Measure or weigh the amount of spices you have now, and add an equal amount of cinnamon.

Recipe Almond Paste
As we are going to make stuffed speculaas, we will need almond paste. You can buy it in a store, but homemade almond paste tastes better.
Ingredients:
7/8 cup (210 ml)(125 gm)(4½ oz) raw almonds (or 1-1/3 cups (320 ml)(125 gm) (4½ oz) ground almonds)
5/8 cup (150 ml) (125 grams) (4½ oz) granulated sugar
1 large egg
1 teaspoon (5 ml) (3 gm) lemon zest
Directions:

Directions:
If the raw almonds still have their brown skins, remove them as follows. Bring water to a boil, add the almonds, cook them for one minute, drain immediately and let cool for a few minutes. Rub them between your fingers to remove the skins.
Grind the almonds for one or two minutes in a food processor, until you see nothing but very small pieces. (Or skip this step if you use ground almonds.)
Add the sugar, and grind for another one or two minutes. It must be very fine after this step.
Add the egg and let the food processor combine it - if it is powerful enough. Otherwise you will have to combine it with your fingers.
Store the almond paste in an airtight container in the refrigerator. Although the flavor gets better as days pass by, it is not wise to store the paste for too long, as it contains a raw egg. For the same reason you should not eat the paste unbaked.

Recipe Speculaas Dough
Ingredients:
1¾ cups (250 gm) (9 oz) all purpose (plain) flour
1 teaspoon (5 ml) (5 gm) baking powder
¾ cup (150 grams) (5-1/3 oz) brown sugar, firmly packed
a pinch salt
2 tablespoons (30 ml) (15 gm) (½ oz) speculaas spices
3/4 cup (1½ stick) (175 gm) (6 oz) unsalted butter
Directions:
Put flour, baking powder, sugar, salt and spices in a bowl.  Cut the butter in dices and add.  Knead until smooth. Feel free to add a little milk if the dough is too dry.  I used food processor.  Wrap in clingfoil and put in the refrigerator for two hours.  You can choose to make the dough a few days in advance, just like the almond paste, that will benefit the flavor. Freezing is no problem.

Assembling and baking the Gevulde Speculaas
Directions:
Grease the pan. Preheat the oven to moderate 350°F/180°C/gas 4. Divide the dough into two portions.
Roll out both portions on a lightly floured surface, until they are exactly as big as the baking pan.  Put one of the layers in the pan and press it lightly to fill the bottom. Roll out the almond paste between two sheets of clingfoil, until it is exactly as big as the pan, and put it on the dough in the pan. (If you chose to make the paste soft, you can smear the paste instead of rolling it.).  Press the paste lightly down to fit in the pan.  Now put the second layer of dough on top of the paste, press it lightly, and make as smooth as possible.  Decorate the pastry with the almonds.  Bake for 40 minutes in the preheated oven.  Let cool completely in the pan, then cut it in portions as you like. 


Saturday, January 19, 2013

Surprise...redone!

When I was little, my mom served a dessert one night when my cousins were over.  It was a dessert with a shortbread pecan crust topped with chocolate pudding, cream cheese mixture, and cool whip.  Well, my cousin Joe decided that it would be fun to tell my brother, then about 2-3 years old, that the dessert smelled good and that he should smell it.  Well, he did and....SMACK!  Joe slammed his face into the dessert.  It "exploded" all over the living room, Philip screamed, and Aunt Margaret made not only Joe but his brother and sister clean up the mess!  Ever since that day, we called that dessert "Joe's surprise!"
  A couple of months ago, I found a recipe on pinterest that was exactly like that dessert except that the base was chocolate chip cookie instead of shortbread.  Well, I thought that D would really like it, so I pinned it.  Come December, I decided that it would be the perfect dessert for Christmas.  Everyone liked it!  My dad, I think, preferred the shortbread crust but D, of course, loved the chocolate chip cookie crust.  :-)  I love when he likes what I make!!  I didn't have two chocolate puddings but used one chocolate and one (random) pumpkin.   It added a little cinnamon to the mix.  Yum!  This really is a GREAT dessert!  Try for yourself.  I think it may have to go into the rotation of desserts D likes, along with the brownie trifle he loves.  :-)

Joe's Surprise Remade a.k.a. Chocolate Chip Cookie Delight adapted from Taste of Home
Ingredients:
1 tube (16-1/2 ounces) refrigerated chocolate chip cookie dough or one recipe chocolate chip cookies (about 2/3 dough used)
1 package (8 ounces) 1/3 less fat cream cheese, softened
1 cup confectioners' sugar
1 carton (12 ounces) frozen whipped topping, thawed, divided
3 cups cold skim milk
1 package (3.9 ounces) instant chocolate pudding mix (sugar free)
1 package (3.4 ounces) instant pumpkin/vanilla pudding mix (sugar free)

Preheat oven to 350.  Press cookie dough into an ungreased 13-in. x 9-in. baking pan. Bake at 350° for 14-16 minutes or until golden brown. Cool on a wire rack.

In a large bowl, beat cream cheese and confectioners' sugar until smooth. Fold in 1-3/4 cups whipped topping. Spread over crust.

In a large bowl, whisk milk and pudding mixes for 2 minutes then refrigerate for 30-60 minutes. Spread over cream cheese layer. Top with remaining whipped topping. Sprinkle with nuts and chocolate curls if desired. Cover and refrigerate for 1-2 hours...will be more firm if you have time to refrigerate overnight.  Enjoy!

Yield: 15 servings.

Saturday, January 12, 2013

My Favorite Bite

The other snack dessert I made this Christmas was a snickerdoodle cookie dough bite.  The original recipe had rolos in the middle; however, I am a Reese's lover...so, I substituted Reese's for the rolos.  Um...YUM! My favorites all in one...snickerdoodles, Reese's, and cookie dough.  :-)  Now, to me, these had a better texture than the chocolate chip dough bites.  They had a bit more texture and were less "sticky." 

Reece's Stuffed Snickerdoodle Bites from Cooking Classy 
1 1/2 cups all-purpose flour
1 tsp cinnamon
1/8 tsp nutmeg
1/4 tsp salt
1/2 cup salted butter, softened
2/3 cup packed light brown sugar
1/4 cup granulated sugar
1/4 tsp cream of tartar
3 Tbsp milk
1 1/2 tsp vanilla extract
28 Reese's candies
3 Tbsp granulated sugar
3/4 tsp cinnamon

In a mixing bowl, stir together flour, 1 tsp cinnamon, nutmeg and salt, set aside. In the bowl of an electric mixer, cream together butter, brown sugar, 1/4 cup granulated sugar and cream of tartar until pale and fluffy, about 4 minutes. Stir in milk and vanilla extract. Add dry ingredients and mix until combine. In a separate small mixing bowl, whisk together 3 Tbsp granulated sugar and 3/4 tsp cinnamon. Scoop dough out 1 (even) TBSP at a time, then press one Reese's candy into the center of scooped dough and roll into a ball. Roll each dough ball into cinnamon sugar mixture. Chill or serve immediately. Store Cookie Dough Bites in refrigerator. Enjoy!

Friday, January 11, 2013

Dessert Bites

Yikes!  I didn't realize it had been so long since I posted.  I've made several different things for my residents at work but before that, we need to finish up Christmas stuff.  Next up, chocolate chip cookie dough balls.  When my dad tried these, his comment was "It's like eating dough..." Well....yes...thus, cookie dough balls.  I did feel like the texture was a little bit too "sticky."  I needed to keep them cool, which made the chocolate chips quite hard.  They were still good though.  I shared with the residents who were on schedule to work at Christmas and they enjoyed them.  Next post I'll share MY favorite, the snickerdoodle balls.  YUM!

Chocolate Chip Cookie Dough Bites from Cooking Classy 
1/2 cup salted butter, softened
3/4 cup packed light-brown sugar
1/3 cup granulated sugar
1/4 tsp salt
3 Tbsp milk
1 tsp vanilla extract
1 1/2 cups all-purpose flour
1/4 cup milk chocolate chips, chopped
1/4 cup semi-sweet chocolate chips, chopped

Topping

1/3 cup semi-sweet chocolate chips

In the bowl of an electric mixer, cream together butter, brown sugar, granulated sugar and salt until pale and fluffy about 3 - 4 minutes. Stir in milk and vanilla extract. Add in flour and mix just until combine (dough will seem dry at first but it will come together). Mix in chopped chocolate chips. Scoop dough out 1 equal tablespoon at a time and roll into balls. Place on parchment or wax paper. If drizzling with chocolate, place 1/3 cup semi-sweet chocolate chips in a microwave safe container and microwave on 50% power in 30 second intervals, stirring after each interval until melted and smooth. Pour melted chocolate into a small ziploc bag, seal bag and cut a very small tip off the corner of the bag. Drizzle chocolate over tops of truffles and allow to set.  For more firm cookie dough bites, chill 1 hour in refrigerator. Store in refrigerator in an airtight container.Enjoy!

Monday, December 31, 2012

Two Tone Fudge

Despite being on service (i.e., covering hospital patients) for the past week, I still had a great Christmas!  D came back from AL on December 24 so that we could have Christmas here together with K.  Santa delivered gifts late to his house (not sure what happened there!  ;-)  ) so, I was there when K saw her princess castle.  While they were gone to AL, I pretty much just stayed at my house, watched movies, and did a bit of Christmas treat making.  I made two different kind of cookie dough balls and some peanut butter fudge.  Mama's favorite was the fudge...mine, the snickerdoodle dough balls. 

I'll share the fudge today.  It's a recipe from Peabody, so you KNOW that it has to be good!  It ended up being pretty easy to make, though I'm not quite sure if I put enough sugar in the peanut butter portion.  Still good.  Try it out yourself!


Double Layer Fudge adapted from Culinary Concoctions by Peabody
 
Chocolate Layer
1 can (14oz) condensed milk
3 cups chocolate chips (of your choice I went semi-sweet)

In a medium saucepan heat up condensed milk over low.  Add chocolate chips and melt. Stirring often.
Mixture will start to get hard and lose its sheen. Spread into a buttered 13x9-inch pan lined with foil.

Peanut Butter Layer from Alton Brown Food Network.com
8 ounces (2 sticks) unsalted butter
1 cup creamy peanut butter
1 teaspoon vanilla extract
1 pound powdered sugar
chocolate chips and peanut butter chips to sprinkle on top about a 1/2 cup each

Soften butter and combine in mixer with peanut butter.  Add in sugar until well combined.

*(This may be where I messed up...obviously didn't read the instructions...This is how Peabody did it!):

Combine the butter and peanut butter in a 4-quart microwave-safe bowl and cover with plastic wrap.
Microwave for 2 minutes on high.  Stir and microwave on high for 2 more minutes. (Use caution when removing this mixture from the microwave, it will be very hot.)  Add the vanilla and powdered sugar to the peanut butter mixture and stir to combine with a wooden spoon. The mixture will become hard to stir and lose its sheen.*

Pour the peanut butter layer on top of the chocolate layer. Sprinkle chocolate and peanut butter chips and press down to help them stick to fudge.  Refrigerate until cool, about 2 hours. Cut into 1-inch pieces and store in an airtight container at room temperature for up to a week. Enjoy!

Sunday, December 30, 2012

Cake...Banana Bread Balls

I'm always looking for new ways to make or use banana bread.  When we had our last baby shower, I decided to try this recipe out.  Instead of the typical cake balls, I made banana bread balls.  They ended up being really good!  And on top of the entire THING being good...the banana bread itself was good, too!  Maybe they'd be good for a post-Christmas breakfast treat...or a New Years Party dessert.  Try them out.

Banana Bread Balls from Vanilla Sugar
1/2 cup shortening
1 cup sugar
2 eggs
1 cup mashed banana (about 3 bananas)
3 tablespoons yogurt
2 cups flour
1 1/2 teaspoons baking powder
1/2 teaspoon salt
1/2 teaspoon baking soda

8 ounces cream cheese, room temperature
2 cups chocolate chips, melted

Preheat oven to 350.  Mix together shortening and sugar.  Add eggs one at a time then banana and yogurt.  Mix well.  Stir in dry ingredients.  Pour into a square baking dish and bake until done (30 minutes or so) or in a loaf pan and bake for 50-60 minutes.  Allow to cool.

When cool, crumble the cake into a bowl and stir in the cream cheese.  Place in refrigerator so that it can cool and firm up.  Roll into 1-2 inch balls.  Place them on a baking sheet and place in refrigerator to chill.  Melt and temper the chocolate.  When ready, dip the balls into the chocolate and place on a wax paper lined pan.  Let harden and enjoy!  Chill until eating.

Sunday, December 23, 2012

Soup's On!

We've been having the typical MS winter weather...3 days of "cold" weather followed by 3 of 70+ temps and back again.  When it gets cold (or even when it's not!) I like to have soup.  K went to see her grandparents last week, so D and I were alone.  We had a couple of parties to go to but several days in between.  I told D that I thought about soup or Mexican for dinner; so, he went and found a Mexican soup recipe after his clinic was over.  :-)  We ended up not having enough time to make it that night; so, I changed it to make overnight in the crockpot.  At first, we weren't so sure about it...but it turned out really good!  The recipe calls for 2 quarts of chicken broth, which I think was a little too much and I added an extra can of rotel tomatoes and red kidney beans.  YUM!  I still have some in my refrigerator and can't wait to have it for lunch.

Mexican Bean and Squash Soup adapted from AllRecipes
2 cups butternut squash - pealed and cut into 3/4-inch cubes
1 small yellow onion, chopped
2 stalks celery, chopped
2 Chipolte peppers (canned in adobo sauce) seeded, and minced
2 teaspoons basil
1 teaspoon cumin
2 15-oz cans diced tomatoes
2 quarts chicken broth (maybe 6 cups next time?)
1 can cannellini beans
1 can red kidney beans
1 can corn

For serving:
limes
tortilla chips
cheese
sour cream
green onions

Put all ingredients into crockpot and cook on high for 6-8 hours or low for 10 hours.  When ready to serve, squirt lime juice on each bowl and top with desired toppings.  Enjoy!

Saturday, December 22, 2012

Christmas Mint Cookies

I told D last week that I'd make cookies for him but we ran out of time before he had to go home...work was calling the next day.  I decided to make cookies anyway!  He doesn't really like mint, but I wanted to make cookies with the Christmas mint M&M's...so I did one pan with no M&M's and the rest with them.  They turned out REALLY good. 

D said he liked them a lot.  I think I'd consider making this a new base dough recipe with varied mix ins.  I think one thing that made it better was the "sprinkle" of cream of tartar...I love that stuff!  Anyway, try these out for your favorite little elves...or even Santa!  :-)

Christmas Mint Cookies
2 sticks butter (1 cup), softened
1 cup packed brown sugar
1/2 cup sugar
1 egg
1 tsp vanilla
3 cups flour
1 tsp baking soda
sprinkle/pinch cream of tartar
1/2 cup mini chocolate chips
1/2 cup chocolate chips
1/2 cup mint M&M's

Preheat oven to 350.  Cream together butter, brown sugar, and sugar.  Cream for 5 minutes.  Add egg and vanilla.  When mixed together, stir in dry ingredients.  Dough will be thick.  Add in chocolate chips and M&M's.  Place walnut sized drops of dough on a baking stone or pan.  Place pan in oven and bake for 12 minutes.  Remove from pan and allow to cool for 1 minute before removing to cooling rack.  Enjoy! 

Monday, December 17, 2012

Fear Not!

Fear not!  How can you "fear not" when it seems there is so much to fear?  When such evil things like happened in Newtown, Connecticut happen?  When children so young are taken from their parents?  When teachers are taken, protecting those who have been entrusted to them for six short hours each day?  When there is a doctor's appointment with the unknown looming?  When bills come that you don't know how you're going to pay?  How can you "fear not?!"  But that's what we're told to do!

Thousands of years ago, that's what a young girl was told...and then she was told, you will give birth to the Son of God, without even knowing a man.  In a culture where engagement was as permanent as marriage; where being "caught" with a man was punishable by death!  She was told "Fear not!"  That's what an elderly priest was told when he found out that his wife, well beyond child bearing years, would give birth to the one who would prepare the way for God's Son...and that he would be unable to speak until that child was born.  He was told, "Fear not!"  (Luke 1)

Thousands of years ago, that's what a group of shepherds were told when a multitude of angels filled the sky on a night when they were just doing their jobs...watching sheep, protecting their sheep, protecting each other..."Fear not!"  Why fear not...the promised Savior had been born!  The one to bring peace, the One to save us from sin, the One on whom all our hope is placed, the One who will carry ALL burdens, God's Son...Jesus!  (Luke 2)

God has been telling us to "Fear not" for thousands of years!  He spoke those words through the prophet Isaiah, to the Israelite people during years of war, uncertainty, famine...fear!  "Fear thou not; for I [am] with thee: be not dismayed; for I [am] thy God: I will strengthen thee; yea, I will help thee; yea, I will uphold thee with the right hand of my righteousness." (Isaiah 41:10) And again in Isaiah 35:4 "Say to those with anxious heart, 'Take courage, fear not. Behold, your God will come with vengeance; The recompense of God will come, But He will save you.'"

It doesn't make sense to us!  But, God sent His Son Jesus into a world of evil to offer the only salvation, the only hope.  He sent Jesus to be the one atoning sacrifice for ALL the sins of the world!  If we but place our hope and trust in Him then we will be safe, forgiven, secure!  Yes, some sins have larger effect, are more heinous, rock us to our core more than others...but we all are in need of someone to save us...someone to bring us peace NOT of this world!  Jesus is that answer! 

"Peace I leave with you; My  peace I give to you; not as the world gives do I give to you. Do not let your heart be troubled, nor let it be fearful." (John 14:27) "These things I have spoken to you, so that in Me you may have peace. In the world you have tribulation, but take courage; I have overcome the world." John 16:33

I don't understand why hard things, struggles, or even tragic things like happen at Sandy Hook happen other than the world we live in now is evil.  But I do know that we have been given a Savior.  That Jesus sacrificed His life so that we might be saved.  That He has placed peace in my heart and that He tells us..."Fear not!"  Run to Him, hope in Him, and pray that His comfort would permeate the hearts of all who are grieving and his Peace would overcome all who are fearful!

Saturday, December 15, 2012

Oreo stuffed Cookie Bars

Back several months ago when D was on a call rotation, I helped with K every fourth night.  Pretty much, every time I kept her, I baked after she went to bed!  This is one of the recipes I made.  I did forget to get caramel, so instead of being oreo AND caramel stuffed, these are just oreo stuffed...and they are STILL fantastic! 

There's something about all of a sudden coming to that center icing of the oreo in the middle of a cookie bar.  I took them to the lounge at work and, per usual, they were devoured!  Try them out...they'd be fun Christmas goodies. You could even use some of the special holiday oreo flavors for some fun.


Oreo Stuffed Chocolate Chip Bars from Recipe Girl
1 cup (2 sticks) butter, at room temp
1 cup packed brown sugar
1/2 cup sugar
1 egg
1 tablespoon vanilla extract
2 cups flour
1 cup oats
1 teaspoon baking powder
1 teaspoon baking soda
1 teaspoon salt
2 cups chocolate chips
24 oreos (recipe says double stuffed which would be awesome!)
1 cup jarred caramel (I didn't have this)

Preheat oven to 350 degrees.  Spray a 13X9 pan.  In a large bowl of a mixer, place butter and sugars.  Cream until smooth.  Add egg and vanilla.  Beat well.  Stir in flour, oats, baking soda and powder, and salt until well incorporated.  Stir in chocolate chips.  Spread half of the dough in the bottom of the pan.  (This is done easily with your hands.  I wet my hand with water, recipe girl used baking spray).  Place oreos on top of dough, evenly spaced.  Spoon remaining dough over the oreos and spread with your hands.  It's okay if it doesn't cover all the cookies (though it drove me CRAZY!), when it bakes, it will cover them.  Place pan in oven and bake for 20-25 minutes.  Cool completely and cut into desired sized bars.  Enjoy!

Saturday, December 08, 2012

Snack Time!

My family loves to snack, especially at family holiday get togethers!  An hour before lunch, you will find people standing around the counter eating cheese, hummus, dips, sausage, crackers...whatever we have.  I saw a snack mix on Recipe Girl one day and knew that I had to make it for Thanksgiving!  It has fritos and Chex...all loved by my fam.  It is covered in a sweet sugar mix to make it the perfect sweet and salty mix.  In fact, I just got an e-mail from my aunt asking for the recipe!  I'd say, it was a hit.  Try it out for yourself!


Frito Snack Mix from Recipe girl
10.5 ounce bag of Fritos
2 cups rice Chex cereal
2 cups pretzel twists
1 1/2 cups nuts
1 cup light brown sugar
1/2 cup butter
1/2 cup light corn syrup
1 cup mini M&M's

Preheat oven to 350.  Mix together the Fritos, cereal, pretzels, and nuts in a bowl.  In a small pan, melt the sugar, butter, and corn syrup over medium heat.  Bring to a boil and then boil for 4 minutes.  Remove from heat and pour over the frito mix.  Stir to coat evenly.  Pour the mix onto a large roasting pan and place in the oven.  Bake for 8 minutes.  Stir and bake for 8 more minutes.  Transfer the mix to wax paper on the counter and allow to cool.  Break into large clumps and place in a storage container.  Pour M&Ms over the mix.  Enjoy!

Tuesday, December 04, 2012

Photo Card

Savior Is Born Religious
Customize your Christmas cards this year at Shutterfly.com.
View the entire collection of cards.

Sunday, December 02, 2012

Cheddar Mac and Cheese

D loves macaroni and cheese.  He just cooks macaroni and melts Kraft cheese slices into it and adds milk.  I am not a huge fan...but I wanted to make something he'd like for Thanksgiving.  So, I went in search of a creamy mac and cheese recipe.  All the recipes I found for "creamy" versions had Velveeta or condensed cheese soup in them.  I didn't want to use processed cheese this time, so I kept looking. 
What I found wasn't a creamy version but looked good and easy.  It was done quickly and was really good.  I used sharp cheddar, so it had a really cheesy taste...definitely how I prefer mac and cheese!  The first day, D thought it was okay and wasn't a fan of the onions (something that could totally be removed if you have someone who doesn't like them).  The next time he said he didn't really notice the onions.  And by the time it was gone, he said it was good.  Guess I could keep looking or make it again.  :-)

Baked Macacroni and Cheese from Alton Brown (I doubled the recipe below for a crowd of 27)
1/2 pound elbow macaroni
3 tablespoons butter
3 tablespoons flour
1 tablespoon powdered mustard
3 cups milk
1/2 cup yellow onion, finely diced (could be omitted)
1/2 teaspoon paprika
1 egg
12 ounces sharp cheddar cheese, shredded
1 teaspoon salt

Preheat oven to 350.  Boil a large pot of water, then salt and place the pasta in the water.  Cook until al dente.  While the past cooks, melt the butter in a separate pot.  Whisk in the flour and mustard.  Keep moving for 5 minutes (Mine was VERY thick almost immediately, so I didn't go for five minutes).  Get all the lumps out.  Stir in the milk, onions, and paprika.  Simmer for 10 minutes.  Crack the egg into a small bowl and pour a small amount of the milk mixture into that bowl, whisking quickly to temper the egg.  Once tempered, pour the egg into the milk mixture.  Stir in 3/4 of the cheese.  Season with salt and pepper.  Fold the macaroni into the cheese mixture and pour into a 2-quart casserole dish.  Top with the remaining cheese.  Place into oven and bake for 30 minutes.  Enjoy!

Tuesday, November 27, 2012

Daring cookies!

Holiday season is the time for sharing and Peta of Peta Eats is sharing a dozen cookies, some classics and some of her own, from all over the world with us.  I had grand plans of making several of these cookies; but I failed!  I only made one!  It's crazy how a month can get away from you.  The cookie I did manage to make, however, was amazing!  I made these turtle bars. 

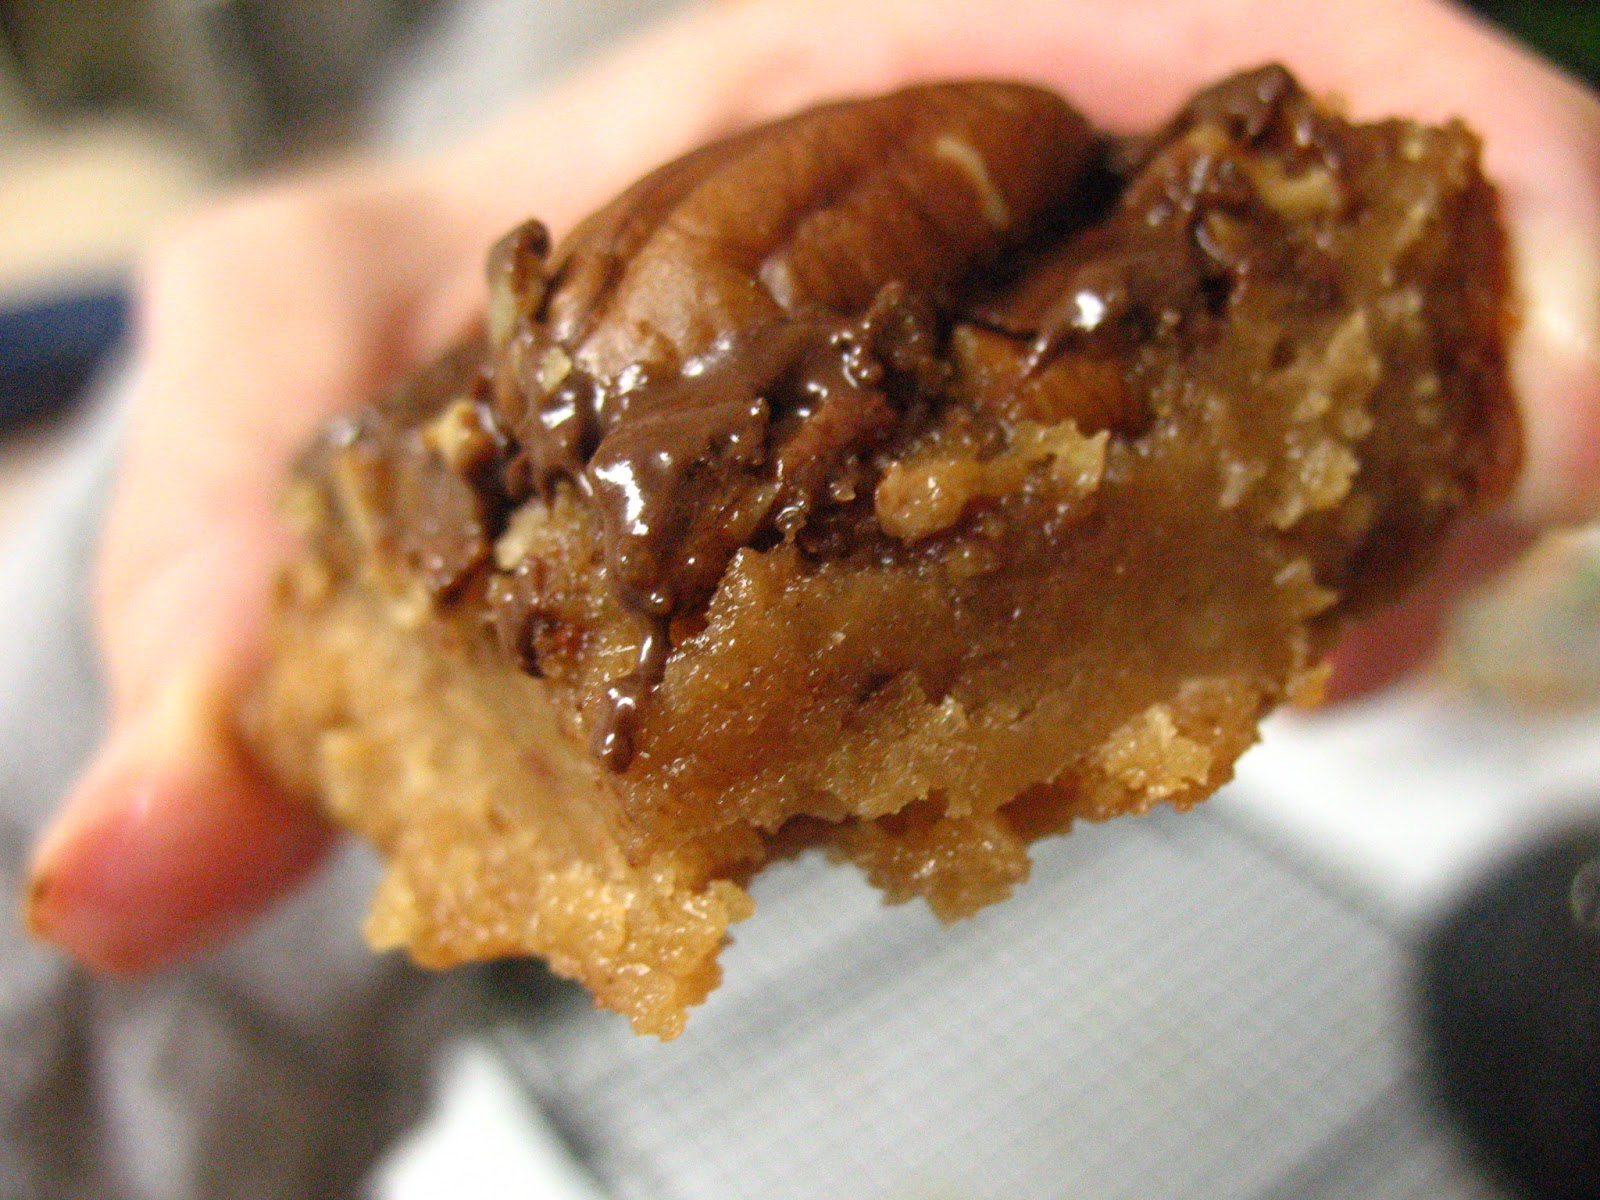
It is very buttery - I actually sopped some of the butter off the base after baking it the first part.  I could eat just the base and be happy!  I took them to the ER when I worked earlier this month and the residents really liked them...one even asked for the recipe.  So, try them out for your holiday party! 


Truffle Bars
Base
2 cups (280 gm) (10 oz) all-purpose (plain) flour
1 cup (200 gm) (7 oz) brown sugar, firmly packed
1 teaspoon (5 ml) (6 gm) mixed spice
1 cup (240 ml) (225 gm) (8 oz) melted butter

Caramel Layer
¾ cup (180 gm) (6-1/3 oz) butter
1 cup (200 gm) (7 oz) brown sugar, firmly packed
1½ cups (200 gm) (7 oz) pecans chopped into 1/4 -inch (2/3-cm) pieces

Top Layer
1 cup plus 2 tablespoons (200 gm) (7 oz) dark eating chocolate or chocolate chips!
 toasted pecans (1 for each piece after cutting)

Directions:
Preheat the oven to moderate 350°F/ 180°C/gas mark 4.  Grease or line with bake paper a 13”x 9” x 2” (33cm x 23 cm x 5 cm) baking tin.  Mix the dry ingredients well in a medium size bowl and mix in the cup of melted butter. Press evenly into lined tin. Bake for 10 minutes.  Scatter the chopped pecans over the base. Bake for another 5 minutes.

While the base is baking melt the ¾ cup (180 gm) (6 1/3 oz) butter in a small pot over low heat. Add the brown sugar and stir until smooth.  Heat over a medium heat until the entire surface is bubbling.  Pour over the base and spread evenly.  Bake for 10 minutes or until the surface is covered with bubbles. 

While this step is baking break up the chocolate and chop or blitz in a food processor until the chocolate is in small ¼ “ (1cm) chunks.  Spread evenly over slice as soon as it comes out of the oven.  Let it sit for 2 or 3 minutes and then smooth the chocolate with a spoon.

Roast the pecans on a lower shelf for 5 minutes (or until they smell cooked) while the base is cooking then let them cool. Place the pecans evenly over the chocolate while it is still soft so when you cut the bake into pieces there is a pecan on each square. Or sprinkle chopped roasted pecans over the top.  Cool completely in the pan before cutting.

Saturday, November 24, 2012

Maple Bread Pudding

I have been looking forward to this week for a LONG time!  MANY months ago, partly because my dreaded boards were between then and now and partly because I just love Thanksgiving.  It is when my dad's entire side of the family gets together.  D had the week off and I took vacation as well.  We went to his family the first part of the week and then to mine the second half.  I always like to try new things and decided to try some bread pudding for dessert and macaroni and cheese for D.  It took a while to find a bread pudding recipe that I thought sounded interesting but this one sounded good and I had a bottle of read maple syrup to use.  In the end, it wasn't quite what I was looking for but was fairly good.  It ended up being a bit too sweet and definitely needed to be warm.  My cousin described it perfectly..."It's like eating pancakes!"  I did use "rustic" bread like the recipe suggested but would prefer a bit less tough bread next time.  D said it was good but I thought it was too sweet...you could probably decrease the amount of maple syrup without any damage done.  If anyone has any suggestions for bread pudding recipes, let me know!

Maple Syrup Bread Pudding adapted from An Hour in the Kitchen
Ingredients
9 cups of bread (any bread will do but a stale rustic loaf is best)
2 cups of milk (or cream)
1 1/2 cups of maple syrup (could use less)
4 eggs
1/2 cup of pecans
1 teaspoon cinnamon
dash salt

Preheat oven to 350. Tear bread into one-inch pieces.  Add bread to 13X9 pan. Toast for 5-10 minutes (would probably skip this next time). Mix milk, maple syrup, eggs, cinnamon, walnuts and salt and pour over heated bread.  Return pan to the oven and bake again for 30-45.  Top with a confectioner's sugar glaze (sugar + water to the desired consistency) if desired. Serve warm.

Saturday, November 10, 2012

Mixer Not Required

During the month of August, D was on a rotation where he was on call every 4th night.  This meant that I kept K every 4th night.  I did quite a bit of baking that month...some with her and some after she went to bed.  This was a cookie that she helped me to make.
K making cookies for Daddy

  D liked it a lot and even said his dad would like them.  Word to the wise, do NOT use light butter for this.  The second time I made these for D's dad, I had accidentally purchased light butter and didn't have any regular butter.  It just didn't turn out nearly as well...still okay but not stellar. 
The original...stellar!  There is just something about butter melted in a pan that makes a unique flavor even if it's not quite browned.  Try these out with YOUR little kitchen helper sometime!

Saucepan M&M Cookies
8 tablespoons (1stick) butter
1/2 cup packed brown sugar
1/3 cup sugar
1 1/2 cups flour
1 teaspoon baking powder
3/8 teaspoon salt
1 egg
1 teaspoon vanilla
1 cup chocolate chip cookies
1/2 cup M&M's

Preheat oven to 350.  Melt butter in a saucepan over medium heat.  Remove from the heat and add the sugars.  Whisk until smooth.  Let cool for 5 minutes.  Combine the dry ingredients in a bowl and mix.  When butter mixture has cooled, add the egg and vanilla.  Stir well.  Add the flour and stir until blended.  Let this cool well.  Stir in chocolate chips and candy. 

For large cookies, use a 1/4 cup measure to scoop dough; place on prepared pan.  For regular sized cookies, use a Tablespoon sized scoop.  Place pan in oven and bake for 12-15 minutes.  Remove when done and let cool on pan, then remove to cooling rack.  Enjoy!

Thursday, November 08, 2012

Ring Cake

Remember back in February when D surprised me by making a cake to take to Sunday School?!  Well, he did it again!  This time it was the Sunday after we got engaged.  He made an apple-butterscotch ring cake.  He said he thought it was appropriate seeing as we were celebrating the gift of a ring.  ;-)  He knows that I prefer a non-chocolate something and like apple.  It turned out great! 

Unlike my pictures...sorry!  I especially loved the goodies (pieces of the cake that either break off or fall to the plate...the best part!).  D said he ended up using 1 1/2 apples and it was still a lot of apple.  If you're looking for a fall recipe to make for a get together, for Thanksgiving, or just for fun, try this one out!

Apple-Butterscotch Ring Cake
Apple base
3 SMALL apples peeled and chopped (2 1/2 cups)
1 cup chopped pecans
1 cup butterscotch chips
1/2 cup brown sugar
1 teaspoon apple pie spice (or a combination of cinnamon and nutmeg)
1/4 cup butter, melted

Cake
1 box yellow cake mix
1 box butterscotch instant pudding
1 1/3 cups water
1/2 cup butter, softened
4 eggs

Preheat oven to 325 degrees.  Prepare a bundt pan with cooking spray.  In a medium bowl, top apples, pecans, butterscotch chips, brown sugar, spices, and butter.  Set aside until ready to use.

In a large mixing bowl beat all the cake ingredients together, scraping frequently.  Pour the apple mixture into the prepared pan.  Pour the better on top of this.  Bake for 55 minutes or until golden and springs back when touched.  Place heatproof plate on top and turn the plate over.  Remove the pan an allow cake to cool slightly.  Enjoy!

Sunday, October 28, 2012

Sweet from My Sweet

Mid-September, I went to Ann Arbor for pediatric board review.  It started at 8am on Sunday and finished at 2pm o!n Friday with days ranging from 8-10 hours of lecture.  Sigh...but it was good.  Before I got back, D told me that he was working on a surprise for me.  I love surprises!  Well, after I got settled, he came over to my apartment with some groceries he had picked up for me and my surprise...a caramel pie that he made! 

He's so sweet!  He is definitely a chocolate kind of guy...and I am definitely NOT a chocolate kind of girl.  He made it just because he knows I like caramel.  It was REALLY good!  So rich and good...one of those desserts that you WANT to eat and eat and eat but just can't because it's so rich.  YUM!  And I must say, it makes me feel really special when he make something because he thinks I'd like it.  He's a keeper!  :-)


Graham Cracker Crust from Allrecipes
1 1/2 cups cinnamon graham cracker crumbs
1/3 cup melted butter
3 tablespoons sugar

Preheat oven to 350.  In a medium bowl, mix together crumbs, butter, and sugar.  Press into a 9-inch pie pan.  Bake for 10 minutes.  Remove to cool.

Caramel Pie
9-inch pie crust
2 14-oz cans sweetened condensed milk (no WONDER this was so rich!)
1 tub cool whip

Pour the milk into a heat proof bowl that will fit over your boiling pan.  Set over a pan of simmering water.  Cook, stirring occasionally...for about 2 hours, replace water as needed.  Don't run out of water!  When ready, the milk will be golden brown and thick.  Pour caramelized milk into crust and allow to cool.  Top with cool whip...and chocolate chips if desired. 

Enjoy!

Sunday, October 21, 2012

Gooey Apple Breakfast Pull Aparts

During my studying over the past, oh, five months I must admit that I took frequent breaks.  It's just hard to study all day long!  Two weeks ago, I found a recipe for apple cinnamon monkey bread that looked really good.  I decided to make it for Sunday School.  We used to have some form of breakfast treat each week but haven't recently so I thought it would be fun to take something. 
Instead of using the traditional biscuits, this recipe used cinnamon rolls, which I suppose makes it easier since you don't have to toss it in cinnamon sugar.  This is actually a Pillsbury recipe.  It called for granola bars on "top."  Well, I used them but they kind of stuck to the pan...oh, well!  That just means they were super gooey and yummy!  I thought the apple actually turned out great.  It cooked perfectly.  A really yummy fall treat that you can portion as you want!  A couple of pieces for a little treat or several to "equal" a full cinnamon roll.  Try it out!


Apple cinnamon Pull-Aparts from Pillsbury
4  crunchy granola bars (2 pouches from 8.9-oz box), crushed (3/4 cup)*
1/4 cup Fisher® Chef's Naturals® chopped pecans
1 teaspoon ground cinnamon
2/3 cup milk
 3/4 cup packed light brown sugar 
 
2 cans Grands cinnamon rolls with icing set aside
 
1 Granny smith apple cored, peeled and chopped
 
  • Heat oven to 350°F. Spray 12-cup fluted tube cake pan with Baking cooking spray. In small bowl, mix crushed granola bars, pecans and 1/2 teaspoon of the cinnamon. Sprinkle mixture evenly in bottom of pan.
  • In large bowl, mix milk, brown sugar and remaining 1/2 teaspoon cinnamon. Separate both cans of dough into 10 rolls; set icing aside. Cut or tear each roll into quarters. Stir roll pieces and apples into whipping cream mixture to coat. Spoon mixture into pan; spread evenly.
  • Bake 50 to 60 minutes or until deep golden brown. Immediately place heatproof serving plate or platter upside down over pan; turn plate and pan over (do not remove pan). Cool 5 minutes. Remove pan; scrape any remaining topping in pan onto coffee cake. Cool 5 minutes longer. Drizzle reserved icing over top. Serve warm. Enjoy!
  •  

    Saturday, October 20, 2012

    What You Get When You Make Meatloaf Muffins!

    Monday, D was on call, so I kept Miss K.  The next day, they were coming to my house for dinner because I needed an early night to get ready for my board exam the next day.  So, I decided to make dinner Monday to make Tuesday as easy as possible.  Now, D loves meatloaf.  I'm not the biggest fan because of the ground beef but can handle it because of the tomato sauce on it!  :-)  However, I didn't get around to making it until around 800 and I still hadn't eaten supper, was tired, and needed to study some.  Hmmm....how to make fast meatloaf?
     Meatloaf muffins.  It cuts the baking time from about an hour to about 20 minutes.  Winner!  Plus, it's preportioned, easy to reheat, and easy to transport.  I ended up using half beef, half turkey because that's what was in the oldest frozen ground meat pack.  Turned out good.  Tuesday D said he liked it (and then on Thursday when we had left overs..."This is good!"  Yay!).  K didn't care for it that much.  I can handle that.  Make meatloaf muffins for D and send them with him to work for lunch.  BTW, check out these beautiful pre-test flowers D gave me! 

    They went home and I got ready for my test.  It was okay...not as awful as I was expecting but still difficult.  Now to wait for results in January!  YIKES!  For celebration, D and I decided to go out to eat.  He suggested a local Drive-In called Walker's.  YES! 
    Now, this isn't your typical Drive-In.  Guy Fieri should totally visit here.  They serve mostly seafood.  We had redfish and red snapper...delicious!  D encouraged me to get dessert; so I had pumpkin, pecan, praline bread pudding....oh my!  Divine!  Then....whether it was the meatloaf muffins or something else....D asked me to marry him! 

    Of course, I said "Yes!"  He picked out the ring all by himself and it is gorgeous!  I am so thankful that God placed him and K in my life, and that I am going to be able to be a part of their lives as a family. 
    So, I guess there will be some different posts in addition to normal food stuff for a little while.  :-)

    Meatloaf Muffins
    1 pound ground meat, I used half beef, half turkey
    20 crumbled saltine crackers
    2 eggs
    1/2 cup ketchup
    2 tablespoons mustard
    2 teaspoons Worcestershire sauce
    garlic salt
    pepper

    Sauce
    Ketchup
    Mustard
     Sorry...no real measurements, I did about 3/4 ketchup, 1/4 mustard.  Warm and spoon over muffins.

    Preheat oven to 350F.  In a medium sized bowl, place all ingredients.  Mix together with a wooden spoon or your hands.  Spray muffin pan with cooking spray.  Spoon meat mixture into muffin pan.  It will make 12 muffins.  Place into preheated over and allow to cook for 25 minutes.  Remove and allow to cool.  Enjoy...you might even get engaged if you make these!  ;-)

    Sunday, October 14, 2012

    Pre-test Pumpkin Patch...and Muffins

     Sorry I've been so absent but my time is full!  I have lots of yummy recipes to post and will soon...my test will be OVER Wednesday (hopefully for another 10 years!) and I'll be back with more.

     Just wanted to share some quick pictures with you from the pumpkin patch and a quick muffin recipe.  While D was mowing his yard, I occupied K.  I offered to make cookies or muffins (secretly hoping she'd say cookies)...but she chose muffins. 
    So, I found a recipe from here.  I did change it slightly and should have cooked them for longer, but K still enjoyed it after she successfully ate all of her salmon and corn and bites of carrot and cauliflower.  We added a few chocolate chips on top.


    Best Ever Pumpkin Muffin Recipe adapted from Cooking with my Kid
    Prep Time: 15 mins  Cooking Time: 15-17 minutes
    Ingredients:
    1 1/2 cups self rising flour
    1/3 cup brown sugar
    1/3 (HEAPING!) cup Splenda (or use real sugar if you please)
     1 teaspoon cinnamon
    1 can 100% pure pumpkin
    2 large eggs lightly beaten
    1/3 cup canola oil or vegetable oil
    1/2 cup lowfat Greek yogurt
    Preheat oven to 400 degrees. Spray mini muffin tins with cooking spray. Mix flour, sugars, and cinnamon. In a separate bowl whisk together pumpkin, eggs, oil, and yogurt. Combine wet and dry ingredients until just blended. Spoon batter into muffin tins. Bake for 15 minutes or until toothpick comes out clean.  Transfer muffins to rack to cool. Makes 12-18 regular sized muffins.

    Thursday, September 27, 2012

    Empanada...Impanato...Spinado...whatever!

    I planned to make these a lot earlier in the month but things kept coming up...board review, a spur of the moment dinner with friends, working in the peds ER...but K and I finally made them.  So glad she enjoys cooking...such a good helper! 
     Patri of the blog, Asi Son Los Cosas, was our September 2012 Daring Bakers’ hostess and she decided to tempt us with one of her family’s favorite recipes for Empanadas! We were given two dough recipes to choose from and encouraged to fill our Empanadas as creatively as we wished!  I decided to fill them with ground turkey mixed with corn, tomato sauce and cheese, seasoned with cumin (YUM!). 
    I used less of this in my empanadas and added zucchini and squash.  K called them different things throughout the night.  First it was spinado.  Then it was impanato.  Cute either way!  She finally decided that she liked it.  D initially wasn't sure because I think he expected it to taste more Tex-Mex than it did...but then said that he liked it. 

    Turns out these make great leftovers to take to work.  :-)  We both felt that they were a little to "bready" but I think that can be attributed to the fact that I used the wheat recipe AND didn't have a rolling pin at D's house to use...so I used a spaghetti-o's can wrapped in foil to roll it out.  Innovation I tell you!  ;-)  A fun challenge that I'm glad I got to do.

    Empanada Dough

    (a recipe using wheat flour from “La Empanada Gallega”)

    Servings: 6

    Ingredients:

    3½ cups (500 gm) all-purpose (plain) or bread flour
    1 cup (240 ml) warm water
    ½ cup less 1 tablespoon (100 ml) of liquid fat (oil, margarine, lard)
    1 satchel (1 tablespoon) (15 gm) dry yeast or (1 oz) (30 gm) fresh yeast
    1 teaspoon (5 ml) (6 gm) salt
    1 teaspoon (3 gm) sweet paprika

    Directions:

    1. Shift the flour into a bowl, make a well in the middle and add all the ingredients (you should break the fresh yeast as much as possible).
    2. Mix with a wooden spoon until all the ingredients have been incorporated
    3. Turn dough onto your counter and knead for 8 minutes
    4. Make a ball and allow to rise covered with a cloth for about half an hour before using. 
    5. Once risen, turn the dough back into a floured counter and tear off in small pieces (I got eight).
    6. Roll each piece out to desired size
    7. Place about 1/4 cup filling on each and top with a little cheese.  
    8. Pull edges of dough over filling in the middle and roll closed.  Then work your way out to the ends until it is completely closed around the filling.
    9. Place empanadas on a baking sheet and place into a preheated 350 degree oven.  Bake for 20-25 minutes. 
    Filling:
    1 pound ground turkey (Probably used about 1/2 of this eventually)
    1 can corn
    1 can tomato sauce
    cumin
    cheese

    Cook turkey.  Then allow to cool.  Mix together turkey, corn, sauce and add cumin (about 1 tsp).  Fill empanadas.

    Sunday, September 16, 2012

    Wow...long time. A cake...Just in Case!

    Can you tell I've been busy!?  No time to blog!  I have been cooking and have lots to share...lots of sweet treats...but just have had lots going on and not able to blog.  Lots of work, family, fun, studying, a WEEK of pediatric board review (i.e., 9 hours a day of lecture for 6.5 days), helping take care of K, etc.  But it's all been good.  Hopefully, after October 17, when I take my board, I'll be able to post a good bit...but here's a quick post.  Just in case you still have lots of zucchini overload, a yummy zucchini cake.  D wouldn't taste it because "who puts zucchini in a cake?"  I told him you couldn't taste it and he said "maybe you can't!"  Ha!  Anyway, my Sunday school class and coworkers enjoyed it.  Try for yourselves!
     Zucchini Cream Cheese Pound Cake from Joy the Baker
    3 cups flour
    1 tsp baking soda
    1/2 tsp baking powder
    1 tsp salt
    2 tsp ground cinnamon
    8 oz. fat free cream cheese
    2 cups sugar (I used half Splenda)
    3 eggs
    2 tsp vanilla
    1 cup butter, melted ( I think I used 3/4 cups)
    2 cups shredded zucchini

    Frosting:
    8 oz. low fat cream cheese
    1/2 cup butter, softened
    1/3 cup brown sugar
    pinch salt
    1 3/4 cups powdered sugar
    2 tsp vanilla

    Preheat oven to 350.  Spray Bundt pan with flour cooking spray.  Whisk together flour, soda, powder, salt, and cinnamon.  Reserve for later.  Cream cream cheese, sugar for 2 minutes.  Add eggs one at a time.  Mix in vanilla.  Pour in melted butter with mixer on low speed.  Increase to medium high for 3 minute or until smooth.  Reduce to low and add all the flour. Mix until incorporated.  Fold in zucchini.  Pour into prepared pan.  Place into oven and bake for 45-50 minutes or until a skewer in the center comes out clean.  Cool for 20 minutes then turn onto cooling rack. 

    For icing, cream the cream cheese in a mixer.  Scrape bowl and add butter.  Beat for 1 minute.  Add brown sugar and beat.  Turn on low and add confectioner's sugar and salt.  Then vanilla.  Beat until incorporated.  Spread over cake.  Enjoy!