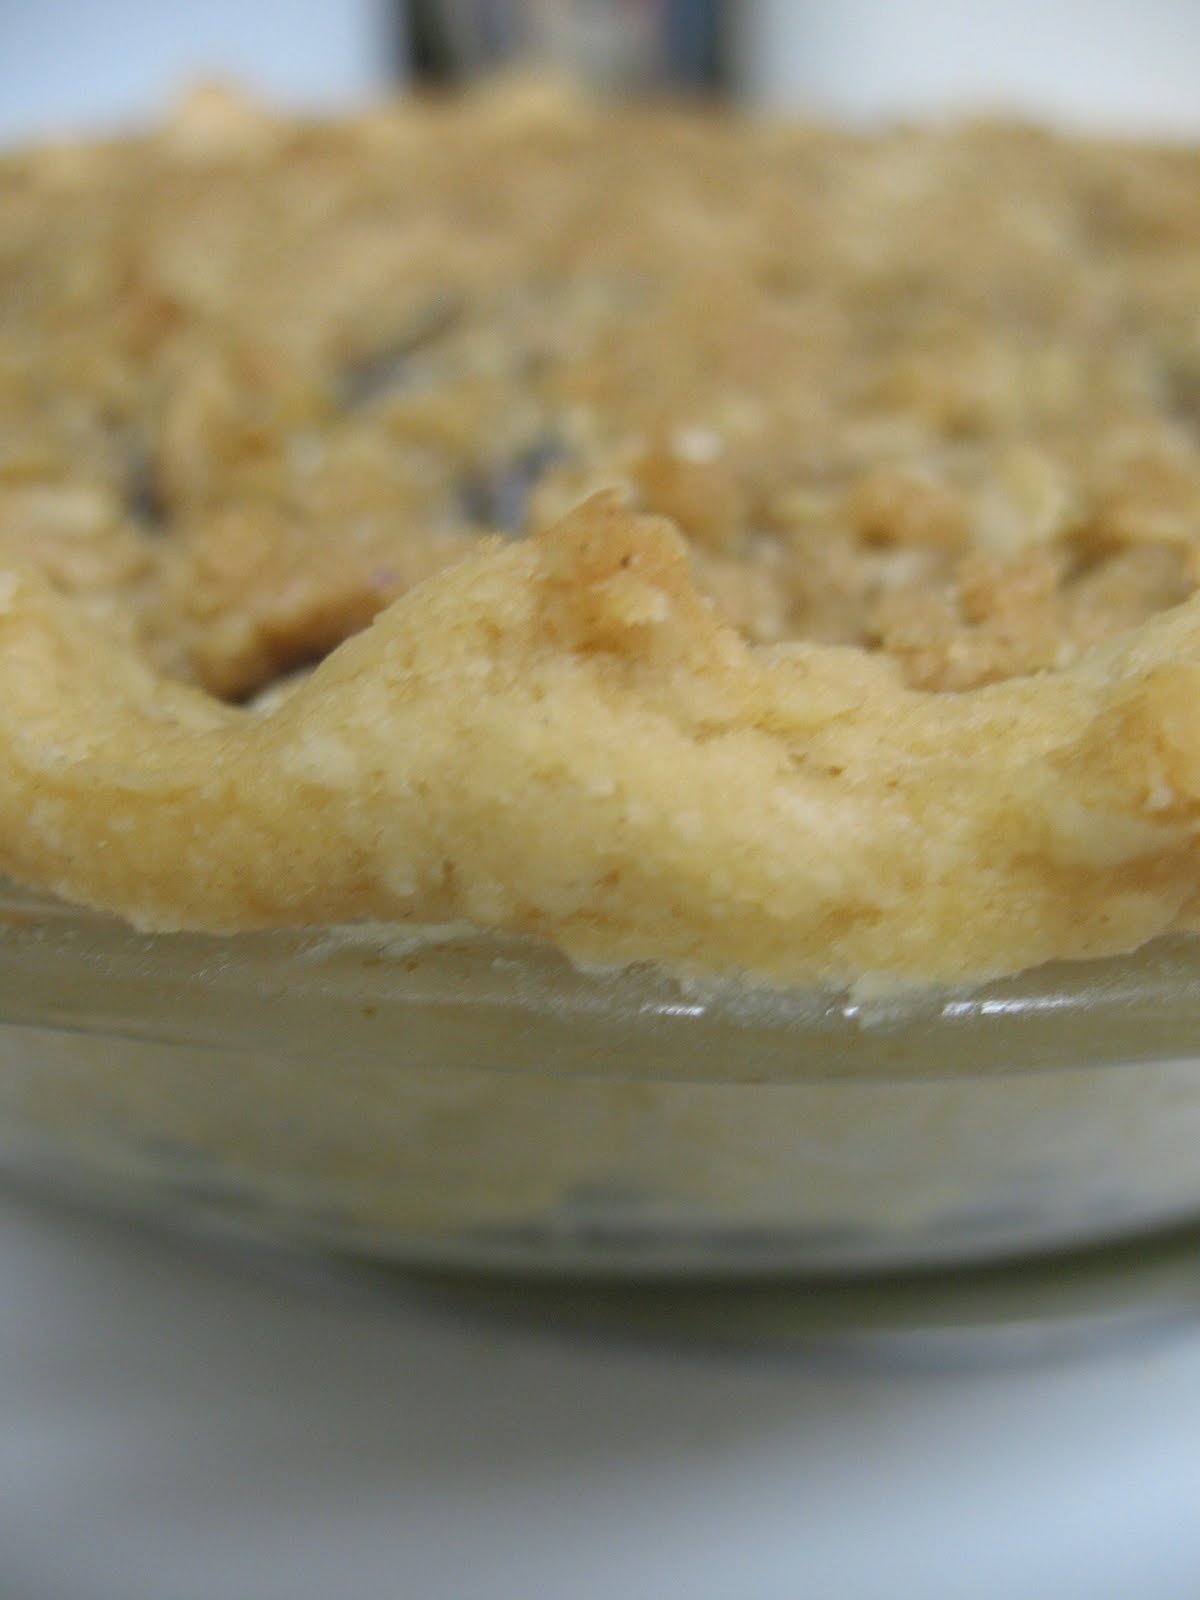
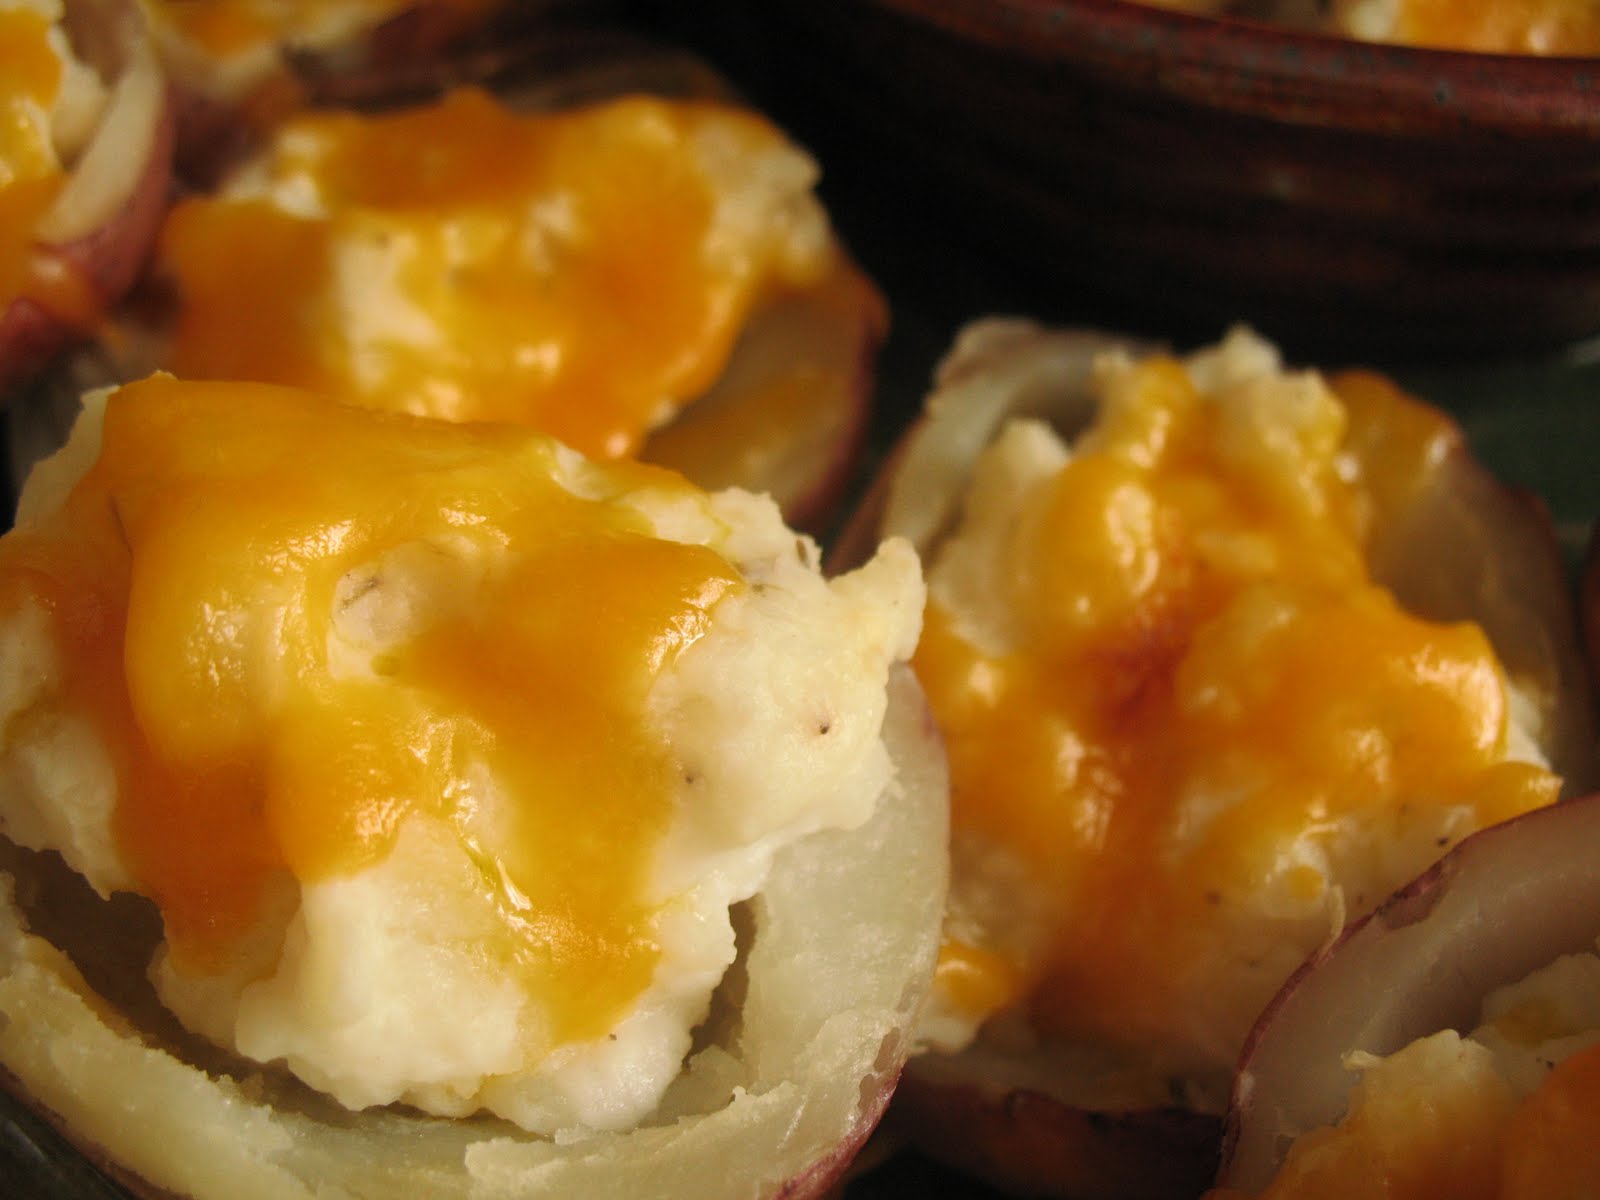
Back in March we had a baby shower for one of the other residents. She has since had the baby and is back to work...that shows how delayed I am in posting this! I decided to take one of the most typical but enjoyed shower foods...baby quiche. (Obviously the theme was baby!). I found this recipe on allrecipes.com and it was really good. The pictures are lack-luster, so you'll just have to trust me!
Mini Cheese Quiches
1/2 cup (1 stick) butter, softened
3 oz cream cheese, softened
1 cup AP flour
1 cup shredded white cheese (suggested Monterey Jack)
2 eggs
1/2 cup milk
1/4 teaspoon salt
1/8 teaspoon pepper
Cream butter and cream cheese. Add flour and beat until blended. Refrigerate for 1 hour. (The recipe suggests pre-dividing into 24 balls) Press balls into the bottom and up the sides of mini-muffin tins. Sprinkle a teaspoon of cheese on the bottom. Meanwhile, beat eggs, milk, salt, and pepper in a bowl. Spoon this mixture over the cheese using a tablespoon. Bake at 350 degrees F for 30-35 minutes or until golden. Allow to stand for five minutes before serving. Enjoy!
Friday, June 04, 2010
Thursday, May 27, 2010
Piece Montee'
My parents have been in town a lot this month for wedding showers and Mother's Day was no exception. I had the chance then to make the Daring Bakers Challenge for mama (and Daddy and Philip)...and I think they liked it! The May 2010 Daring Bakers’ challenge was hosted by Cat of Little Miss Cupcake. Cat challenged everyone to make a piece montée, or croquembouche, based on recipes from Peter Kump’s Baking School in Manhattan and Nick Malgieri.
I think the hardest part of this challenge was getting the puffs to puff! Some of mine were great and others had no center to them. I still managed to get filling inside. I used the coffee filling and just used an individual packed of instant coffee to make it. Turned out well...not too strong and not weak either.
I wouldn't tell Philip the flavor for fear that he wouldn't eat it but thought he'd like it as he loves tiramisu. He did like it and even took some back for Kenna to try. I thought the puff themselves were a bit eggy...but I think I felt the same way when we made e-clairs. Maybe I'm just not a pat-a-choux person! Thanks for the challenge Cat! can't wait to see what June's challenge is.
For the Vanilla Crème Patissiere (Half Batch)
1 cup (225 ml.) milk (I used skim)
2 Tbsp. cornstarch
6 Tbsp. (100 g.) sugar
1 large egg
2 large egg yolks
2 Tbsp. (30 g.) unsalted butter
1 Tsp. Vanilla (For Coffee Pastry Cream (Half Batch recipe) Dissolve 1 ½ teaspoons instant espresso powder in 1 ½ teaspoons boiling water. Whisk into pastry cream with butter and vanilla.)
Dissolve cornstarch in ¼ cup of milk. Combine the remaining milk with the sugar in a saucepan; bring to boil; remove from heat.
Beat the whole egg, then the yolks into the cornstarch mixture. Pour 1/3 of boiling milk into the egg mixture, whisking constantly so that the eggs do not begin to cook.
Return the remaining milk to boil. Pour in the hot egg mixture in a stream, continuing whisking.
Continue whisking (this is important – you do not want the eggs to solidify/cook) until the cream thickens and comes to a boil. Remove from heat and beat in the butter and vanilla.
Pate a Choux (Yield: About 28)
¾ cup (175 ml.) water
6 Tbsp. (85 g.) unsalted butter
¼ Tsp. salt
1 Tbsp. sugar
1 cup (125 g.) all-purpose flour
4 large eggs
For Egg Wash: 1 egg and pinch of salt
Pre-heat oven to 425◦F/220◦C degrees. Line two baking sheets with parchment paper.
Preparing batter:
Combine water, butter, salt and sugar in a saucepan over medium heat. Bring to a boil and stir occasionally. At boil, remove from heat and sift in the flour, stirring to combine completely.
Return to heat and cook, stirring constantly until the batter dries slightly and begins to pull away from the sides of the pan. Transfer to a bowl and stir with a wooden spoon 1 minute to cool slightly.
Add 1 egg. The batter will appear loose and shiny. Keep stirring until it looks like mashed potatoes. It is at this point that you will add in the next egg. Repeat until you have incorporated all the eggs.
Piping:
Transfer batter to a pastry bag fitted with a large open tip (I piped directly from the bag opening without a tip). Pipe choux about 1 inch-part in the baking sheets. Choux should be about 1 inch high about 1 inch wide.
Using a clean finger dipped in hot water, gently press down on any tips that have formed on the top of choux when piping. You want them to retain their ball shape, but be smoothly curved on top.
Baking:
Bake the choux at 425◦F/220◦C degrees until well-puffed and turning lightly golden in color, about 10 minutes. Lower the temperature to 350◦F/180◦C degrees and continue baking until well-colored and dry, about 20 minutes more. Remove to a rack and cool. Can be stored in a airtight box overnight.
Filling:
When you are ready to assemble your piece montée, using a plain pastry tip, pierce the bottom of each choux. Fill the choux with pastry cream using either the same tip or a star tip, and place on a paper-lined sheet. Choux can be refrigerated briefly at this point while you make your glaze.
Use one of these to top your choux and assemble your piece montée.
Chocolate Glaze: (I used white chocolate)
8 ounces/200 g. finely chopped chocolate (use the finest quality you can afford as the taste will be quite pronounced; I recommend semi-sweet)
Melt chocolate in microwave or double boiler. Stir at regular intervals to avoid burning. Use the best quality chocolate you can afford. Use immediately.
I think the hardest part of this challenge was getting the puffs to puff! Some of mine were great and others had no center to them. I still managed to get filling inside. I used the coffee filling and just used an individual packed of instant coffee to make it. Turned out well...not too strong and not weak either.
I wouldn't tell Philip the flavor for fear that he wouldn't eat it but thought he'd like it as he loves tiramisu. He did like it and even took some back for Kenna to try. I thought the puff themselves were a bit eggy...but I think I felt the same way when we made e-clairs. Maybe I'm just not a pat-a-choux person! Thanks for the challenge Cat! can't wait to see what June's challenge is.
For the Vanilla Crème Patissiere (Half Batch)
1 cup (225 ml.) milk (I used skim)
2 Tbsp. cornstarch
6 Tbsp. (100 g.) sugar
1 large egg
2 large egg yolks
2 Tbsp. (30 g.) unsalted butter
1 Tsp. Vanilla (For Coffee Pastry Cream (Half Batch recipe) Dissolve 1 ½ teaspoons instant espresso powder in 1 ½ teaspoons boiling water. Whisk into pastry cream with butter and vanilla.)
Dissolve cornstarch in ¼ cup of milk. Combine the remaining milk with the sugar in a saucepan; bring to boil; remove from heat.
Beat the whole egg, then the yolks into the cornstarch mixture. Pour 1/3 of boiling milk into the egg mixture, whisking constantly so that the eggs do not begin to cook.
Return the remaining milk to boil. Pour in the hot egg mixture in a stream, continuing whisking.
Continue whisking (this is important – you do not want the eggs to solidify/cook) until the cream thickens and comes to a boil. Remove from heat and beat in the butter and vanilla.
Pate a Choux (Yield: About 28)
¾ cup (175 ml.) water
6 Tbsp. (85 g.) unsalted butter
¼ Tsp. salt
1 Tbsp. sugar
1 cup (125 g.) all-purpose flour
4 large eggs
For Egg Wash: 1 egg and pinch of salt
Pre-heat oven to 425◦F/220◦C degrees. Line two baking sheets with parchment paper.
Preparing batter:
Combine water, butter, salt and sugar in a saucepan over medium heat. Bring to a boil and stir occasionally. At boil, remove from heat and sift in the flour, stirring to combine completely.
Return to heat and cook, stirring constantly until the batter dries slightly and begins to pull away from the sides of the pan. Transfer to a bowl and stir with a wooden spoon 1 minute to cool slightly.
Add 1 egg. The batter will appear loose and shiny. Keep stirring until it looks like mashed potatoes. It is at this point that you will add in the next egg. Repeat until you have incorporated all the eggs.
Piping:
Transfer batter to a pastry bag fitted with a large open tip (I piped directly from the bag opening without a tip). Pipe choux about 1 inch-part in the baking sheets. Choux should be about 1 inch high about 1 inch wide.
Using a clean finger dipped in hot water, gently press down on any tips that have formed on the top of choux when piping. You want them to retain their ball shape, but be smoothly curved on top.
Baking:
Bake the choux at 425◦F/220◦C degrees until well-puffed and turning lightly golden in color, about 10 minutes. Lower the temperature to 350◦F/180◦C degrees and continue baking until well-colored and dry, about 20 minutes more. Remove to a rack and cool. Can be stored in a airtight box overnight.
Filling:
When you are ready to assemble your piece montée, using a plain pastry tip, pierce the bottom of each choux. Fill the choux with pastry cream using either the same tip or a star tip, and place on a paper-lined sheet. Choux can be refrigerated briefly at this point while you make your glaze.
Use one of these to top your choux and assemble your piece montée.
Chocolate Glaze: (I used white chocolate)
8 ounces/200 g. finely chopped chocolate (use the finest quality you can afford as the taste will be quite pronounced; I recommend semi-sweet)
Melt chocolate in microwave or double boiler. Stir at regular intervals to avoid burning. Use the best quality chocolate you can afford. Use immediately.
Monday, May 24, 2010
Scones for Daddy
When Daddy mentioned that he thought I should make scones, I asked him what kind he thought I should make. Due to some cookies that I made earlier (sorry, can't share the recipe yet!), he suggested orange scones. So, I went in search of a good recipe. I found a couple and this one looked good to me. I didn't have any nuts, which it didn't call for, but I thought they would make a good addition.
Oh, well! The dough, once again, was too sticky to form into a disc and cut, so I just freeformed it. I kind of like the free form version because it gives lovely little pieces that stick up...perfect for my favorite act of nibbling! I served these with honey and they turned out great!
Orange Scones
1 cup all-purpose flour
1 cup whole wheat flour
3 tablespoons sugar
2 1/2 teaspoons baking powder
2 teaspoons grated orange peel
1/4 teaspoon salt
1/3 cup cold butter
1/3 cup milk
1 egg
1 tsp orange extract
Additional sugar
In a large bowl, combine the flours, sugar, baking powder, orange peel and salt. Cut in butter until mixture resembles coarse crumbs. In a bowl, whisk milk and egg. Stir into dry ingredients just until moistened.
Lightly spoon dough onto baking stone or greased baking sheet. Top with extra granulated sugar. Bake at 400 degrees F for 15-20 minutes or until golden brown. Enjoy!
Oh, well! The dough, once again, was too sticky to form into a disc and cut, so I just freeformed it. I kind of like the free form version because it gives lovely little pieces that stick up...perfect for my favorite act of nibbling! I served these with honey and they turned out great!
Orange Scones
1 cup all-purpose flour
1 cup whole wheat flour
3 tablespoons sugar
2 1/2 teaspoons baking powder
2 teaspoons grated orange peel
1/4 teaspoon salt
1/3 cup cold butter
1/3 cup milk
1 egg
1 tsp orange extract
Additional sugar
In a large bowl, combine the flours, sugar, baking powder, orange peel and salt. Cut in butter until mixture resembles coarse crumbs. In a bowl, whisk milk and egg. Stir into dry ingredients just until moistened.
Lightly spoon dough onto baking stone or greased baking sheet. Top with extra granulated sugar. Bake at 400 degrees F for 15-20 minutes or until golden brown. Enjoy!
Sunday, May 16, 2010
Scones with Sarah
I was recently informed by my dad that I haven't made scone in a while. He's right...in fact, I haven't made scone since I made these...in October! Yikes!
I made them with my friend, Sarah. It's so funny because we'll both decide we need to hang out and when I ask what she wants to do we usually end up cooking something. I guess we would rather do something where we could talk as opposed to watching a movie and having to pay attention to that instead of each other (and Luke!!!). Anyway, after giving her the peach scones from so long ago, she said she wanted to make some.
So, I found this recipe from Emily and we went to baking. This is actually the FIRST scone recipe I've made that has allowed me to form a disc and cut the scones into triangles.
It turned out DELICIOUS!!! I highly recommend this recipe...and have another scone recipe coming, specially made for my dad this weekend!
Cranberry, White Chocolate & Toasted Walnut Scones (Recipe adapted from Emily at Sugar Plum)
2 cups unbleached all-purpose flour (spooned into cup & leveled with knife)
1 tablespoon baking powder
1/2 teaspoon salt
1 teaspoon ground cinnamon
6 tablespoons granulated sugar, plus additional for sprinkling
1/3 cup cold unsalted butter, cut into small pieces
2/3 cup sweetened dried cranberries, soaked in hot water
1/2 cup finely chopped pecans, toasted
1/2 cup white chocolate chips
2 large eggs, divided use
1/4 cup yogurt
1 1/2 teaspoons vanilla extract
Heat oven to 375 degrees F. Spray cookie sheets with cooking spray.
In a large mixing bowl, sift together flour, baking powder, salt and cinnamon; whisk in 6 tablespoons sugar until combined. Knead in butter, using fingertips, until well incorporated and mixture starts to clump together, forming pea-sized lumps. Gently stir in cranberries, pecans and white chocolate chips until combined.
In a small bowl, whisk together 2 eggs, yogurt and vanilla until combined; sprinkle into flour mixture and toss together using a fork.
Turn shaggy dough out onto a floured surface, and gently pat and knead until it comes together, handling as little as possible. Form two (6-inch) rounds. Insides of the rounds should be thicker. Slice each round into 6 equal triangles and place on cookie sheets.
Bake for 20-25 minutes or until golden brown. Cool on wire racks until ready to serve. Enjoy!
I made them with my friend, Sarah. It's so funny because we'll both decide we need to hang out and when I ask what she wants to do we usually end up cooking something. I guess we would rather do something where we could talk as opposed to watching a movie and having to pay attention to that instead of each other (and Luke!!!). Anyway, after giving her the peach scones from so long ago, she said she wanted to make some.
So, I found this recipe from Emily and we went to baking. This is actually the FIRST scone recipe I've made that has allowed me to form a disc and cut the scones into triangles.
It turned out DELICIOUS!!! I highly recommend this recipe...and have another scone recipe coming, specially made for my dad this weekend!
Cranberry, White Chocolate & Toasted Walnut Scones (Recipe adapted from Emily at Sugar Plum)
2 cups unbleached all-purpose flour (spooned into cup & leveled with knife)
1 tablespoon baking powder
1/2 teaspoon salt
1 teaspoon ground cinnamon
6 tablespoons granulated sugar, plus additional for sprinkling
1/3 cup cold unsalted butter, cut into small pieces
2/3 cup sweetened dried cranberries, soaked in hot water
1/2 cup finely chopped pecans, toasted
1/2 cup white chocolate chips
2 large eggs, divided use
1/4 cup yogurt
1 1/2 teaspoons vanilla extract
Heat oven to 375 degrees F. Spray cookie sheets with cooking spray.
In a large mixing bowl, sift together flour, baking powder, salt and cinnamon; whisk in 6 tablespoons sugar until combined. Knead in butter, using fingertips, until well incorporated and mixture starts to clump together, forming pea-sized lumps. Gently stir in cranberries, pecans and white chocolate chips until combined.
In a small bowl, whisk together 2 eggs, yogurt and vanilla until combined; sprinkle into flour mixture and toss together using a fork.
Turn shaggy dough out onto a floured surface, and gently pat and knead until it comes together, handling as little as possible. Form two (6-inch) rounds. Insides of the rounds should be thicker. Slice each round into 6 equal triangles and place on cookie sheets.
Bake for 20-25 minutes or until golden brown. Cool on wire racks until ready to serve. Enjoy!
Sunday, May 09, 2010
Happy Mother's Day!
Today my parents came to my apartment for Mother's Day lunch after church. They were in town for a wedding shower for my brother and my mom and I were able to sing together in church. She has been such a blessing in my life: a great example to me of a Godly wife and mother. So many things about what I should be doing for others and for my family, I've learned from her. I am so thankful for my Mama! Anyway, we were talking about cooking and I told my parents that sometimes I find it hard to get motivated to cook for myself...okay, a lot of times! Maybe that will change when I have more to cook for than just me! However, I did find some individual cooking plates in my cabinet the other day and decided that I should use them.
So, I pulled out one of my favorite things to make, frittata, and morphed it into an individual recipe! To make this even easier, I chopped the zucchini into small pieces so that they would cook while the frittatas were cooking instead of having to cook them ahead of time.
These ended up being great, healthy and springy dishes to have around. They were so easy to just heat up and enjoy. This is also an easy way to feed everyone the same meal but with different "insides." If someone doesn't like zucchini, they could easily make theirs with the veggies (or meat) that they wanted. So, pick your favorite fritatta recipe and split it between some individual dishes and cook away!
Individual Frittatas
1-2 zucchini, chopped (more is better if you ask me!)
2 eggs
1/2 cup egg whites
1 cup milk
seasonings
sharp cheddar cheese (this provides more flavor for a smaller amount)
Preheat oven to 350 degrees. Place chopped zucchini in the 4 individual dishes. In a bowl mix together the eggs, egg whites, milk, and seasonings. Pour over the zucchini. Sprinkle cheese on top of egg mixture in each dish. Bake until done (about 20-30 minutes). Enjoy!
So, I pulled out one of my favorite things to make, frittata, and morphed it into an individual recipe! To make this even easier, I chopped the zucchini into small pieces so that they would cook while the frittatas were cooking instead of having to cook them ahead of time.
These ended up being great, healthy and springy dishes to have around. They were so easy to just heat up and enjoy. This is also an easy way to feed everyone the same meal but with different "insides." If someone doesn't like zucchini, they could easily make theirs with the veggies (or meat) that they wanted. So, pick your favorite fritatta recipe and split it between some individual dishes and cook away!
Individual Frittatas
1-2 zucchini, chopped (more is better if you ask me!)
2 eggs
1/2 cup egg whites
1 cup milk
seasonings
sharp cheddar cheese (this provides more flavor for a smaller amount)
Preheat oven to 350 degrees. Place chopped zucchini in the 4 individual dishes. In a bowl mix together the eggs, egg whites, milk, and seasonings. Pour over the zucchini. Sprinkle cheese on top of egg mixture in each dish. Bake until done (about 20-30 minutes). Enjoy!
Saturday, May 01, 2010
New Toppings
And so begins a new month. New month brings a new rotation, for me that is the NICU. In celebration of this (HA!) I give you a new way to make blueberry pie. I've always made the pie with a double crust. However, when I went to my friend's house for Easter her husband said he liked crumb toppings...so I decided to give that a try. When I pulled it out of the oven it looked perfect!
I was so excited and couldn't wait to cut into it to see how the inside did. Well, I had to use frozen berries because the fresh berries were SOOO expensive. Unfortunately, it created a bit of a soupy pie. I'm sure it was from the frozen berries.
The funny thing is that everyone at lunch thought is was the most set blueberry pie they'd seen! My friend's husband thought it was the best part of lunch! And the topping...delicious! I got the recipe from here. I used the filling recipe from my Papa's pie and the crust from my Granny.
Crust
1 cup sifted flour (usually use AP but accidentally used self rising and it worked well.)
1/2 teaspoon salt
3 T water
1/3 cup shortening
Sift flour and salt into bowl. Remove 1/4 cup flour and blend to a paste. Cut shortening into remaining flour until pieces are size of small peas. Add paste to flour mixture. Mix with fork until dough comes together and can be shaped into a ball (this is best done by putting a piece of saran wrap over the bowl, dumping it, and pressing the dough together.) Place in the refrigerator for about 30 minutes. Roll out crust to 1/8 inch thick to cover 9-inch pie pan
Filling:
1 quart (4 cups) or a little more blueberries
3/4 cup sugar
3 T flour
2 T corn starch
1/4 teaspoon salt
Mix dry ingredients. Fold in berries to coat. Place in deep dish pie crust.
Topping
2/3 cup packed brown sugar
3/4 cup rolled oats
1/2 cup all-purpose flour
1/2 teaspoon ground cinnamon
6 tablespoons butter
In a medium bowl, stir together the brown sugar, oats, flour and cinnamon. Mix in butter using a fork until crumbly. Spread the crumb topping evenly over the pie filling. Bake at 375 for about 40 minutes.
I was so excited and couldn't wait to cut into it to see how the inside did. Well, I had to use frozen berries because the fresh berries were SOOO expensive. Unfortunately, it created a bit of a soupy pie. I'm sure it was from the frozen berries.
The funny thing is that everyone at lunch thought is was the most set blueberry pie they'd seen! My friend's husband thought it was the best part of lunch! And the topping...delicious! I got the recipe from here. I used the filling recipe from my Papa's pie and the crust from my Granny.
Crust
1 cup sifted flour (usually use AP but accidentally used self rising and it worked well.)
1/2 teaspoon salt
3 T water
1/3 cup shortening
Sift flour and salt into bowl. Remove 1/4 cup flour and blend to a paste. Cut shortening into remaining flour until pieces are size of small peas. Add paste to flour mixture. Mix with fork until dough comes together and can be shaped into a ball (this is best done by putting a piece of saran wrap over the bowl, dumping it, and pressing the dough together.) Place in the refrigerator for about 30 minutes. Roll out crust to 1/8 inch thick to cover 9-inch pie pan
Filling:
1 quart (4 cups) or a little more blueberries
3/4 cup sugar
3 T flour
2 T corn starch
1/4 teaspoon salt
Mix dry ingredients. Fold in berries to coat. Place in deep dish pie crust.
Topping
2/3 cup packed brown sugar
3/4 cup rolled oats
1/2 cup all-purpose flour
1/2 teaspoon ground cinnamon
6 tablespoons butter
In a medium bowl, stir together the brown sugar, oats, flour and cinnamon. Mix in butter using a fork until crumbly. Spread the crumb topping evenly over the pie filling. Bake at 375 for about 40 minutes.
Tuesday, April 27, 2010
Broccoli Pudding?????
Maybe this is a new way to get kids to eat their veggies! They all like pudding, right? So make broccoli pudding! Sounds disgusting? Weeeeellllllll, I have to admit...this is not an American style pudding...it's a traditional British steamed pudding.
Why did I make a British Pudding? It's Daring Baker time!!!! The April 2010 Daring Bakers’ challenge was hosted by Esther of The Lilac Kitchen. She challenged everyone to make a traditional British pudding using, if possible, a very traditional British ingredient: suet. Suet is basically animal fat, the kind found around organs...the kind that if found in humans is VERY unhealthy! I must admit, I didn't use suet. I used a vegetable shortening...which was allowed! There are multiple types of puddings. You can boil or steam a pudding.
We were supposed to steam ours, which I thought sounded better anyway. There is a traditional steaming bowl used in Britain; however, I didn't have this, so I just used a bowl with a rim and placed this in my steamer/pasta drainer thingie. It worked perfectly! Other options are to make a sweet pudding (sticky toffee pudding anyone?) or savory. I did not make a sweet version but many of these end up looking like a cake. The savory versions, however, look like a pot pie! In fact, after seeing someone use chicken, carrots, peas, and a white sauce as a filling I realized that this really reminded me of those frozen chicken pot pies...I LOVED those as a child! Anyway, I decided to go with a broccoli filling. I simply put frozen (yet, not defrosted at all) chopped broccoli inside the suet (shortening) dough along with a couple of eggs for binding and some goat cheese and topped it with the remaining dough. The outcome? Well, at first I thought it wasn't done after 3 hours of steaming.
However, I realized that the exposed part of the dough was just moist from the steam and the dish was really cooked. The crust was perfectly flaky and the inside perfectly cooked! It reminded me of a delicious broccoli quiche but with crust surrounding it. Would I make this again? Probably not...though it was pretty hands off it just cooked for too long. However, I am glad to know about the steaming method of cooking entire dishes. Quite an interesting concept that produces a very tender and (if appropriate for the dish) flaky result. Thanks, Esther, for the great challenge!
Type 1 Puddings — suet crusts.
Pudding Crust for both Savoury Pudding or Sweet Pudding (using suet or a suet substitute):
Ingredients
(250 grams/12 ounces) Self-raising flour (Note* If you cannot find self-raising flour, use a combination of all-purpose flour and baking powder.)
(175 grams/6 ounces) Shredded suet or suet substitute (i.e., Vegetable Suet, Crisco, Lard)
(a pinch) Salt and pepper (Note* If making a savory dish, can be replaced with spices for sweet if wished.)
(210 millilitres/a little less than a cup) Water (Note* You can use a milk or a water and milk mix for a richer pastry.)
1. Mix the flour and suet together.
2. Season the flour and suet mixture with salt and pepper if savory and just a bit of salt and/or spices if sweet.
3. Add the water, a tablespoonful at a time, as you mix the ingredients together. Make up the pastry to firm an elastic dough that leaves the bowl clean. The liquid amounts are only an estimate and most recipes just say water to mix.
4. Don’t over handle the pastry or it will be too hard.
5. Reserve a quarter for the lid and roll out the rest and line a well-greased bowl.
6. At this point add your filling.. a couple of options are give below but have fun and go wild!
7. Roll the final piece of pastry out into a circle big enough to cover the top of the basin, dampen the edges and put in position on the pudding, pinching the edges together to seal.
8. Seal well and cover with a double sheet of foil – pleated in the centre to allow room for expansion while cooking. Secure with string, and place it in a steamer over boiling water.
9. Steam for up to 5 hours, you may need to add more boiling water halfway through or possibly more often. There is a lot of leeway in this steaming time and different recipes give different steaming times. I steamed mine for about 3 hours.
Why did I make a British Pudding? It's Daring Baker time!!!! The April 2010 Daring Bakers’ challenge was hosted by Esther of The Lilac Kitchen. She challenged everyone to make a traditional British pudding using, if possible, a very traditional British ingredient: suet. Suet is basically animal fat, the kind found around organs...the kind that if found in humans is VERY unhealthy! I must admit, I didn't use suet. I used a vegetable shortening...which was allowed! There are multiple types of puddings. You can boil or steam a pudding.
We were supposed to steam ours, which I thought sounded better anyway. There is a traditional steaming bowl used in Britain; however, I didn't have this, so I just used a bowl with a rim and placed this in my steamer/pasta drainer thingie. It worked perfectly! Other options are to make a sweet pudding (sticky toffee pudding anyone?) or savory. I did not make a sweet version but many of these end up looking like a cake. The savory versions, however, look like a pot pie! In fact, after seeing someone use chicken, carrots, peas, and a white sauce as a filling I realized that this really reminded me of those frozen chicken pot pies...I LOVED those as a child! Anyway, I decided to go with a broccoli filling. I simply put frozen (yet, not defrosted at all) chopped broccoli inside the suet (shortening) dough along with a couple of eggs for binding and some goat cheese and topped it with the remaining dough. The outcome? Well, at first I thought it wasn't done after 3 hours of steaming.
However, I realized that the exposed part of the dough was just moist from the steam and the dish was really cooked. The crust was perfectly flaky and the inside perfectly cooked! It reminded me of a delicious broccoli quiche but with crust surrounding it. Would I make this again? Probably not...though it was pretty hands off it just cooked for too long. However, I am glad to know about the steaming method of cooking entire dishes. Quite an interesting concept that produces a very tender and (if appropriate for the dish) flaky result. Thanks, Esther, for the great challenge!
Type 1 Puddings — suet crusts.
Pudding Crust for both Savoury Pudding or Sweet Pudding (using suet or a suet substitute):
Ingredients
(250 grams/12 ounces) Self-raising flour (Note* If you cannot find self-raising flour, use a combination of all-purpose flour and baking powder.)
(175 grams/6 ounces) Shredded suet or suet substitute (i.e., Vegetable Suet, Crisco, Lard)
(a pinch) Salt and pepper (Note* If making a savory dish, can be replaced with spices for sweet if wished.)
(210 millilitres/a little less than a cup) Water (Note* You can use a milk or a water and milk mix for a richer pastry.)
1. Mix the flour and suet together.
2. Season the flour and suet mixture with salt and pepper if savory and just a bit of salt and/or spices if sweet.
3. Add the water, a tablespoonful at a time, as you mix the ingredients together. Make up the pastry to firm an elastic dough that leaves the bowl clean. The liquid amounts are only an estimate and most recipes just say water to mix.
4. Don’t over handle the pastry or it will be too hard.
5. Reserve a quarter for the lid and roll out the rest and line a well-greased bowl.
6. At this point add your filling.. a couple of options are give below but have fun and go wild!
7. Roll the final piece of pastry out into a circle big enough to cover the top of the basin, dampen the edges and put in position on the pudding, pinching the edges together to seal.
8. Seal well and cover with a double sheet of foil – pleated in the centre to allow room for expansion while cooking. Secure with string, and place it in a steamer over boiling water.
9. Steam for up to 5 hours, you may need to add more boiling water halfway through or possibly more often. There is a lot of leeway in this steaming time and different recipes give different steaming times. I steamed mine for about 3 hours.
Friday, April 23, 2010
Cristy's Cookies!
Last month was a busy baking month for me! You see, I was on a Q4 call month and I try to take little treats to work when I'm on call...it just makes those 30 hour shifts a lot better for everyone. In fact, my fellow intern told me that she had been looking forward to working with me that month all year because she knew I brought treats! :-)
One day I saw this recipe on Anna's site and knew I needed to make it...especially since my fellow intern's name is Cristy! She loved that they were "her" cookies. These turned out GREAT! I cooked them a little long, so they were crisper than I like but the flavor was fantastic. I think I'd play around a bit to see if I could make them softer but otherwise, wonderful! A perfect sweet treat!
Small Batch Doubletree Copycats (Like Christie Cookies)
1 cup all purpose flour (4.5 oz)
1/2 teaspoon baking powder
1/2 teaspoon baking soda
4 oz (1 stick) unsalted butter, cold – cut up
1/4 cup granulated sugar
3/4 cup packed light brown sugar
1 egg
1 teaspoon vanilla
1 cup dark chocolate chips
3 oz Bits of Brittle (1/2 cup)
3/4 cups pecans, toasted and chopped
1 1/8 cups oatmeal (quick cooking or old fashioned, ground finely)
Preheat oven to 375 degrees F. Mix flour, baking powder, baking soda and salt, set aside.
Cream butter and sugars in large mixer bowl. Add egg and vanilla and stir until mixed.
Add flour mixture and oatmeal gradually, stirring until incorporated. Stir in Heath Bits, Chocolate Chips, and nuts. Scoop dough up with a quarter cup measure and shape into big balls. Press them slightly to make discs. Set the discs on a plate and chill for a few hours or until firm. Note: You can bake these without chilling, but I liked the texture better after chilling.
Bake for 8-13 minutes. Cookies should still be slightly underdone. Move to wax paper lined counter to cool, do not use wire racks. (Interesting observation from Anna – wire racks made the cookies crispier, cooling on rack helps internal cooking for underdone cookies and probably makes them chewier).
One day I saw this recipe on Anna's site and knew I needed to make it...especially since my fellow intern's name is Cristy! She loved that they were "her" cookies. These turned out GREAT! I cooked them a little long, so they were crisper than I like but the flavor was fantastic. I think I'd play around a bit to see if I could make them softer but otherwise, wonderful! A perfect sweet treat!
Small Batch Doubletree Copycats (Like Christie Cookies)
1 cup all purpose flour (4.5 oz)
1/2 teaspoon baking powder
1/2 teaspoon baking soda
4 oz (1 stick) unsalted butter, cold – cut up
1/4 cup granulated sugar
3/4 cup packed light brown sugar
1 egg
1 teaspoon vanilla
1 cup dark chocolate chips
3 oz Bits of Brittle (1/2 cup)
3/4 cups pecans, toasted and chopped
1 1/8 cups oatmeal (quick cooking or old fashioned, ground finely)
Preheat oven to 375 degrees F. Mix flour, baking powder, baking soda and salt, set aside.
Cream butter and sugars in large mixer bowl. Add egg and vanilla and stir until mixed.
Add flour mixture and oatmeal gradually, stirring until incorporated. Stir in Heath Bits, Chocolate Chips, and nuts. Scoop dough up with a quarter cup measure and shape into big balls. Press them slightly to make discs. Set the discs on a plate and chill for a few hours or until firm. Note: You can bake these without chilling, but I liked the texture better after chilling.
Bake for 8-13 minutes. Cookies should still be slightly underdone. Move to wax paper lined counter to cool, do not use wire racks. (Interesting observation from Anna – wire racks made the cookies crispier, cooling on rack helps internal cooking for underdone cookies and probably makes them chewier).
Labels:
Baking,
chocolate chip cookies,
Cookies,
Desserts,
wok
Sunday, April 18, 2010
Who Lives in a Pineapple Under the Sea?
Well, I do know this answer as I work in a children's hospital! Our department chair even has a SpongeBob tie. However, I would not recommend living in a pineapple, especially under the sea. But I would recommend using them in muffins! I used pineapple in my pie but didn't use the entire can. I bought (I think) a 20 oz. can but only used about 6-10 oz (OBVIOUSLY I didn't measure!) leaving me with a half a can of pineapple to use for something else.
Well, I had promised my co-resident in nursery that I would bring muffins one day, so I set out to make a pineapple muffin. These turned out perfectly if I do say so myself! Not overly sweet but with enough sweetness from the pineapple. I did use some sugar but you MIGHT could get away with not adding any (or a little less) if you used more pineapple and included some juice as pineapple is a sweet fruit on it's own. The texture was so soft, especially in the center! My co-resident really liked them and was quite grateful for the breakfast to go along with his coffee.
Pineapple Muffins
10-14 oz. crushed pineapple, with juice
1/3 cup granulated sugar
1/3 cup canola oil
1 egg (I think I used an egg...can't remember!)
1 2/3 cup self rising flour (I accidentally bougth this the other day and have really loved having it!)
Preheat oven to 350 degrees F. In a bowl mix together pineapple and sugar. Add oil and egg. Stir in flour. Spray a muffin tin with cooking spray. Fill each muffin holder 2/3 full. Bake for 17-20 minutes (once again...I didn't time it...BAD, BAD baker!) or until soft but firm in center and golden but not browned. I got 12-13 muffins. Enjoy!
Well, I had promised my co-resident in nursery that I would bring muffins one day, so I set out to make a pineapple muffin. These turned out perfectly if I do say so myself! Not overly sweet but with enough sweetness from the pineapple. I did use some sugar but you MIGHT could get away with not adding any (or a little less) if you used more pineapple and included some juice as pineapple is a sweet fruit on it's own. The texture was so soft, especially in the center! My co-resident really liked them and was quite grateful for the breakfast to go along with his coffee.
Pineapple Muffins
10-14 oz. crushed pineapple, with juice
1/3 cup granulated sugar
1/3 cup canola oil
1 egg (I think I used an egg...can't remember!)
1 2/3 cup self rising flour (I accidentally bougth this the other day and have really loved having it!)
Preheat oven to 350 degrees F. In a bowl mix together pineapple and sugar. Add oil and egg. Stir in flour. Spray a muffin tin with cooking spray. Fill each muffin holder 2/3 full. Bake for 17-20 minutes (once again...I didn't time it...BAD, BAD baker!) or until soft but firm in center and golden but not browned. I got 12-13 muffins. Enjoy!
Tuesday, April 13, 2010
Summer Pie
his past week my Sunday School class had a get together. I offered to bring a dessert and wanted to take something different and fun. I thought about taking cheesecake simple because I LOVE graham cracker crust! I also thought about taking cupcakes just because they're fun! Then my mom reminded me of a DELICIOUS spring/summer pie.
It is pretty easy, light, delicious, and ALMOST healthy! Another bonus, it makes TWO pies, so this is great for a large group. It is called strawberry, mandarin, pineapple pie. This is a pie that my mom has been making since early in her marriage. The recipe calls for two bakes pie crusts; however, you could probably use a graham cracker crust, though you might want to be careful as it has the potential to get soggy quickly.
The sweetened condensed milk really gives the filling a wonderful sweet taste BUT if you wanted to make the pie less sweet or more healthy you could simply leave that portion out. I hope you are able to enjoy this sometime with your family and friends!
Strawberry, Mandarin, Pineapple Pie
2 baked pie shells 1 carton (1 lb) strawberries, cut into pieces
1 can mandarin oranges (in juice)
1 can crushed pineapple (I'm pretty sure the SMALL can), drained
1 container cool whip (I used sugar free)
1 cup (not the whole can) fat free, sweetened condensed milk
Stir together fruit, cool whip, and milk. Divide mixture between the two pie shells and refrigerate. If you plan on serving the pie the next day, I would suggest making the filling but NOT putting it in the shells until an hour or so until you serve it to prevent the crust from becoming soggy; just store the filling in the refrigerator in a bowl. This could also help keep so extra fluid that may "drain" from the fruit from causing a soupy filling.
It is pretty easy, light, delicious, and ALMOST healthy! Another bonus, it makes TWO pies, so this is great for a large group. It is called strawberry, mandarin, pineapple pie. This is a pie that my mom has been making since early in her marriage. The recipe calls for two bakes pie crusts; however, you could probably use a graham cracker crust, though you might want to be careful as it has the potential to get soggy quickly.
The sweetened condensed milk really gives the filling a wonderful sweet taste BUT if you wanted to make the pie less sweet or more healthy you could simply leave that portion out. I hope you are able to enjoy this sometime with your family and friends!
Strawberry, Mandarin, Pineapple Pie
2 baked pie shells 1 carton (1 lb) strawberries, cut into pieces
1 can mandarin oranges (in juice)
1 can crushed pineapple (I'm pretty sure the SMALL can), drained
1 container cool whip (I used sugar free)
1 cup (not the whole can) fat free, sweetened condensed milk
Stir together fruit, cool whip, and milk. Divide mixture between the two pie shells and refrigerate. If you plan on serving the pie the next day, I would suggest making the filling but NOT putting it in the shells until an hour or so until you serve it to prevent the crust from becoming soggy; just store the filling in the refrigerator in a bowl. This could also help keep so extra fluid that may "drain" from the fruit from causing a soupy filling.
Friday, April 09, 2010
New Stuffed Potatoes
This year for Easter, I went to my friend's house for a late lunch. She had to work that day and my family stayed in TN, so we thought we'd make lunch together. Two days before her mom texted her saying that they were coming. So, we ended up having a larger crowd than expected for lunch.
Sarah made ham (which her little boy LOVED), rolls, and asparagus. Her mom brought chicken and grilled it. I brought pineapple, a blueberry pie (with adapted recipe to come), and stuffed red potatoes. I had tasted a stuffed new potato dish at a Sunday School party and thought it would be a good dish for Easter lunch. Your typical stuffed potato uses LOTS of creamy stuff like mayonaise and/or sour cream along with cheese. OH YUM! But, this is not so good for you...but you can still have delicious potatoes without all this.
Instead of sour cream, I used Greek yogurt. And instead of mixing a lot of cheese into the filling AND putting it on top, I just put a little bit on top when I baked the potatoes. As to seasoning, you can do whatever you like. I used salt, pepper, and thyme but green onion/chives would be great. Additionally, if you wanted to make these more "hearty" you could mix some veggies (broccoli, tomatoes, etc) into the filling. When I made these, the filling was just a bit too crumbly, so I added a squirt or two of Ranch dressing (fat free or lite). They ended up being pretty tasty.
Stuffed Red/New Potatoes
1 bag (about 12-15 potatoes) red potatoes
1 single serving size (6-8oz) container fat free Greek yogurt
salt
pepper
seasoning of choice (rosemary, thyme, chives, parsley, etc)
sharp cheddar cheese (using stronger cheeses enables you to use less and get great taste)
Ranch dressing, buttermilk, or milk (something to help thin the filling a tad)
In a large pot of water, boil the potatoes until fork tender but with enough firmness to hold shape. Drain the water and cut potatoes in half so that they will sit stably on a place. Using a spoon or melon baller (I used a tablespoon) to scoop out the center of the potato halves. Take care when doing this so that the skins will hold their shape and not break apart. In a large bowl, place the potato centers. Mix with yogurt, salt, pepper, herbs, and liquid of choice for making a smooth filling. Place the empties potato halves on a baking sheet. Fill with filling. Top each potato with a small amount (fingertip-full) of cheese. Place in a 350 degree oven for 10-15 minutes or until cheese is melted and edges slightly browned. Enjoy!
Sarah made ham (which her little boy LOVED), rolls, and asparagus. Her mom brought chicken and grilled it. I brought pineapple, a blueberry pie (with adapted recipe to come), and stuffed red potatoes. I had tasted a stuffed new potato dish at a Sunday School party and thought it would be a good dish for Easter lunch. Your typical stuffed potato uses LOTS of creamy stuff like mayonaise and/or sour cream along with cheese. OH YUM! But, this is not so good for you...but you can still have delicious potatoes without all this.
Instead of sour cream, I used Greek yogurt. And instead of mixing a lot of cheese into the filling AND putting it on top, I just put a little bit on top when I baked the potatoes. As to seasoning, you can do whatever you like. I used salt, pepper, and thyme but green onion/chives would be great. Additionally, if you wanted to make these more "hearty" you could mix some veggies (broccoli, tomatoes, etc) into the filling. When I made these, the filling was just a bit too crumbly, so I added a squirt or two of Ranch dressing (fat free or lite). They ended up being pretty tasty.
Stuffed Red/New Potatoes
1 bag (about 12-15 potatoes) red potatoes
1 single serving size (6-8oz) container fat free Greek yogurt
salt
pepper
seasoning of choice (rosemary, thyme, chives, parsley, etc)
sharp cheddar cheese (using stronger cheeses enables you to use less and get great taste)
Ranch dressing, buttermilk, or milk (something to help thin the filling a tad)
In a large pot of water, boil the potatoes until fork tender but with enough firmness to hold shape. Drain the water and cut potatoes in half so that they will sit stably on a place. Using a spoon or melon baller (I used a tablespoon) to scoop out the center of the potato halves. Take care when doing this so that the skins will hold their shape and not break apart. In a large bowl, place the potato centers. Mix with yogurt, salt, pepper, herbs, and liquid of choice for making a smooth filling. Place the empties potato halves on a baking sheet. Fill with filling. Top each potato with a small amount (fingertip-full) of cheese. Place in a 350 degree oven for 10-15 minutes or until cheese is melted and edges slightly browned. Enjoy!
Labels:
friends,
healthy redo's,
Holidays,
Kid-friendly,
quick and easy,
Side Dish
Thursday, April 01, 2010
Bunnies or Turtles?
This weekend is Easter and one of the things associated with this time of the year (for some reason) is the bunny rabbit. Though that is not the reason for Easter, it is fun to play. But why not the turtle? That is a cute, green (spring color) animal, right? Hmmm. A couple of months ago, I found a recipe for turtle cookies at Emily's site.
This produces a crumbly (in a good way...like a sandy) cookie with caramel on them. The only problem I had was that the caramel got REALLY hard after I drizzled it. Now, this could have been because of the caramel I used. Maybe adding some milk to it when I melted it would have helped. I don't know but the cookies were great!
Before I give you the recipe I'd like to share why I celebrate Easter. All of us sin and this keeps us separated from God. No matter how hard we try, we can't be good enough on our own. But God WANTS us to be His! He gave us a way to be with Him. He sent His Son, Jesus, to earth to live among us and live a perfect life. Then despite not sinning Himself, Jesus was sent to the cross to suffer death, the penalty for OUR sin. He sacrificed His life for us, for YOU! That is how much He loves you! His death paid the price for our sin. But three days later, He rose from the dead. He lives! People saw Him. This resurrection gives us righteousness and life forever with God. All you have to do is trust Him, believe that He died for you and trust Him. His death has paid the price for my sin and His resurrection has given me life...and can give the same to you! I think THAT is reason to celebrate! Thank God for His grace and mercy to us!
Turtle Cookies by Emily
1/2 cup unsalted butter
1 3/4 cups all purpose flour
1 teaspoon baking soda
1/2 teaspoon salt
1/2 cup lightly packed brown sugar
1/3 cup granulated sugar
1 large egg
1 teaspoon vanilla extract
1/2 cup mini chocolate chips
1/2 cup finely chopped pecans, toasted
Melted caramel, for drizzling
Melt butter in a small saucepan over medium heat; cook for 3-4 minutes, stirring frequently, until butter browns and starts to foam. Remove from heat to cool.
In a medium mixing bowl, sift together flour, baking soda and salt. In a large mixing bowl, using a mixer on medium speed, beat together melted browned butter, brown sugar and granulated sugar until creamy - about 1-2 minutes. Beat in egg and vanilla until combined. Reduce mixer speed to low and gradually beat in flour until just combined; stir in chocolate chips and pecans until combined. Chill dough in the refrigerator for 30 minutes.
Heat oven to 350 degrees F. Coat cookie sheets with cooking spray.
Roll dough into balls (about 2 teaspoons per ball), place on cookie sheets, and flatten using the palms of your hands. Bake 8 minutes or until set and light golden. Cool on wire racks. Drizzle with melted caramel.
This produces a crumbly (in a good way...like a sandy) cookie with caramel on them. The only problem I had was that the caramel got REALLY hard after I drizzled it. Now, this could have been because of the caramel I used. Maybe adding some milk to it when I melted it would have helped. I don't know but the cookies were great!
Before I give you the recipe I'd like to share why I celebrate Easter. All of us sin and this keeps us separated from God. No matter how hard we try, we can't be good enough on our own. But God WANTS us to be His! He gave us a way to be with Him. He sent His Son, Jesus, to earth to live among us and live a perfect life. Then despite not sinning Himself, Jesus was sent to the cross to suffer death, the penalty for OUR sin. He sacrificed His life for us, for YOU! That is how much He loves you! His death paid the price for our sin. But three days later, He rose from the dead. He lives! People saw Him. This resurrection gives us righteousness and life forever with God. All you have to do is trust Him, believe that He died for you and trust Him. His death has paid the price for my sin and His resurrection has given me life...and can give the same to you! I think THAT is reason to celebrate! Thank God for His grace and mercy to us!
Turtle Cookies by Emily
1/2 cup unsalted butter
1 3/4 cups all purpose flour
1 teaspoon baking soda
1/2 teaspoon salt
1/2 cup lightly packed brown sugar
1/3 cup granulated sugar
1 large egg
1 teaspoon vanilla extract
1/2 cup mini chocolate chips
1/2 cup finely chopped pecans, toasted
Melted caramel, for drizzling
Melt butter in a small saucepan over medium heat; cook for 3-4 minutes, stirring frequently, until butter browns and starts to foam. Remove from heat to cool.
In a medium mixing bowl, sift together flour, baking soda and salt. In a large mixing bowl, using a mixer on medium speed, beat together melted browned butter, brown sugar and granulated sugar until creamy - about 1-2 minutes. Beat in egg and vanilla until combined. Reduce mixer speed to low and gradually beat in flour until just combined; stir in chocolate chips and pecans until combined. Chill dough in the refrigerator for 30 minutes.
Heat oven to 350 degrees F. Coat cookie sheets with cooking spray.
Roll dough into balls (about 2 teaspoons per ball), place on cookie sheets, and flatten using the palms of your hands. Bake 8 minutes or until set and light golden. Cool on wire racks. Drizzle with melted caramel.
Saturday, March 27, 2010
Segments
As a doctor, I become a part of many people's lives. They become a part of mine. This time comes in segments. Some people, I am a part of a very small segment...and only one. Other people, a larger segment...but only one. And other people, small segments...but multiple ones. Some people are a part of multiple segments of my life. One of my best friends went to school with me, works with me, we hang out at eat others' house, and I am her son's doctor: MANY segments!
Other people I went to school with, go to church with, and will work with. Sometimes, however, you have a person who was a part of a large segment of your life but something changes, they don't show up as much. It's like part of the segment is taken away. That can sometimes make for a sticky situation. That's how I felt when I was preparing the oranges for this Daring Baker's challenge...very sticky! However, learning to segment an orange was one of my favorite parts of this challenge...and orange tian. I can honestly say I would have NEVER made this dessert if it hadn't been selected for this month's challenge.
The 2010 March Daring Baker’s challenge was hosted by Jennifer of Chocolate Shavings. She chose Orange Tian as the challenge for this month, a dessert based on a recipe from Alain Ducasse’s Cooking School in Paris. I had kind of mixed thoughts on the final result. First off, I really like pate sablee. It's just such a simple and pleasing component, though I overcooked mine so it was a bit too crumbly! The marmalade was a fun thought. I was really excited about trying this but when put into the final dessert, I was really distracted by it. I felt like the chewiness of the orange was just too much for the dessert. To go through the creaminess of the whipped cream and hit an almost hard orange piece was just not pleasing for me.
The next two problems could have been (were likely) due to mistakes on my part. First the caramel...I misread the instructions and put the liquid in before cooking the sugar. This led to the "caramel" being more of a simple syrup! Oh, well...I still soaked the oranges in it but didn't use it for decoration in the end. Then the whipped cream...well, I got half and half. Yeah, that doesn't whip! :-) So, I had to go back (post-call!) to the store and get the real thing. I didn't use the gelatin though...just used some cream of tartar...and it worked just fine! In the end, I really like the combination of the oranges and whipped cream (did it take anyone else back to summers as a child and eating dreamsicles?) but, sadly, the marmalade ruined it for me. I served this to some friends who I had over for dinner, and they both enjoyed it but I don't think I'd make this again.
However, I am glad that I now know how to segment oranges and did enjoy trying this tian! Thanks for the challenge, Jennifer!
Other people I went to school with, go to church with, and will work with. Sometimes, however, you have a person who was a part of a large segment of your life but something changes, they don't show up as much. It's like part of the segment is taken away. That can sometimes make for a sticky situation. That's how I felt when I was preparing the oranges for this Daring Baker's challenge...very sticky! However, learning to segment an orange was one of my favorite parts of this challenge...and orange tian. I can honestly say I would have NEVER made this dessert if it hadn't been selected for this month's challenge.
The 2010 March Daring Baker’s challenge was hosted by Jennifer of Chocolate Shavings. She chose Orange Tian as the challenge for this month, a dessert based on a recipe from Alain Ducasse’s Cooking School in Paris. I had kind of mixed thoughts on the final result. First off, I really like pate sablee. It's just such a simple and pleasing component, though I overcooked mine so it was a bit too crumbly! The marmalade was a fun thought. I was really excited about trying this but when put into the final dessert, I was really distracted by it. I felt like the chewiness of the orange was just too much for the dessert. To go through the creaminess of the whipped cream and hit an almost hard orange piece was just not pleasing for me.
The next two problems could have been (were likely) due to mistakes on my part. First the caramel...I misread the instructions and put the liquid in before cooking the sugar. This led to the "caramel" being more of a simple syrup! Oh, well...I still soaked the oranges in it but didn't use it for decoration in the end. Then the whipped cream...well, I got half and half. Yeah, that doesn't whip! :-) So, I had to go back (post-call!) to the store and get the real thing. I didn't use the gelatin though...just used some cream of tartar...and it worked just fine! In the end, I really like the combination of the oranges and whipped cream (did it take anyone else back to summers as a child and eating dreamsicles?) but, sadly, the marmalade ruined it for me. I served this to some friends who I had over for dinner, and they both enjoyed it but I don't think I'd make this again.
However, I am glad that I now know how to segment oranges and did enjoy trying this tian! Thanks for the challenge, Jennifer!
Sunday, March 21, 2010
Please Forgive the Photography!
As said in the title, PLEASE, forgive the photography! I forgot my camera and had to use one I was not aquainted with. Do not judge with your eyes...let you tastebuds give it a try!
I made this dish a long time ago and have been waiting to post it, hoping that I'd make it again and could take some better pictures. However, I have not made it again yet (thought I plan to soon...I have all but the feta available) and it is so good, I feel that I need to share this recipe with you!
I found the recipe on one of the first sites I ever visited, Sweetnicks. She has been cooking great dishes for adults and dishes for the kiddos for several years (well, Nick is 7, I think, so gather from that as you may). Anyway, I made this one day when I went to a friend's house to eat. She doesn't like shrimp (go figure!) so we made a small dish for her with chicken. Both versions were delicious! I served it with roasted zucchini and couscous. Delicious and healthy!
Baked Shrimp with Tomatoes and Feta
Recipe courtesy of Ellie Krieger
Remove from the heat. Stir in the parsley, dill, and shrimp and season with salt and pepper. Sprinkle the feta over the top. Bake until the shrimp are cooked through and cheese melts, about 12 minutes.
I made this dish a long time ago and have been waiting to post it, hoping that I'd make it again and could take some better pictures. However, I have not made it again yet (thought I plan to soon...I have all but the feta available) and it is so good, I feel that I need to share this recipe with you!
I found the recipe on one of the first sites I ever visited, Sweetnicks. She has been cooking great dishes for adults and dishes for the kiddos for several years (well, Nick is 7, I think, so gather from that as you may). Anyway, I made this one day when I went to a friend's house to eat. She doesn't like shrimp (go figure!) so we made a small dish for her with chicken. Both versions were delicious! I served it with roasted zucchini and couscous. Delicious and healthy!
Baked Shrimp with Tomatoes and Feta
Recipe courtesy of Ellie Krieger
- 1 tablespoon olive oil
- 1 medium onion, diced (about 1-1/2 cups)
- 2 cloves garlic, minced (about 2 teaspoons)
- 2 (14.5-ounce) cans of no-salt-added diced tomatoes, with their juices (I think we added extra tomatoes)
- 1/4 cup finely minced fresh flat-leaf parsley
- 1 tablespoon finely minced fresh dill (I didn't use this...not a fan of dill)
- 1-1/4 pounds medium shrimp, peeled and deveined
- 1/4 teaspoon salt
- 1/4 teaspoon freshly ground black pepper
- 2/3 cup crumbled feta cheese (about 3 ounces)
Remove from the heat. Stir in the parsley, dill, and shrimp and season with salt and pepper. Sprinkle the feta over the top. Bake until the shrimp are cooked through and cheese melts, about 12 minutes.
Wednesday, March 17, 2010
Making Biscuits
I love breakfast foods. In fact, it is one of my favorite things to have for supper! However, I have yet to find a plain biscuit recipe that is great. For some reason, the frozen Pillsbury biscuits are the best I've found. Even homemade ones aren't that great. That tend to be heavy and flat. Plus, they use so much butter, making them not really the best choice for you health-wise.
However, I found this recipe from Cooking Light and it pleased me! No, it's not as fluffy or buttery as those lovely frozen biscuits. But it is lighter than the typical southern biscuit. Mine came out a bit flatter than those in the CL picture but I think I probably rolled them flatter as well.
So, if you get a hankering for biscuits but that heavy southern biscuit doesn't cut it and you want to keep it light, try this recipe! (There are also some variations at the bottom of the main recipe for pumpkin biscuits and parmesan biscuits)
However, I found this recipe from Cooking Light and it pleased me! No, it's not as fluffy or buttery as those lovely frozen biscuits. But it is lighter than the typical southern biscuit. Mine came out a bit flatter than those in the CL picture but I think I probably rolled them flatter as well.
So, if you get a hankering for biscuits but that heavy southern biscuit doesn't cut it and you want to keep it light, try this recipe! (There are also some variations at the bottom of the main recipe for pumpkin biscuits and parmesan biscuits)
Buttermilk Biscuits
9 ounces all-purpose flour (about 2 cups)
2 1/2 teaspoons baking powder
1/2 teaspoon salt
5 tablespoons chilled butter, cut into small pieces
3/4 cup fat-free buttermilk
3 tablespoons honey
1. Preheat oven to 400°.
2. Weigh or lightly spoon flour into dry measuring cups; level with a knife. Combine flour, baking powder, and salt in a large bowl; cut in butter with a pastry blender or 2 knives until mixture resembles coarse meal. Chill 10 minutes.
3. Combine buttermilk and honey, stirring with a whisk until well blended. Add buttermilk mixture to flour mixture; stir just until moist.
4. Turn dough out onto a lightly floured surface; knead lightly 4 times. Roll dough into a (1/2-inch-thick) 9 x 5–inch rectangle; dust top of dough with flour. Fold dough crosswise into thirds (as if folding a piece of paper to fit into an envelope). Re-roll dough into a (1/2-inch-thick) 9 x 5–inch rectangle; dust top of dough with flour. Fold dough crosswise into thirds; gently roll or pat to a 3/4-inch thickness. Cut dough with a 1 3/4-inch biscuit cutter to form 14 dough rounds. Place dough rounds, 1 inch apart, on a baking sheet lined with parchment paper. Bake at 400° for 12 minutes or until golden. Remove from pan; cool 2 minutes on wire racks. Serve warm.
Spiced Pumpkin Biscuits: Add 1 1/4 teaspoons pumpkin pie spice to flour mixture. Decrease buttermilk to 1/3 cup; add 3/4 cup canned pumpkin to buttermilk mixture. Bake at 400° for 14 minutes. Yield: 14 servings (serving size: 1 biscuit).
Parmesan-Pepper Biscuits: Add 1 teaspoon freshly ground black pepper to flour mixture. Decrease butter to 1/4 cup. Add 1/2 cup (2 ounces) grated fresh Parmesan cheese to buttermilk mixture. Bake at 400° for 13 minutes. Yield: 14 servings (serving size: 1 biscuit).
2. Weigh or lightly spoon flour into dry measuring cups; level with a knife. Combine flour, baking powder, and salt in a large bowl; cut in butter with a pastry blender or 2 knives until mixture resembles coarse meal. Chill 10 minutes.
3. Combine buttermilk and honey, stirring with a whisk until well blended. Add buttermilk mixture to flour mixture; stir just until moist.
4. Turn dough out onto a lightly floured surface; knead lightly 4 times. Roll dough into a (1/2-inch-thick) 9 x 5–inch rectangle; dust top of dough with flour. Fold dough crosswise into thirds (as if folding a piece of paper to fit into an envelope). Re-roll dough into a (1/2-inch-thick) 9 x 5–inch rectangle; dust top of dough with flour. Fold dough crosswise into thirds; gently roll or pat to a 3/4-inch thickness. Cut dough with a 1 3/4-inch biscuit cutter to form 14 dough rounds. Place dough rounds, 1 inch apart, on a baking sheet lined with parchment paper. Bake at 400° for 12 minutes or until golden. Remove from pan; cool 2 minutes on wire racks. Serve warm.
- (Calories:121 (31% from fat) Fat:4.2g Protein:2.4g Carbohydrate:18.4g Fiber:0.5g Cholesterol: 11mg
Spiced Pumpkin Biscuits: Add 1 1/4 teaspoons pumpkin pie spice to flour mixture. Decrease buttermilk to 1/3 cup; add 3/4 cup canned pumpkin to buttermilk mixture. Bake at 400° for 14 minutes. Yield: 14 servings (serving size: 1 biscuit).
Parmesan-Pepper Biscuits: Add 1 teaspoon freshly ground black pepper to flour mixture. Decrease butter to 1/4 cup. Add 1/2 cup (2 ounces) grated fresh Parmesan cheese to buttermilk mixture. Bake at 400° for 13 minutes. Yield: 14 servings (serving size: 1 biscuit).
Nutritional Information
Sunday, March 14, 2010
"Fruity not fatty"
That was the response when I asked my fellow intern what treat she wanted for our next call. Fruity, not fatty. Hmm...actually, I immediately had a recipe in mind! I had seen this recipe a week or two earlier on Emily's blog and knew that at some point I wanted to try it.
I haven't made biscotti in quite a while but they are wonderful little treats. Some versions are very crunchy and do best when enjoyed when eaten with a cup of coffee or tea. Others are soft enough to eat on their own. These fall into the later category. Quite often the softer versions are more of a cookie in ingredient content, having 1/2 cup of butter or oil. These, however, achieved a soft texture without that amount of oil. It only has 3 Tablespoons and I may have used less...I don't know...didn't measure! :-)
When I tasted the dough prior to baking, the rice flour was a bit overwhelming in taste (probably due in part to using BROWN rice flour instead of white rice flour, but it's what I have...and I have decided that I really like rice flour, BTW). So, I added an extra banana. Let me tell you, these biscotti were SO good! Not overwhelmingly banana but you could definitely taste it. I would totally make these again. Oh, and if you have cinnamon chips...they go great in these! Thanks for a fantastic recipe, Emily!
Chocolate Chip Coconut-Banana Biscotti (adapted from Emily at Sugar Plum)
(Gluten-free)
2 cups brown rice flour
1 teaspoon baking powder
1/3 cup granulated sugar
1/2 cup unsweetened flaked coconut
1/2 cup mini chocolate chips and cinnamon chips (a total of 1/2 cup)
2 ripe bananas, mashed
1 large egg
3 tablespoons oil
3/4 teaspoon vanilla extract
Heat oven to 350 degrees F. Coat a large cookie sheet with cooking spray or get baking stone out.
In a medium mixing bowl, whisk together rice flour, baking powder, salt and sugar until well combined; whisk in coconut and chocolate until combined. In a large mixing bowl, whisk together banana, egg, oil and vanilla until well combined; stir dry ingredients into liquid, until well combined and moistened.
Divide dough and shape into two (7 1/2 x 3–inch) logs on cookie sheet. Bake 25 minutes; transfer logs to wire racks to cool an additional 20 minutes.
Transfer to a cutting board and cut rolls diagonally into 1/2-inch thick slices. Place, cut sides down, on baking sheet. Reduce oven temperature to 300 degrees; bake 10 minutes. Turn cookies over; bake an additional 10 minutes (cookies will be slightly soft in center but will harden as they cool). Remove from baking sheet; cool completely on wire racks.
Makes about 2 dozen biscotti (though I'm pretty sure I got about 3 dozen)
I haven't made biscotti in quite a while but they are wonderful little treats. Some versions are very crunchy and do best when enjoyed when eaten with a cup of coffee or tea. Others are soft enough to eat on their own. These fall into the later category. Quite often the softer versions are more of a cookie in ingredient content, having 1/2 cup of butter or oil. These, however, achieved a soft texture without that amount of oil. It only has 3 Tablespoons and I may have used less...I don't know...didn't measure! :-)
When I tasted the dough prior to baking, the rice flour was a bit overwhelming in taste (probably due in part to using BROWN rice flour instead of white rice flour, but it's what I have...and I have decided that I really like rice flour, BTW). So, I added an extra banana. Let me tell you, these biscotti were SO good! Not overwhelmingly banana but you could definitely taste it. I would totally make these again. Oh, and if you have cinnamon chips...they go great in these! Thanks for a fantastic recipe, Emily!
Chocolate Chip Coconut-Banana Biscotti (adapted from Emily at Sugar Plum)
(Gluten-free)
2 cups brown rice flour
1 teaspoon baking powder
1/3 cup granulated sugar
1/2 cup unsweetened flaked coconut
1/2 cup mini chocolate chips and cinnamon chips (a total of 1/2 cup)
2 ripe bananas, mashed
1 large egg
3 tablespoons oil
3/4 teaspoon vanilla extract
Heat oven to 350 degrees F. Coat a large cookie sheet with cooking spray or get baking stone out.
In a medium mixing bowl, whisk together rice flour, baking powder, salt and sugar until well combined; whisk in coconut and chocolate until combined. In a large mixing bowl, whisk together banana, egg, oil and vanilla until well combined; stir dry ingredients into liquid, until well combined and moistened.
Divide dough and shape into two (7 1/2 x 3–inch) logs on cookie sheet. Bake 25 minutes; transfer logs to wire racks to cool an additional 20 minutes.
Transfer to a cutting board and cut rolls diagonally into 1/2-inch thick slices. Place, cut sides down, on baking sheet. Reduce oven temperature to 300 degrees; bake 10 minutes. Turn cookies over; bake an additional 10 minutes (cookies will be slightly soft in center but will harden as they cool). Remove from baking sheet; cool completely on wire racks.
Makes about 2 dozen biscotti (though I'm pretty sure I got about 3 dozen)
Saturday, March 06, 2010
Mediterranean Concoction
Sometimes when you don't have much time, little bits of inspiration are important. One of the challenges of residency is making healthy meals that are quick and will last for several days. One day, inspiration hit!
I have had a box of taboulea sitting in my pantry for a while. I also had some frozen (pre-cooked, pre-shelled, de-veined!) shrimp...all I have to do is thaw! Hmmmm...just need something else. What would I turn to? Only my favorite! Roasted veggies. This turned out to be SOOOO good! The perfect Mediterranean meal!
Shrimp and Veggie Taboulea
1 box taboulea, cooked as directed
2 tomatoes, chopped
1 eggplant, cubed*
1 "bunch" asparagus, cut into 1.5 inch pieces (I thirded mine)*
1 cup shrimp (about 25-30 shrimp)
Roast eggplant and asparagus in oven for 15-20 minutes at 400. In the meantime, cook taboulea as directed. Also, thaw shimp in a bowl of water. In a large bowl, place, cooked taboulea then add veggies, tomato, and shrimp. Stir to combine. Enjoy!!!
*You can use whatever veggies you like or have on hand. It would be good with squashes, peppers, onions, broccoli, etc.
I have had a box of taboulea sitting in my pantry for a while. I also had some frozen (pre-cooked, pre-shelled, de-veined!) shrimp...all I have to do is thaw! Hmmmm...just need something else. What would I turn to? Only my favorite! Roasted veggies. This turned out to be SOOOO good! The perfect Mediterranean meal!
Shrimp and Veggie Taboulea
1 box taboulea, cooked as directed
2 tomatoes, chopped
1 eggplant, cubed*
1 "bunch" asparagus, cut into 1.5 inch pieces (I thirded mine)*
1 cup shrimp (about 25-30 shrimp)
Roast eggplant and asparagus in oven for 15-20 minutes at 400. In the meantime, cook taboulea as directed. Also, thaw shimp in a bowl of water. In a large bowl, place, cooked taboulea then add veggies, tomato, and shrimp. Stir to combine. Enjoy!!!
*You can use whatever veggies you like or have on hand. It would be good with squashes, peppers, onions, broccoli, etc.
Subscribe to:
Posts (Atom)