Long ago.......seriously......17 years ago, I lived far, far away.....seriously........in Bishkek, Kyrgyzstan. When I was in fifth grade, my family went to live in a family's apartment and they came and lived in our house for ten months. My dad taught English and physics (THAT was interesting...teaching physics to students using their second (or third) language!
We also worked with some other Americans with the IMB. While we were there we had MANY opportunities to enjoy the local cuisine. Let me must tell you, if you even go to a Russian or Kyrgyz house for a meal...don't eat anything beforehand! They expect you to eat and likely to seconds...if you don't, "you must be ill!" One house we went to seriously provided a seven course meal!
(This is one of the salads we had....pickled carrots and cucubmers...so good!) Salads, bread, main course 1, main course 2, main course 3, dessert, and tea! We ate for 3-4 hours....though it was all good, it was too much! Since leaving 17 years ago, I haven't had any of this delicious food....until Friday night! We recently discovered that tucked away in Memphis there is a restaurant owned by a Uzbek man (from Kyrgyzstan) that serves many of the dishes we remember. It is called EuroStyle and was, oh, so authentic! We walked in and there was a man sitting at the door with an electric synthesizer and microphone singing with lots of revirb. The floor are wooden and the tables covered in plastic, lace tablecloths (not really as tacky as it sounds). We sat down at the table and there was a table of women sitting next to us, chatting away in Russian. A nearby table was for a birthday party...with a bouquet of flowers in the center of the table (VERY authentic!). We were immediately transported back to Bishkek just by the atmosphere. Then came the food. Oh, goodness! We ordered three dishes to share, but there were others we wanted to try. First we ordered plov.
This is a delicious rice dish with carrots, onion, and lamb. According to recipes I've seen, you should use equal parts carrot, onion, and lamb. Then the rice is cooked on top of all that without stirring. It was great! One thing I liked about this recipe was that it was not nearly as oily as the plov we had in Bishkek. The only thing missing was roasted garlic! You WILL see this dish recreated on my blog in the future! The next dish was laghman, which is apparently the national dish of Kyrgyzstan.
I was SO excited about this. It is basically a vegetable and lamb soup over HOMEMADE noodles. Oh my yum! I'm not big on pasta but these noodles were fantastic! This was the last thing I had, and my mouth loved it....Daddy did too!
(This picture was posed!) Once again....at some point, not promising when, this (or a version of it) will appear on my blog! Finally, the piece de resistance....pelmeini!
Oh goodness. THIS was my reaction to pelmeini....I spontaneously made a silly face and just giggled!
You may think, "oh, but that's just ravioli!" My dear friends, I must beg to differ! There is just something unique about the filling of pelmeini that defines it from any other filled pasta. I don't know what it is but it is delicious! We learned to make this when we were in Bishkek, but never made it at home.
I've got to figure this one out, too. It is served with smitana (sour cream) but we often added salsa to it. SOOO very good. Finally, we ended with blini. This is basically a dessert crepe.
When we were in Bishkek, we would fill them ourselves, usually with honey or raspberry preserves and may dip it in smitana. These were serves already rolled with blueberry filling and whipped cream. The blini itself was very good but I left like they really needed to serve it with honey to make it "authentic" in my eyes. Still delicious! Another offering on the menu that we wanted to try were the varenki (or piroshki....and bread pocket filled with potato, mushrooms, and/or meat). These were street foods in Bishkek and were great. There is another dish called Beshbarmak that we want...and the owner said that if we called him a couple of days before coming, he'd make it for us....but he couldn't use horse like they would in Kyrgyzstan...we're okay with that!!! :-) So, if you live near Memphis and want to try Russian, Central Asian, or European cuisine, we HIGHLY recommend trying out EuroStyle. It is fantastic!!!!
Tuesday, August 24, 2010
Monday, August 16, 2010
Sour or Not?
I had my first call in the PICU last night. As this is the critical care unit for our hospital, it has the potential to be really busy and to have really sick children. I was hoping that, being a Sunday, it wouldn't be too busy! HA! We didn't sit down until 10pm. There were 3 admits, one transfer, and we did a total of seven procedures (I did four of them!). There are several pretty sick kiddos but they stabilized a little bit overnight. The PICU has a potential to be "sour," but I wouldn't call my experience last night sour. We were all busy and tired, which led to some tense moments; but everyone worked together well and the right decisions were made at that point. As to sour food, you would think that something titled "sour" would not be good for use in a sweet treat. However, that is definitely NOT the case!
Sour cream is often used in baked goods to add moisture. This cakes uses it and, quite often, cheesecakes use it as a topping (not my favorite). Well, I found a recipe for sour cream sugar cookies on Anna's site and made them last month. I added some toffee to "dress it up" a bit. They were fantastic. The texture was just perfect and the taste was light and had a faint tang to it (TOTALLY a good thing!). I think this recipe could be used as a base for many types of cookies...so try it out!
Sour Cream Sugar Cookies from Cookie Madness
Sour cream is often used in baked goods to add moisture. This cakes uses it and, quite often, cheesecakes use it as a topping (not my favorite). Well, I found a recipe for sour cream sugar cookies on Anna's site and made them last month. I added some toffee to "dress it up" a bit. They were fantastic. The texture was just perfect and the taste was light and had a faint tang to it (TOTALLY a good thing!). I think this recipe could be used as a base for many types of cookies...so try it out!
Sour Cream Sugar Cookies from Cookie Madness
12 tablespoons unsalted butter, room temperature
2 cups granulated sugar
1 teaspoon vanilla extract
¼ teaspoon almond extract
1 large egg
1/2 teaspoon salt
1 cup room temperature sour cream (I used Greek Yogurt)
3 ¼ cups all purpose flour
1 teaspoon baking soda
1 teaspoon baking powder
Toffee pieces (optional)
Preheat the oven to 350F. In your mixer bowl, cream the butter and sugar for about 3 minutes or until light and fluffy. Scrape sides of bowl often and add in the vanilla and almond extract. After creaming the butter and sugar, add the egg and salt and beat just until mixed. Stir in the sour cream or yogurt.
Stir together the flour, soda, and baking powder in a separate bowl, then add to the batter and stir until mixed.
Scoop batter up by heaping tablespoons and arrange scoops of dough a couple of inches apart on parchment lined cookie sheets. Sprinkle toffee pieces on top of dough, if desired. Bake for 12-15 minutes or until cookies are brown around the edges. Remove from oven and scoop cookies onto a cooling rack to cool. Enjoy!
Thursday, August 12, 2010
Quick and Easy Side
First of all, PLEASE forgive me for the lack of photography skill lately. I've gotten a bit lazy recently but will improve soon...I promise!
As summer comes to an end, you've gotta take advantage of those yummy garden vegetables. A really quick and easy was to do that is to saute. One evening, I was looking for something easy to go along with my delicious salmon (which I baked with Cavender's seasoning...a new favorite!) and had 2-3 small squash and some spinach that was about to be bad. Well, I've found that the best way to use almost bad spinach is to cook it. Cooking it wilts the spinach, which is kind of how it gets on it's own when it's going bad...perfect! So, I just cut the squash in half moons and sauteed them until they were soft. Then I added the spinach along with a little chopped garlic and cooked until wilted.
Served alongside the salmon it was fantastic!
As summer comes to an end, you've gotta take advantage of those yummy garden vegetables. A really quick and easy was to do that is to saute. One evening, I was looking for something easy to go along with my delicious salmon (which I baked with Cavender's seasoning...a new favorite!) and had 2-3 small squash and some spinach that was about to be bad. Well, I've found that the best way to use almost bad spinach is to cook it. Cooking it wilts the spinach, which is kind of how it gets on it's own when it's going bad...perfect! So, I just cut the squash in half moons and sauteed them until they were soft. Then I added the spinach along with a little chopped garlic and cooked until wilted.
Served alongside the salmon it was fantastic!
Monday, August 09, 2010
Mr. and Mrs.
This weekend was a big one for my family. My brother married his "love and best friend" on Saturday. It was a great day of celebration and fun. We are so excited about having Kenna in the family.
Per tradition, my parents hosted a rehearsal dinner on Friday. We spent that afternoon putting together party favor boxes with mints in them and decorating the tables.
Then that evening we had dinner catered from Philip and Kenna's favorite restaurant, Amerigo. We had salad, chicken penne pasta, and duck and sausage bowtie pasta (apparently, it's better with angel hair but they don't use that for catering jobs).
Then we had tiramisu for dessert. It was good...very rich and I thought that the tiramisu here was a bit better.
The next day turned out beautiful and HOT!
However, I think Philip and Kenna are quite happy to be husband and wife.
The bride's cake was strawberry and white. They served this with forks.
What's with that?! The groom's cake was caramel...YUM!!!
They tried to do the fork thing again but I convinced them that they needed to use their fingers. :-)
At the end of the day, they drove off in a pretty cool ride to start off a pretty cool ride in life! Congrats Kenna and Philip! Love you!
Per tradition, my parents hosted a rehearsal dinner on Friday. We spent that afternoon putting together party favor boxes with mints in them and decorating the tables.
Then that evening we had dinner catered from Philip and Kenna's favorite restaurant, Amerigo. We had salad, chicken penne pasta, and duck and sausage bowtie pasta (apparently, it's better with angel hair but they don't use that for catering jobs).
Then we had tiramisu for dessert. It was good...very rich and I thought that the tiramisu here was a bit better.
The next day turned out beautiful and HOT!
However, I think Philip and Kenna are quite happy to be husband and wife.
The bride's cake was strawberry and white. They served this with forks.
What's with that?! The groom's cake was caramel...YUM!!!
They tried to do the fork thing again but I convinced them that they needed to use their fingers. :-)
At the end of the day, they drove off in a pretty cool ride to start off a pretty cool ride in life! Congrats Kenna and Philip! Love you!
Wednesday, August 04, 2010
Cammy's Potatoes
My dad loves baked potatoes, and for years my mom had made them in the microwave. Now, this does provide a very quick and easy way to make baked potatoes. However, several years ago we were introduced to a method of baking (yes, really baking!) potatoes that is excellent. I made these potatoes this weekend at the Lake (which was beautiful!)
with my Sunday School class and everyone really liked them. Basically, you just season the outside of the potatoes...after thoroughly washing, of course! Then wrap in foil and bake in the oven until "sqeezable!" SO good! You don't even need any toppings...somehow, the seasoning sort of seeps into the inside and flavors the entire potato. Yummy AND healthy (a great source of potassium!).
Cammy's Potatoes
baking potatoes
cooking spray
seasoning of your choice (I've used Cavender's and Tony's before)
aluminum foil
Pre-heat oven to 400 degrees F. Scrub potatoes well to remove all dirt.
Spray each potato with cooking spray.
Sprinkle seasoning all over the potato.
Wrap in aluminum foil.
Bake for 1 hour or until potato gives slightly when squeezed (please, us a potholder so you don't burn you hand!). Enjoy!
with my Sunday School class and everyone really liked them. Basically, you just season the outside of the potatoes...after thoroughly washing, of course! Then wrap in foil and bake in the oven until "sqeezable!" SO good! You don't even need any toppings...somehow, the seasoning sort of seeps into the inside and flavors the entire potato. Yummy AND healthy (a great source of potassium!).
Cammy's Potatoes
baking potatoes
cooking spray
seasoning of your choice (I've used Cavender's and Tony's before)
aluminum foil
Pre-heat oven to 400 degrees F. Scrub potatoes well to remove all dirt.
Spray each potato with cooking spray.
Sprinkle seasoning all over the potato.
Wrap in aluminum foil.
Bake for 1 hour or until potato gives slightly when squeezed (please, us a potholder so you don't burn you hand!). Enjoy!
Tuesday, July 27, 2010
Ice Cream Cake
When I was little the most popular birthday cake to have was the ice cream cake from Dairy Queen! It had chocolate ice cream on the bottom with this wonderfully thick and sticky chocolate fudge center with little chocolate crispies, all topped by vanilla ice cream....YUM! The July 2010 Daring Bakers’ challenge was hosted by Sunita of Sunita’s world – life and food. Sunita challenged everyone to make an ice-cream filled Swiss roll that’s then used to make a bombe with hot fudge. Her recipe is based on an ice cream cake recipe from Taste of Home.
When I saw that this was the Daring Baker's challenge, I thought about that cake. Then I remembered how my friend Katie (who JUST got married!) loved that cake. So, I decided to use the opportunity to make the cake for her bachelorette party. The problem....I'm on a Q4 call month and do NOT have a lot of time!
My plan to make the ice cream fell through and I had to "cheat" on the challenge and use store bought ice cream. Sorry! The next failure was the cake...though I followed instructions, the first cake would NOT cook! By the time the center was near bakes the outer edge was crispy. The next cake cooked but left this pretty present after rolling.
Yeah, did not work so well! I worked with what I had, though, and put the cake rolls on top (oops, misread the layering instructions!). This was okay until I had to transport the cake to my friend's house 20 minutes away! By the time I arrived, the ice cream had softened (unbeknownst to me) and the plate was slightly tilted when I put it in the freezer (again...unbeknownst to me).
Sooooo, when I pulled it out to serve, it was even uglier than when I started! All that said, it still tasted great...and I believe that if I had been able to freeze it for longer that chocolate fudge filling would have just like the wonderful Dairy Queen cake!
Thanks for the challenge Sunita! Check out the recipe on her blog.
When I saw that this was the Daring Baker's challenge, I thought about that cake. Then I remembered how my friend Katie (who JUST got married!) loved that cake. So, I decided to use the opportunity to make the cake for her bachelorette party. The problem....I'm on a Q4 call month and do NOT have a lot of time!
My plan to make the ice cream fell through and I had to "cheat" on the challenge and use store bought ice cream. Sorry! The next failure was the cake...though I followed instructions, the first cake would NOT cook! By the time the center was near bakes the outer edge was crispy. The next cake cooked but left this pretty present after rolling.
Yeah, did not work so well! I worked with what I had, though, and put the cake rolls on top (oops, misread the layering instructions!). This was okay until I had to transport the cake to my friend's house 20 minutes away! By the time I arrived, the ice cream had softened (unbeknownst to me) and the plate was slightly tilted when I put it in the freezer (again...unbeknownst to me).
Sooooo, when I pulled it out to serve, it was even uglier than when I started! All that said, it still tasted great...and I believe that if I had been able to freeze it for longer that chocolate fudge filling would have just like the wonderful Dairy Queen cake!
Thanks for the challenge Sunita! Check out the recipe on her blog.
Tuesday, July 20, 2010
A Tale of Two Desserts....in One
I have had this recipe hiding in my photo files for a few month...I couldn't find the recipe I used. Why? Because it was on the bag of flour and I threw it away! So, today, I got some of that flour and now have my recipe. :-) A few months ago I decided to make a decadent treat...cookie dough topped brownies. YUM! The first time I made them, I overcooked the brownies and the did NOT work.
I actually threw the whole batch away. But being the dedicated cookie doc that I am, I made another batch...and they were much better. Notice a difference?
Let me just say, by lunch time, the entire batch was GONE...our lounge devoured them! In fact, my best friend grabbed one early b/c she figured they'd be gone if she didn't. She was right! So, I highly recommend trying these!
Cookie Dough Topped Brownies
Brownie:
12 oz. chocolate chips
1 cup butter/margarine (I used 3/4 cup)
4 eggs (I think I used 3)
2 cups sugar (I reduced by 1/3 cup)
1 teaspoon vanilla
2 cups self-rising flour
Preheat oven to 325 degrees F. Melt chocolate chips and butter together. Beat eggs; then beat in sugar, eggs, and butter mixture. Stir in vanilla. Slowly add flour. Pour into greased 13 X 9 pan and bake for 35 minutes or until beginning to pull away from the edge of the pan. Allow to cool.
Cookie Topping (adapted from Mel's Kitchen Cafe)
1/2 cup (1 stick) butter, softened
1/2 cup brown Sugar
1/4 cup granulated sugar
~1-2 tablespoons milk (adjust for how thick/thin you want the topping
1 teaspoon vanilla extract
3/4 cup all-purpose flour
1 cup semisweet chocolate chips (mini chips would be good for this)
In a small bowl, cream butter and sugars until light and fluffy. Beat in milk and vanilla. Gradually add flour and salt. Stir in chocolate chips.
Once the brownies are cooled, spread the cookie dough topping over the brownies. Cut into squares. Store in the refrigerator.
I actually threw the whole batch away. But being the dedicated cookie doc that I am, I made another batch...and they were much better. Notice a difference?
Let me just say, by lunch time, the entire batch was GONE...our lounge devoured them! In fact, my best friend grabbed one early b/c she figured they'd be gone if she didn't. She was right! So, I highly recommend trying these!
Cookie Dough Topped Brownies
Brownie:
12 oz. chocolate chips
1 cup butter/margarine (I used 3/4 cup)
4 eggs (I think I used 3)
2 cups sugar (I reduced by 1/3 cup)
1 teaspoon vanilla
2 cups self-rising flour
Preheat oven to 325 degrees F. Melt chocolate chips and butter together. Beat eggs; then beat in sugar, eggs, and butter mixture. Stir in vanilla. Slowly add flour. Pour into greased 13 X 9 pan and bake for 35 minutes or until beginning to pull away from the edge of the pan. Allow to cool.
Cookie Topping (adapted from Mel's Kitchen Cafe)
1/2 cup (1 stick) butter, softened
1/2 cup brown Sugar
1/4 cup granulated sugar
~1-2 tablespoons milk (adjust for how thick/thin you want the topping
1 teaspoon vanilla extract
3/4 cup all-purpose flour
1 cup semisweet chocolate chips (mini chips would be good for this)
In a small bowl, cream butter and sugars until light and fluffy. Beat in milk and vanilla. Gradually add flour and salt. Stir in chocolate chips.
Once the brownies are cooled, spread the cookie dough topping over the brownies. Cut into squares. Store in the refrigerator.
Sunday, July 11, 2010
Opa!
Last month when I was in the ER, I had a stint of 6 night shifts in a row followed by 4 more day shifts. All in all, I was working 13/16 days at the end of the month. So, I decided that I needed to prepare some food ahead of time to take with me to work. No way was I going to want to cook after 12 hours of work overnight...not happening. So, I loaded up on fresh veggies and made a summer veggie soup (which I'll tell you about later) and a Greek Barley Salad.
YUM! It turned out delicious! I had seen a couple of versions on some other blogs and decided I should try my hand at it. Originally, I had planned to add some balsamic vinegar to the salad, but when I tasted it there was no need for extra flavor...I suppose the olives brought some of the brine with them and flavored the whole thing on their own. It was simple, easy and OH so yummy! Just add some pita and even hummus and you are ready to take your taste buds on a trip to the Mediterranean!
Greek Barley Salad
1 cup uncooked pearled barley, prepared as instructed on package
2 cucumbers,cubed
3-4 tomatoes,cubed
1/2 red onion, diced
1/3-1/2 cup black olives, chopped
1/3 cup feta cheese
Cavender's seasoning
Cook barley as instructed on package. Meanwhile, cube cucumbers and tomatoes. Dice onion. Combine in a large mixing bowl. When barley is ready, stir it into the prepared vegetables. Season with Cavender's Greek seasoning. Add olives and feta. Enjoy!
YUM! It turned out delicious! I had seen a couple of versions on some other blogs and decided I should try my hand at it. Originally, I had planned to add some balsamic vinegar to the salad, but when I tasted it there was no need for extra flavor...I suppose the olives brought some of the brine with them and flavored the whole thing on their own. It was simple, easy and OH so yummy! Just add some pita and even hummus and you are ready to take your taste buds on a trip to the Mediterranean!
Greek Barley Salad
1 cup uncooked pearled barley, prepared as instructed on package
2 cucumbers,cubed
3-4 tomatoes,cubed
1/2 red onion, diced
1/3-1/2 cup black olives, chopped
1/3 cup feta cheese
Cavender's seasoning
Cook barley as instructed on package. Meanwhile, cube cucumbers and tomatoes. Dice onion. Combine in a large mixing bowl. When barley is ready, stir it into the prepared vegetables. Season with Cavender's Greek seasoning. Add olives and feta. Enjoy!
Sunday, July 04, 2010
It's a Toffee Job, but Somebody's Got to Do It!
I have officially started my second year of residency, which means I am an upper level. I lead the team, have to see all of our patients, and help the interns make decisions about patients overnight (if they need help). I definitely have to get used to is because some of my responsibilities have changed from those I had last year. I have survived the first call, which all in all wasn't too bad, though I think we admitted more than any team over the 4 day stretch. I made some cookies, as per usual, but didn't take a picture. I'm trying to re-create a cookie (that I have never tasted, BTW) for one of my mom's friend. A chocolate and pecan cookie that is "chewy" and has "air pockets" in it...they apparently used to make it at MSU in the 70's but don't anymore! Anyway, I took the first version of this cookie, and though good, I don't think it was "the" cookie. I'll keep trying. Any suggestions on reaching these goals?!
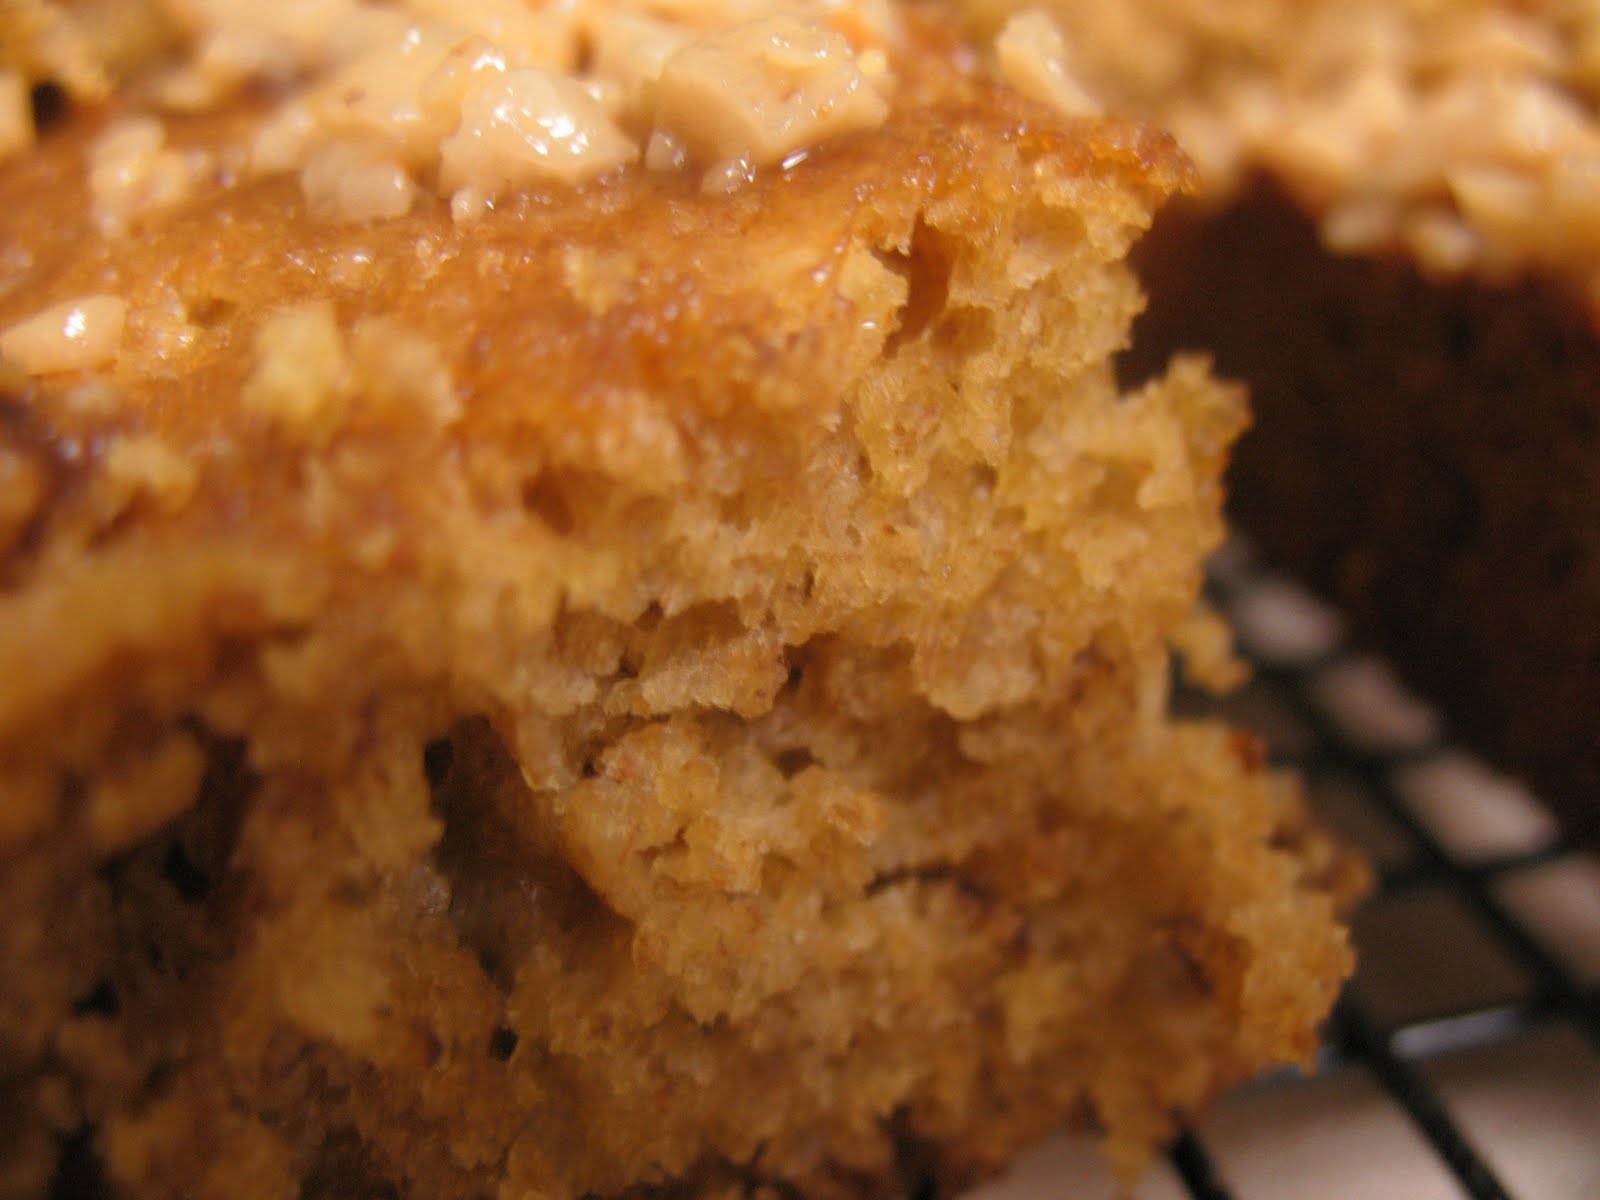
Anyway, I made this snack cake for a call many months ago. The inspiration was a toffee snack cake that Peabody made. I LOVE toffee...and to me, adding banana in with it is just perfect. I've done it before in a nice, light summer pie and the results are great; so why not try in a cake. I had a banana left over and decided to add that to these bars. The results were great. A not too banana flavored cake that remained moist and had a little crunch from the toffee! Yum!
Banana Toffee Cake
1/4 cup unsalted butter, at room temperature (Peabody used 1/2 cup...use that if you like!)
1 ripe banana, mashed
3/4 cup dark brown sugar, packed (I decreased this slightly, maybe even more than noted here, due to the sweetness from the banana)
1 egg
1 tsp vanilla extract
1 ¼ cup self rising flour
¼ cup yogurt
¼ cup buttermilk
1 ½ cups toffee pieces, divided
Preheat oven to 350F.
Spray a 8-x-8-inch pan with baking spray. Set aside.
Using a stand mixer, cream together the butter, banana, and brown sugar on medium speed until light and fluffy, about 3 minutes.
Add the egg and vanilla extract and beat until incorporated.
In a small bowl whisk together the buttermilk and sour cream.
Turn mixer speed to low. Starting with the flour alternate flour and buttermilk mixture ending with flour. Fold in ½ cup toffee pieces.
Pour into prepared pan and bake for 25-30 minutes. Insert a knife or wooden skewer to test for doneness.
Remove from oven. Sprinkle the remaining 1 cup toffee pieces on top.Store in an air tight container. Enjoy!
Anyway, I made this snack cake for a call many months ago. The inspiration was a toffee snack cake that Peabody made. I LOVE toffee...and to me, adding banana in with it is just perfect. I've done it before in a nice, light summer pie and the results are great; so why not try in a cake. I had a banana left over and decided to add that to these bars. The results were great. A not too banana flavored cake that remained moist and had a little crunch from the toffee! Yum!
Banana Toffee Cake
1/4 cup unsalted butter, at room temperature (Peabody used 1/2 cup...use that if you like!)
1 ripe banana, mashed
3/4 cup dark brown sugar, packed (I decreased this slightly, maybe even more than noted here, due to the sweetness from the banana)
1 egg
1 tsp vanilla extract
1 ¼ cup self rising flour
¼ cup yogurt
¼ cup buttermilk
1 ½ cups toffee pieces, divided
Preheat oven to 350F.
Spray a 8-x-8-inch pan with baking spray. Set aside.
Using a stand mixer, cream together the butter, banana, and brown sugar on medium speed until light and fluffy, about 3 minutes.
Add the egg and vanilla extract and beat until incorporated.
In a small bowl whisk together the buttermilk and sour cream.
Turn mixer speed to low. Starting with the flour alternate flour and buttermilk mixture ending with flour. Fold in ½ cup toffee pieces.
Pour into prepared pan and bake for 25-30 minutes. Insert a knife or wooden skewer to test for doneness.
Remove from oven. Sprinkle the remaining 1 cup toffee pieces on top.Store in an air tight container. Enjoy!
Monday, June 28, 2010
Cupcakes and a Return
Can you tell that I've been busy?! Since June 15 I have worked all but 2.5 days. Thus, my absence. At the beginning of June, I started teaching a college girls' Bible study (it's on a weeknight, which I can be at more often than Sunday mornings). I've been wanting to make cupcakes and decided this was the right time to try a fun recipe out!
One of the best cookies, in my opinion, is the snickerdoodle. And it has translated well into other forms...so why not a cupcake? I saw this recipe from Recipe Girl and decided to give it a whirl!
Other than not cooking properly for some reason...seriously, the cupcakes from the same pan all cooked differently...these were great! I have a liking for icing and this one was great. Try them out sometime!
Snickerdoodle Cupcakes (from Recipe Girl) www.RecipeGirl.com
CAKE:
1 1/2 cups all-purpose flour
1 1/2 cups cake flour
1 Tbsp. baking powder
1/2 tsp. salt
1 Tbsp. ground cinnamon
1 cup (2 sticks) unsalted butter, at room temperature (I used Smart Balance)
1 3/4 cups sugar
4 large eggs, at room temperature
2 tsp. vanilla extract
1 1/4 cups milk (I used skim)
ICING:
12 ounces cream cheese, at room temperature (I use 50% 1/3 less fat, and 50% fat free)
1/2 cup unsalted butter, at room temperature
1 pound powdered sugar, sifted
2 Tbsp. brown sugar
1/2 Tbsp. vanilla extract
1 tsp. ground cinnamon
TOPPING:
2 Tbsp. sugar + 1/2 tsp. ground cinnamon
1. Preheat oven to 350 degrees F. Line 28 muffin tins with paper liners. (I made 24 full cupcakes and 24 mini)
2. Sift together both flours, baking powder, salt and cinnamon.
3. Cream together butter and sugar until pale and fluffy. Add eggs, one at a time, beating until each is incorporated. Add vanilla. Add the flour mixture in three parts, alternating with milk, beating until combined after each addition.
4. Divide batter evenly among lined or greased cups, filling each about 3/4 full. Bake 20 minutes (mine were perfect at this point. Remove to a wire rack to cool completely before icing.
5. For Frosting: Blend cream cheese and butter. Add sugars, vanilla and ground cinnamon. Spread onto cooled cupcakes, or scoop into piping bag and pipe on the frosting decoratively. If you don't have a piping bag, you can just use a zip-loc bag and cut the tip out! Place sugar-cinnamon mixture in a fine sieve and sprinkle it lightly over the cupcakes.
Yield: 28 full-sized cupcakes
Recipe Source: cake adapted from Martha Stewart (frosting is from Recipe Girl)
One of the best cookies, in my opinion, is the snickerdoodle. And it has translated well into other forms...so why not a cupcake? I saw this recipe from Recipe Girl and decided to give it a whirl!
Other than not cooking properly for some reason...seriously, the cupcakes from the same pan all cooked differently...these were great! I have a liking for icing and this one was great. Try them out sometime!
Snickerdoodle Cupcakes (from Recipe Girl) www.RecipeGirl.com
CAKE:
1 1/2 cups all-purpose flour
1 1/2 cups cake flour
1 Tbsp. baking powder
1/2 tsp. salt
1 Tbsp. ground cinnamon
1 cup (2 sticks) unsalted butter, at room temperature (I used Smart Balance)
1 3/4 cups sugar
4 large eggs, at room temperature
2 tsp. vanilla extract
1 1/4 cups milk (I used skim)
ICING:
12 ounces cream cheese, at room temperature (I use 50% 1/3 less fat, and 50% fat free)
1/2 cup unsalted butter, at room temperature
1 pound powdered sugar, sifted
2 Tbsp. brown sugar
1/2 Tbsp. vanilla extract
1 tsp. ground cinnamon
TOPPING:
2 Tbsp. sugar + 1/2 tsp. ground cinnamon
1. Preheat oven to 350 degrees F. Line 28 muffin tins with paper liners. (I made 24 full cupcakes and 24 mini)
2. Sift together both flours, baking powder, salt and cinnamon.
3. Cream together butter and sugar until pale and fluffy. Add eggs, one at a time, beating until each is incorporated. Add vanilla. Add the flour mixture in three parts, alternating with milk, beating until combined after each addition.
4. Divide batter evenly among lined or greased cups, filling each about 3/4 full. Bake 20 minutes (mine were perfect at this point. Remove to a wire rack to cool completely before icing.
5. For Frosting: Blend cream cheese and butter. Add sugars, vanilla and ground cinnamon. Spread onto cooled cupcakes, or scoop into piping bag and pipe on the frosting decoratively. If you don't have a piping bag, you can just use a zip-loc bag and cut the tip out! Place sugar-cinnamon mixture in a fine sieve and sprinkle it lightly over the cupcakes.
Yield: 28 full-sized cupcakes
Recipe Source: cake adapted from Martha Stewart (frosting is from Recipe Girl)
Thursday, June 17, 2010
When You Feel Scrambled Have Some Eggs
When we arrived back from our trip to help my brother move a few weeks ago, I didn't have much to offer in my kitchen. When that happens, one of the best options...in my opinion...is eggs. I haven't made scrambled eggs in ages because I usually do omelets so that I can add some yummy veggies to my dinner.
So, before I fixed my omelet, I made my parents some scrambled eggs...cheesy at Daddy's request! Alongside we had tomato basil bread from Panera (perfect when toasted!) and fresh peaches. It is such a simple dinner and is healthy. You could surely add some chopped veggies if you wanted. I may have to try that sometime.
Scrambled Eggs (serves 2)
3 eggs
milk
salt
pepper
cheese
In a bowl, crack your eggs. Pour the mik into the bowl until the milk swirls around the yolks. The sprinkle each yolk with salt and pepper. This really puts the right amount of seasoning in there. With a fork, whisk the eggs until the yolks are broken and well mixed. You should have a mixture that is a pretty yellow color. Then sprinkle cheese on top of the mixture. Lightly whisk. Meanwhile, heat a skillet on the stove to medium heat. Spray with cooking spray. pour the egg mixture into the skillet. Let it sit for a minute. Then take a plastic spatula (metal will scratch and ruin your pan!) and push from the edge to the middle.
This is what makes your scrambled eggs scrambled and not an omelet! Don't worry if it looks soupy...be patient. It will soon look just firm enough.
Be careful not to overcook, the eggs can easily get rubbery. Enjoy!
So, before I fixed my omelet, I made my parents some scrambled eggs...cheesy at Daddy's request! Alongside we had tomato basil bread from Panera (perfect when toasted!) and fresh peaches. It is such a simple dinner and is healthy. You could surely add some chopped veggies if you wanted. I may have to try that sometime.
Scrambled Eggs (serves 2)
3 eggs
milk
salt
pepper
cheese
In a bowl, crack your eggs. Pour the mik into the bowl until the milk swirls around the yolks. The sprinkle each yolk with salt and pepper. This really puts the right amount of seasoning in there. With a fork, whisk the eggs until the yolks are broken and well mixed. You should have a mixture that is a pretty yellow color. Then sprinkle cheese on top of the mixture. Lightly whisk. Meanwhile, heat a skillet on the stove to medium heat. Spray with cooking spray. pour the egg mixture into the skillet. Let it sit for a minute. Then take a plastic spatula (metal will scratch and ruin your pan!) and push from the edge to the middle.
This is what makes your scrambled eggs scrambled and not an omelet! Don't worry if it looks soupy...be patient. It will soon look just firm enough.
Be careful not to overcook, the eggs can easily get rubbery. Enjoy!
Friday, June 11, 2010
Whole Wheat Wonderful
Sometimes I like to try and substitute whole wheat flour for regular AP flour in my baking.
This can be difficult to do because a lot of the stone ground flour is thicker and sometimes lends a flavor that doesn't work well for most cakes and cookies. However, several months ago I won the King Arthur Whole Grain Baking Cookbook. I have been really wanting to try a recipe in it, and finally tried a recipe a month or so ago. I did the whole wheat oatmeal cookies.
I made some adjustments to the recipe because I didn't have all the ingredients, but they turned out GREAT! Can't wait to try more recipes from this cookbook! Maybe soon...I just got a Krups waffle maker at a thrift store for $6...looked it up and it's $52 online!
Chewy Oatmeal Cookies
3/4 cup unsalted butter (I'm LOVING the Smart Balance mix these days!)
1 1/4 cups packed brown sugar
3/4 teaspoon baking soda
1/2 teaspoon baking powder
2 teaspoons cinnamon
1/2 teaspoon ground ginger
1/4 teaspoon nutmeg
1 Tablespoon vanilla
1 egg
1 1/3 cups oats
1 1/4 cups whole wheat flour (called for traditional...I used white whole wheat, it's not as strong)
1 cup chopped nuts (optional)
2 cups of your choice of add ins...dried fruit, chips, candies, etc
Preheat to 350 F. Cream butter, sugar, soda, powder, salt, spices, and vanilla together. Beat in the gg. Add the flour, oats, and add-ins. Stir until mixed. Place dough on pans. Bake for 14 minutes or until slightly brown on the edges and soft in the middle. Remove from oven and transfer to a cooling rack.
This can be difficult to do because a lot of the stone ground flour is thicker and sometimes lends a flavor that doesn't work well for most cakes and cookies. However, several months ago I won the King Arthur Whole Grain Baking Cookbook. I have been really wanting to try a recipe in it, and finally tried a recipe a month or so ago. I did the whole wheat oatmeal cookies.
I made some adjustments to the recipe because I didn't have all the ingredients, but they turned out GREAT! Can't wait to try more recipes from this cookbook! Maybe soon...I just got a Krups waffle maker at a thrift store for $6...looked it up and it's $52 online!
Chewy Oatmeal Cookies
3/4 cup unsalted butter (I'm LOVING the Smart Balance mix these days!)
1 1/4 cups packed brown sugar
3/4 teaspoon baking soda
1/2 teaspoon baking powder
2 teaspoons cinnamon
1/2 teaspoon ground ginger
1/4 teaspoon nutmeg
1 Tablespoon vanilla
1 egg
1 1/3 cups oats
1 1/4 cups whole wheat flour (called for traditional...I used white whole wheat, it's not as strong)
1 cup chopped nuts (optional)
2 cups of your choice of add ins...dried fruit, chips, candies, etc
Preheat to 350 F. Cream butter, sugar, soda, powder, salt, spices, and vanilla together. Beat in the gg. Add the flour, oats, and add-ins. Stir until mixed. Place dough on pans. Bake for 14 minutes or until slightly brown on the edges and soft in the middle. Remove from oven and transfer to a cooling rack.
Subscribe to:
Posts (Atom)