In 1993-1994, my family and I lived in Bishkek, Kyrgyzstan. We traded living places with a local family...we went to their two bedroom apartment and they took our house...I slept on the couch the whole year. Anyway, my dad was the supervisor for 3 college students from MC. They did have local families take care of them; however, they spend a lot of time at our apartment. We spent a lot of time playing cards...a LOT. We also ate together a good bit. One of our favorite things to get was ekmek.
Daddy would get two loaves on his was home from university. When he got home, they would still be warm...and the attack would begin, especially with the college students there! Basim, the lone male, would probably eat half a loaf alone! Toppings included butter, homemade raspberry jam, nutella, and even Milky Way topping. Soooo good! Why do I tell you all of this? The February challenge for Daring Bakers was to make Julia Child's French bread. When I tasted the bread, fresh out of the oven (no, I did NOT wait the two hours you were supposed to wait) I went on a time machine journey back to Bishkek! It tasted so much like Ekmek!
I don't really know how to rate this recipe. First of all, it takes just about all day to make...this is why I made it the FIRST Saturday it was available, a first! Next, the bread really doesn't hold for many days. For a large gathering, it would be great. For just a few people, it might not be worth it...even though we ate all of it and enjoyed it. Oh...just a thought...once this bread sits for a few days, it would be a GREAT soup sopper....kind of crusty and soaks up liquid just deliciously! So, maybe it's not so bad for just a few people.
Thanks to Mary at The Sour Dough & Sara at I Like to Cook for this wonderful challenge. Once again, a recipe that I wouldn't have done had I not been part of this group! Check out the other great posts here. Because this is such a long recipe, I'm not posting it here. If you'd like it, check out Sara's posting here.
Friday, February 29, 2008
Tuesday, February 26, 2008
Still a Perfect 10!!!
I was on call today and we got 10 patients (the most we can get) in only two hours...so I was there later than I expected. Anyway, I don't know if this will get to Cate in time, but it's my entry for her ARF Tuesday at Sweetnicks. Last week, before I caught a stomach bug from one of my patients, I made this delicious chicken dish that I found in our local newspaper. Each week, the food section has a celebrity interview and gives one of the celebrity's favorite recipes. Two weeks ago, the person was Mary Lou Retton. I figure that since she's a former gymnast and proponent for healthy lifestyle, this would be nice and healthy...and with these black beans, it's great for antioxidants and fiber!
The chicken turned out SOOOO tender! If you have about an hour to wait but not much time for hands on time, this is perfect. Serve with rice and a salad, maybe even some cornbread, and you have a yummy, healthy, and festive Mexican meal!
Mary Lou's family favorite "Perfect 10" Southwest Chicken
3-4 chicken boneless, skinless breasts (I used chicken tenders)
1 can black beans, drained
1 can corn, drained
1 medium jar picante sauce
1 tablespoon chili powder
1 tablespoon paprika
1 tablespoon garlic salt
Pepper to taste
1 cup grated cheddar cheese (I used Kraft fat free...it's actually pretty good!)
Pam spray
Preheat oven to 400 degrees. Place chicken on bottom of Pam-sprayed Dutch oven. Sprinkle with chili powder, paprika, garlic salt and pepper. Mix black beans, corn and picante sauce and pour over chicken. Bake at 400 degrees for 40 minutes. Remove from oven and top with cheese. Bake an additional 10 minutes.
3-4 chicken boneless, skinless breasts (I used chicken tenders)
1 can black beans, drained
1 can corn, drained
1 medium jar picante sauce
1 tablespoon chili powder
1 tablespoon paprika
1 tablespoon garlic salt
Pepper to taste
1 cup grated cheddar cheese (I used Kraft fat free...it's actually pretty good!)
Pam spray
Preheat oven to 400 degrees. Place chicken on bottom of Pam-sprayed Dutch oven. Sprinkle with chili powder, paprika, garlic salt and pepper. Mix black beans, corn and picante sauce and pour over chicken. Bake at 400 degrees for 40 minutes. Remove from oven and top with cheese. Bake an additional 10 minutes.
Sunday, February 24, 2008
Happy...errrr...Valentine's Day?
Just a couple of weeks late, huh? My VA medicine team was on call on Valentine's Day* (great fun, huh?), so I decided to make some cookies to take in. Though I have found a couple of recipes that I do like, I'm always curious to see what new recipes taste like. The recipe I used this time is from a cookbook I received in a little contest at Cathy's site. She just recently went through the entire book and I could never find it in the bookstores. Now I have it! Thanks Kathy! The book is Maida Heatters Book of Great Cookies. I haven't had a chance to make any other recipes, but there are many that look wonderful.
ANYWAY, back to the sugar cookies. I'm pretty picky about my sugar cookies. I don't like them thin and crispy but a little bite around the edges is good. These had a great texture. As to taste, I thought they were a little bland. Don't really know what needs to be added, but if you are putting icing on them anyway, it doesn't matter that much! I decided to just take the plain cookies, a spray can of icing, and a selection of sprinkles to our team room. They turned out to be a hit! One of our interns wasn't feeling good that day and the "blandness" was good for him. The other intern had fun sweetening her cookies.
And Sarah? Well, let's just say she's got some sweet lips!
Plain Old-Fashioned Sugar Cookies
3 1/4 cups AP flour (sifted)
2 1/2 teaspoons baking powder
1/2 teaspoon salt
1 1/2 sticks butter
1 1/2 teaspoons vanilla extract
1 1/2 cups sugar
2 eggs
1 tablespoon milk
Sift dry ingredients together. In a mixer, cream the butter. Add the vanilla and sugar to this and beat well. One at a time, add the eggs and then the milk. On low, add the dry ingredients, scraping bowl as needed. Divide the dough and wrap each half in wax paper or cling wrap then in aluminum foil and refrigerate for at least 3 hours or longer (I did it overnight).
When ready, preheat the oven to 400 degress F. Place one piece of dough on a lightly floured pastry cloth (I used waxed paper and it worked fine). Roll out the dough to 1/4 inch thickness using a floured rolling pin (or one of those awesome marble pins...I so want one!). Using the cookie cutters of your choice, cut out the cookies. Keep rolling and cutting until all of the dough is used. Transfer the cookies to a cookie sheet and bake for 10-12 minutes or until slightly browned. Decorate as desired!
*Sorry for the poor picture quality...call does not lend to good pictures and all the cookies got eaten. Was not expecting that!
3 1/4 cups AP flour (sifted)
2 1/2 teaspoons baking powder
1/2 teaspoon salt
1 1/2 sticks butter
1 1/2 teaspoons vanilla extract
1 1/2 cups sugar
2 eggs
1 tablespoon milk
Sift dry ingredients together. In a mixer, cream the butter. Add the vanilla and sugar to this and beat well. One at a time, add the eggs and then the milk. On low, add the dry ingredients, scraping bowl as needed. Divide the dough and wrap each half in wax paper or cling wrap then in aluminum foil and refrigerate for at least 3 hours or longer (I did it overnight).
When ready, preheat the oven to 400 degress F. Place one piece of dough on a lightly floured pastry cloth (I used waxed paper and it worked fine). Roll out the dough to 1/4 inch thickness using a floured rolling pin (or one of those awesome marble pins...I so want one!). Using the cookie cutters of your choice, cut out the cookies. Keep rolling and cutting until all of the dough is used. Transfer the cookies to a cookie sheet and bake for 10-12 minutes or until slightly browned. Decorate as desired!
*Sorry for the poor picture quality...call does not lend to good pictures and all the cookies got eaten. Was not expecting that!
Tuesday, February 19, 2008
All Wrapped Up!
Last week our dear Cate over at Sweetnick's made a surprise announcement...she just welcomed a new member to the family, her precious little Madeline Olivia! That is why we took a break from ARF Tuesday. However, Cate is super-mom and is already back at it. In honor of her being "all wrapped up" with her new bundle of joy, who apparently has her brother, and I'm sure Daddy, wrapped around her little finger already, my entry for ARF is chicken breasts wrapped around spinach and goat cheese!
I just kind of threw this together one day and it was pretty good. The only thing I need to work on is the exact timing of the cooking and the seasoning. This is a pretty quick and versatile meal. Stuff the thinned chicken breasts with whatever you want and cook away. It's also easy to make for just a few people! Later in the week, I cut these up and served them on top of a salad. Great leftovers! So, for all you busy moms and dads, or even those of you who are just busy...give these a try and stop by Cate's to see the other great recipes AND her new family member!
Spinach and Goat Cheese Stuffed Chicken Breasts
as many chicken breasts as you want, pounded to 1/4 inch thick
spinach
goat cheese
salt and pepper
Preheat oven to 350 degrees F. After you pound the chicken (which is done well between some cling wrap with either a meat pounder thingy or even a rolling pin - my tool of choice!) place several leaves of spinach and a little goat cheese inside. Then roll the chicken fajita style. Place the seal on the bottom of the pan. Cook for around 20 minutes or until chicken is cooked through. Enjoy! I served with salsa!
Tuesday, February 12, 2008
"Bran"d New Muffins and Blog
First, a quick update. Last Tuesday, the tornado that hit Union University destroyed many dorms and damaged others. Through the past week there has been much clean-up going on. Rooms were "bagged and tagged," arrangements for student housing has been made, and classes have been rearranged. On Monday classes will start again...there's already been a basketball game! Of all the students involved, none passed away and only 5 remain in the hospital, with serious but non-life threatening injuries! What a great God we serve! He is Sovereign and full of mercy towards us! Now a yummy and healthy muffin.
A few weeks ago, I found a new site called A Cookie a Day. There are so many good looking recipes on there...lemon and caper tilapia, lasagna rolls, lentil soup...but what caught my eye that day were some fantastic looking muffins. Add to that that they were healthy, a winner! On top of the changes already made, I made a few of my own changes. I decided to remove 1/2 cup of flour and replace it with 1/2 cup wheat bran. I also only used 1/4 cup margarine instead of 5 T. And because I ran out, I used about 3/4 cups of brown sugar; I think it could even be decreased to 1/2 cup.
Even with the small amount of fat in these muffins, there were SO tender. The spices give them a fantastic flavor and they just smelled fantastic. I am definitely making these again! Here is the original recipe...if you want something healthy and fantastic for breakfast or even a snack, try these muffins. 
1 cup all-purpose flour
1/2 cup wheat bran
1 1/2 teaspoons baking powder
1/2 teaspoon baking soda
1 teaspoon cinnamon
1/2 teaspoon ground allspice
1/4 teaspoon freshly grated nutmeg
1/4 teaspoon salt
1 large egg
3/4 cup packed light brown sugar
1/2 cup (4 T) margarine, melted
1 cup unsweetened applesauce
1 cup pecans or walnuts (3 1/2 oz), coarsely chopped
Put oven rack in middle position and preheat oven to 400°F. Grease muffin pan.
Stir together flour, baking powder, baking soda, spices, and salt in a bowl. Whisk together eggs and brown sugar in a large bowl until combined well, then add butter, a little at a time, whisking until mixture is creamy. Stir in applesauce, then fold in flour mixture until flour is just moistened. Stir in nuts and divide batter among muffin cups
Wednesday, February 06, 2008
Unfortunately...not a food post
As most of you know, I'm sure, last night there was some really bad weather in the South. One of the hardest hit areas was Jackson, TN, where my parents live. They are fine and didn't have any damage, but the college where my dad teaches, Union University, was directly hit. Looking at pictures you would think it was a war zone. Cars are flipped and re-parked, almost every building has damage, and two dorms, one each women's and men's, are completely destroyed. At this point, the college has not place to house the students.
However, this is a complete example of God's hand in everything! Even with all that destruction...there were no deaths! About 20 students were trapped in the debris but no one has major/life-threatening injuries. He is comepletely sovereign in all things. He is Jehovah Jireh - our Lord who provides - and will provide for these students and the university. He is Jehovah Shammah - the Lord who is with us - and never leaves. Praise God for His goodness! Please pray for the University and the students and faculty as decisions are made and things cleaned and repaired.
However, this is a complete example of God's hand in everything! Even with all that destruction...there were no deaths! About 20 students were trapped in the debris but no one has major/life-threatening injuries. He is comepletely sovereign in all things. He is Jehovah Jireh - our Lord who provides - and will provide for these students and the university. He is Jehovah Shammah - the Lord who is with us - and never leaves. Praise God for His goodness! Please pray for the University and the students and faculty as decisions are made and things cleaned and repaired.Tuesday, February 05, 2008
College Dinner for ARF
I spend a lot of time talking about the foods I make for my brother. WELL, this weekend his girlfriend went to visit and he made Friday night supper for her and some friends (fried catfish, hushpuppies, and fried) and then made Sunday dinner. I was super impressed. He even sent me pictures. Who knew!? What did he make?
Roast with veggies and rolls!!! Wow, Philip! So, I told him that I would post this on here if he told me what he did. Do you like easy, chop and bake recipes? If so, this is for you! Because of the great carrots, onions, and even potatoes, this is my entry to Sweetnicks ARF Tuesday. Check by there for other great recipes! Philip...here you go!
Philip's Sunday Roast
1 chuck pot roast (unsure of weight)
red potatoes
baby carrots
red onions
mushrooms (optional)
McCormick pot roast seasoning with an oven bag- an all in one deal
Chop the onions and potatoes and put all ingredients into the oven bag. Cook for 3 hours at 350 or as according to directions. As Philip says, "It doesn't have to cook for that long but it just makes it really tender if you do!" :-)
1 chuck pot roast (unsure of weight)
red potatoes
baby carrots
red onions
mushrooms (optional)
McCormick pot roast seasoning with an oven bag- an all in one deal
Chop the onions and potatoes and put all ingredients into the oven bag. Cook for 3 hours at 350 or as according to directions. As Philip says, "It doesn't have to cook for that long but it just makes it really tender if you do!" :-)
Sunday, February 03, 2008
Chocolate for your Valentine...Even when You're in a Pinch for Time!
It seems that chocolate is the going post topic these days! I'm not entering the contest so many people are but...many moons ago (i.e., around Christmas!), my mom printed off a recipe she wanted to try. What was this recipe? None other than Rachael Ray's Five-Minute Fudge. I had seen her prepare in on Oprah (which I think is where Mama had seen it as well) and thought that it would be a fun recipe to try. We didn't do too much adding to it and did not do the lovely wreath that Rachael does, but this fudge turned out okay.
Really, my only "problem" with it was that the butterscotch morsels didn't melt! I don't know if they have a higher melting temp than the chocolate or what, but I think we were in a rush to go somewhere, so I didn't have time to wait! As I've mentioned several times here before, my dear brother does not like nuts in his foods. Thus, being the wonderful sister that I am, I constructed a cute little double-sided aluminum foil pan to make some fudge without nuts just for him.
How grateful was he? He didn't even eat more than one piece of the fudge!!! Oh, well. I think the unmelted butterscotch threw him off, as they did look like little peanuts! All in all, this was a pretty good recipe, but it doesn't hold a candle to Dr. McMath (who DOES teach math at Mississippi College!) fudge, does it Daddy? We STILL need to get that recipe, so I can make it! If you have a Valentine who likes chocolate, this would be an easy treat to make for them next week. If they prefer white chocolate, I think that a white chocolate, pistachio, cranberry fudge would be delicious!
Add chips and milk and stir until chips are melted and milk combined. Stir in vanilla and remove fudge from heat.
Add nuts and stir in immediately. Spoon fudge into pan and make smooth.
The fudge will set up almost immediately. Chill covered in the refrigerator and slice fudge into SMALL squares when ready to serve, a little goes a long way.
Five Minute Fudge (adapted from Rachael Ray)
1 (12-ounce) bag semisweet chocolate morsels
9 ounces (3/4 of a 12-ounce bag) butterscotch morsels
1 (14-ounce) can sweetened condensed milk
1 teaspoon vanilla extract
1 cup chopped pecans
8X8 cake pan, lightly greased with softened butter
Place a heavy pot on the stove and preheat it over low heat.
The fudge will set up almost immediately. Chill covered in the refrigerator and slice fudge into SMALL squares when ready to serve, a little goes a long way.
Tuesday, January 29, 2008
Chicken and Asparagus
I know that I've mentioned my Adopt-a-Blogger friend over at Other People's Food, but I don't think I've done a recipe from her yet. Well, this recipe is one I had picked out to try even before we were paired up by Kristen. It's a chicken and asparagus dish. Really yummy looking and very healthy.
Last week, I pulled out some chicken from the freezer and got ready to make the dish. I cheated a bit and used canned asparagus. :-) I just love asparagus, especially fresh; but right now it's just too expensive to do that. This is a really easy dish to shrink and make for only a few...just cook less chicken. If you have extra sauce, no biggie! The other changes I made were to use sherry as I don't have wine and to use Australian cheddar instead of Gruyere. The was a delicious dish that I'd love to make again. It made a great salad a couple of days later, too. Because of the healthy asparagus and the chicken, this is my entry to Sweetnick's ARF Tuesday. For the original recipe, click here. I've noted by changes.
Chicken & Asparagus with Melted Gruyere
Eating Well Magazine, June 2007
1 can asparagus
2/3 C reduced-sodium chicken broth
2 Tsps all-purpose flour
2 boneless, skinless chicken breasts ,trimmed
¼ Tsp. salt
½ Tsp. freshly ground pepper
1 Tbsp. canola oil
½ C sherry
1/3 C yogurt
1 Tbsp. chopped fresh tarragon
2 Tsps lemon juice
2/3 C shredded Australian cheddar cheese and mozarella cheese
Whisk broth and 2 teaspoons flour in a small bowl until smooth. Set aside. Sprinkle chicken with salt and pepper. Heat oil in a large skillet over medium heat. Add the chicken and cook until golden brown, 3 to 4 minutes per side (it took me about double the time), adjusting heat as needed to prevent scorching. Transfer to a plate and cover to keep warm.
Add wine and the reserved broth mixture to the pan; cook over medium heat, stirring, until thickened, about 2 minutes. Reduce heat to medium-low; stir in yogurt, tarragon, and lemon juice until combined. Return the chicken to the pan and turn to coat with the sauce. Sprinkle cheese on top of each piece of chicken, cover and continue cooking until the cheese is melted, about 2 minutes. Serve with asparagus on top or in the sauce. Serve over rice or couscous.
Monday, January 28, 2008
Pie in the Sky
It's Daring Baker time again! I was pretty excited when I saw the challenge this month. It's something that I've never made the "real" thing; I also thought, "Too bad Daddy doesn't live near me anymore...he love this dessert." What is it...this challenge this month was lemon meringue pie! Makes one 10-inch (25 cm) pie
For the Crust:
3/4 cup (180 mL) cold butter, cut into ½-inch (1.2 cm)
2 cups (475 mL) all-purpose flour
1/4 cup (60 mL) granulated sugar
1/4 tsp (1.2 mL) salt
1/3 cup (80 mL) ice water
To Make the Crust:
Make sure all ingredients are as cold as possible. Using a food processor or pastry cutter and a large bowl, combine the butter, flour, sugar and salt. Process or cut in until the mixture resembles coarse meal and begins to clump together. Sprinkle with water, let rest 30 seconds and then either process very briefly or cut in with about 15 strokes of the pastry cutter, just until the dough begins to stick together and come away from the sides of the bowl.
Turn onto a lightly floured work surface and press together to form a disk. Wrap in plastic and chill for at least 20 minutes.Allow the dough to warm slightly to room temperature if it is too hard to roll. On a lightly floured board (or countertop) roll the disk to a thickness of 1/8 inch (.3 cm). Cut a circle about 2 inches (5 cm) larger than the pie plate and transfer the pastry into the plate by folding it in half or by rolling it onto the rolling pin. Turn the pastry under, leaving an edge that hangs over the plate about 1/2 inch (1.2 cm). Flute decoratively. Chill for 30 minutes.
Preheat oven to 350ºF (180ºC). Line the crust with foil and fill with metal pie weights or dried beans. Bake for 20 to 25 minutes. Carefully remove the foil and continue baking for 10 to 15 minutes, until golden. Cool completely before filling.
For the Filling:
2 cups (475 mL) water
1 cup (240 mL) granulated sugar
1/2 cup (120 mL) cornstarch
5 egg yolks, beaten (save the whites for meringue)
1/4 cup (60 mL) butter
3/4 cup (180 mL) fresh lemon juice (this was about 5 lemons for me)
1 tbsp (15 mL) lemon zest
1 tsp (5 mL) vanilla extract
To Make the Filling:
Bring the water to a boil in a large, heavy saucepan. Remove from the heat and let rest 5 minutes. Whisk the sugar and cornstarch together. Add the mixture gradually to the hot water, whisking until completely incorporated. Return to the heat and cook over medium heat, whisking constantly until the mixture comes to a boil. The mixture will be very thick.
Add about 1 cup (240 mL) of the hot mixture to the beaten egg yolks, whisking until smooth. Whisking vigorously, add the warmed yolks to the pot and continue cooking, stirring constantly, until mixture comes to a boil. Remove from the heat and stir in butter until incorporated. Add the lemon juice, zest and vanilla, stirring until combined. Pour into the prepared crust. Cover with plastic wrap to prevent a skin from forming on the surface, and cool to room temperature.
For the Meringue:
5 egg whites, room temperature (mine were cold and worked fine), use the white from the yolks used in the custard
1/2 tsp (2.5 mL) cream of tartar
1/2 tsp (2.5 mL) vanilla extract
3/4 cup (180 mL) granulated sugar
To Make the Meringue: Preheat the oven to 375ºF (190ºC). Using an electric mixer beat the egg whites with the cream of tartar, salt and vanilla extract until soft peaks form. Add the sugar gradually, beating until it forms stiff, glossy peaks. Pile onto the cooled pie, bringing the meringue all the way over to the edge of the crust to seal it completely. Bake for 15 to 20 minutes, or until golden. Cool on a rack. Serve within 6 hours to avoid a soggy crust.
Saturday, January 26, 2008
Reese's Pieces Cookies - SHF
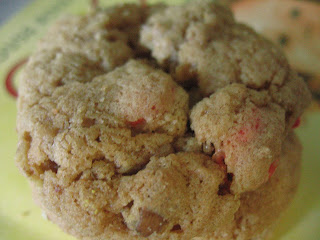
Well, I just saw this morning the theme for this month's SHF and I actually have a cookie that I made recently that fits the rules...use store bought candy! I just hope that CandyRecapper will accept my entry...it's a day late! If you go in search of a cookie using Reese's pieces, the recipes are few and far between. Add to the qualifications a cookie that is not chocolate based and the search is even harder. SO, I decided to make my own cookie.
I had just a few peanut butter chips left and decided to incorporate those into the mix. The cookies ended up being a little crisp, but not that crumbly, break your teeth crisp. It was a pleasant crisp and softened upon warming in the microwave. So, if you get a craving for Reese's pieces cookies, try these out! Check back at CandyRecapper Jan 28th for other great entries!
Reese's Pieces Cookies
1 stick margarine, softened
1/2 cup peanut butter chips
1/2 stick margarine (4 T)
1 cup packed brown sugar
1/2 cup white sugar
1 teaspoon vanilla
1 cup AP flour*
1/2 cup whole wheat flour
1/2 teaspoon baking soda
1 cup Reese's pieces candy
1/2 cup chopped, toasted pecans
Preheat oven to 350 degrees F. In a mixing bowl, mix 1 stick margarine and sugars until fluffy. Meanwhile, melt the 1/2 stick margarine and peanut butter chips in the microwave; 2 one minute sessions should work, stirring in between. Add this mixture to the sugar-margarine mixture. Blend until mixed. Add vanilla. Mix in flours and soda until just combined. Stir in candy and nuts. Drop onto baking stones or sheets in tablespoonfuls. Bake for 10 minutes. Allow to cool for 3 minutes before removing to a cooling rack.
*I'm not completely sure that this is the amount I used. If you think the batter is too thin or your cookies are too thin, feel free to add some more flour in 1/4 cup increments until it is the consistency you desire.
Breakfast Biscuit Sandwich
Over breaks when my brother and I are both home, I enjoy making breakfast, er, lunch...um...the first meal he eats, when he gets up around noon or a little after. This Christmas, he got up one day and wanted a sausage egg biscuit sandwich.
Well, two to be exact. I was pretty excited to try my hand at frying the eggs. I cooked the sausage first, flipping to the opposite side when I could see it had cooked halfway through!
Then, using the fat from the sausage and with the burner on medium (after getting the pan hot), I fried the eggs. The first one was pretty good but did fold over on itself just a bit.
The second one, perfect if you ask me. The biscuits we used were those frozen ones. I, personally, this these are the best there are and wish I could figure out how to make homemade ones like them. Anyone have a good recipe?
Nevertheless, Philip took his plate into the den, set his tray, and enjoyed his sandwiches while watching some car show (probably!).
Breakfast Sandwiches
frozen biscuits (or your own homemade!)
breakfast sausage patties
egg
Prepare in the amounts you need!
Preheat the oven to the package instructions. Bake biscuits. While they cook, fry the sausage until cooked through. In the fat from the sausage, fry the eggs. Flip the eggs when they are beginning to cook over the edges but are still uncooked right around the yolk. The second side needs only minimal cooking if you like a runny yolk (which my family does). Split open the biscuit and place a sausage and egg on top. Top with the biscuit top and enjoy. If you like,you can put cheese on the sandwich or even use bacon or canadian bacon.
Tuesday, January 22, 2008
Coffee Cake or Muffins...How about BOTH!
2 cups all purpose flour
2 tsp baking powder
1/2 tsp baking soda
1/2 tsp salt
1 tsp cinnamon
1/2 cup sugar
1/2 cup brown sugar
1 large egg
3 tbsp vegetable oil
1 tsp vanilla extract
3/4 cup buttermilk
1/4 cup brown sugar
1/2 tsp cinnamon
Preheat oven to 400F. Spray muffin cups with cooking spray (or use paper liners). In a medium bowl, whisk together flour, baking powder, baking soda, salt and cinnamon. In a large bowl, whisk together sugars and the egg until smooth. Beat in vegetable oil and vanilla. Working in 2 or 3 additions, alternate adding the flour and the buttermilk to the sugar mixture, stiring until just combined.In a small bowl, stir together remaining brown sugar and cinnamon. Fill each muffin cup about 1/2 full. Sprinkle with a scant 1/2 tsp of the brown sugar mixture into each cup. Evenly divide remaining batter on top and sprinkle with remaining sugar mixture.Bake at 400F for 15-18 minutes, until a tester comes out clean.Transfer to a wire rack to cool completely before eating. I made 12 muffins, but the original recipe suggests only making 11 unless adding nuts or fruit.
Monday, January 21, 2008
Christmas roast
Somewhere along the way, I think from my Papa, our family started a tradition of having rib roast for Christmas dinner. Beef is not my favorite meat, but this year the roast was very good and enjoyable! So, for all you steak and potato people out there....I give you rib roast (NOT brisket, as I was quickly corrected by my Dad!). We served this with horseradish sauce, squash casserole, green bean bundles, roasted potatoes, and fruit. 
Instructions per Dr. Bill Nettles, aka Doc, aka Daddy, aka brother of THE Tom Nettles:
Total cooking time: 30 minutes per pound.
You want the ribs cut off and retied. Usually that's the way they come if they are in a package, but sometimes the butcher will cut a fresh roast.
Rub the roast with pepper and salt. Place in a roasting pan, ribs down.
Preheat oven to 400F. Cook roast at 400 for 1 hour. Reduce heat to 325 cook another 30 minutes. Cover the left and right sides with Al foil (about an inch on each side) to keep the ends from over cooking and cook at 325 for remainder of time as deemed by weight.
Remove from oven and cover with foil until time to slice and serve. (Roast should set out of oven at least 15 minutes before slicing.)
Friday, January 18, 2008
Pecan Pound Cake
Anyone need a good breakfast cake recipe? Well, this one is pretty good. It is from Baking Bites. I made it for my Sunday School class Christmas brunch. Yes...I actually got to go. You see, third year of medical school we still get a Christmas break...it was my last one. By the time that Sunday came, I was SOOO ready for a break and making this cake was a treat. It turned out to be very much a pound cake, which made me think of my Granny. In fact, it was the first time I used her tube pan!
What did I like the best about the cake? That crust on the top of the cake that kind of flakes up and falls off. In fact, I've been known to pick that off and not eat the rest!
Pecan Cake
1 cup butter, room temperature
2 cups sugar
2 cups all purpose flour
1/4 tsp salt
1 cup toasted pecans, finely chopped
2 tsp vanilla extract
pinch nutmeg, freshly grated (I used dried)
5 large eggs, room temperature (I used 4)
Preheat oven to 350F. Grease and flour a 10-inch tube pan.In a large mixing bowl, cream together butter and sugar until light. Beat in flour, salt and pecans at low speed until completely incorporated. Mix in vanilla and nutmeg.With the mixer on low, add in the eggs one at a time, waiting until each is fully incorporated to add the next. Turn mixer up to high speed and beat for 5 minutes.Pour batter into prepared pan. Bake for 60-70 minutes, until a tester inserted into the center comes out clean.Cool in the pan for about 30 minutes, then slide a knife around the edge to loosen the cake and turn it out onto a wire rack (reinvert so the crunchy top stays on top) to cool completely before slicing.
Labels:
Breakfast,
Cakes/Cupcakes,
Christmas baking,
Desserts
Tuesday, January 15, 2008
Tiger Food???
You'd think I was an LSU Tiger fan if you looked at the colors in my dinner last night...I had eggplant parmesan over spaghetti squash...colors? Purple and gold! To tell the truth, I have nothing against the Tigers and, being a fan of the SEC, am glad they won the national championship; however, I am NOT trying to support them in my food color choices. Needless to say, last night I tried something "new." I've had spaghetti squash before and thought I didn't like it. However, I decided that I should try again. On top of this spaghetti squash, since I haven't had it in FOREVER, I have baked eggplant parmesan.
Well, this turned out GREAT! Guess what...I do like spaghetti squash. If you want to learn more about it, click on the link...it has options on how to cook it, how to purchase it, and even more recipe options! The baking instructions I used were from The Joy of Cooking. As to the eggplant parmesan...I've made this before but have found an even easier way to do it. You don't even have to pre-cook the eggplant. Just spap it all in a baking dish and bake away. Yum!
With all of the vitamins, beta-carotene, and surely ARF's, this is my entry for Cate's ARF Tuesday over at Sweetnicks. Last week there were lots of great recipes and several newcomers. Drop in and see what everyone else is cooking up.
Microwaving Spaghetti Squash
Take your squash and pierce it generously with a knife. Place in a microwave and cook on high for 15 minutes. Let the squash sit in the microwave for 10 minutes before removing and cutting in half lengthwise. Using a knife, scrape the spaghetti-like strands from the squash.
Eggplant Parmesan
1 medium eggplant, cut into 1/2 inch discs
jarred spaghetti/marinara sauce
garlic powder
Nature's seasoning
parmesan cheese
mozzarella cheese (about 1/4-1/2 cup)
leftover chicken (optional)
Preheat oven to 325 degrees F. In a oval baking dish (or 11X8 casserole), place one layer of eggplant. Sprinkle with Nature's seasoning, garlic powder, and grated parmesan cheese. Spoon enough spaghetti sauce over the eggplant to cover the vegetable. Continue this in layers until the eggplant is gone. If you have some leftover chicken or want to add chicken, just cut it in chunks and sprinkle through the eggplant layers. Place in the oven and bake for 40 minutes (or until the eggplant is fork tender). Sprinkle the cheese on top and return to oven for 5 minutes or until cheese melts. Serve over prepared spaghetti squash (or spaghetti!).
Subscribe to:
Posts (Atom)