Wednesday, August 30, 2006

Rolling Along!

Last Wednesday when I was in Bed, Bath, and Beyond looking for a wedding present, my phone rang. It was my Sunday School teacher. She said, "Claire, I need to ask a favor. You know how you sometimes bring yummy things for us to eat at Sunday School? Could you bring something on Sunday? I'm trying to do a little change from do-nuts." What do I say? Sure!!! So then I go through the whole thought process of what I should make. Do I make sweet or savory? Well, I would have done a breakfast casserole, but that would require going to the grocery store. Hmmm....Ah ha! I have to make bread anyway, so I'll use 2/3 of the dough to make cinnamon rolls and only make one loaf of bread! I have everything else needed on hand! Problem solved!

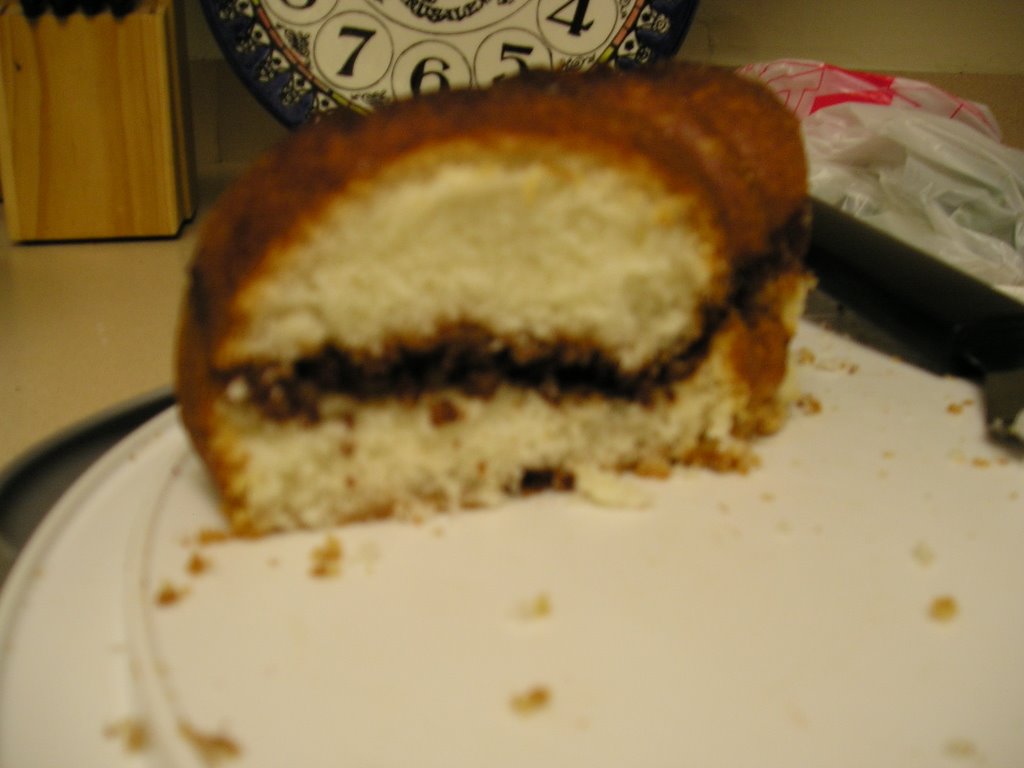
So, if you haven't figured out already, the yummy breakfast treat that you can make with the sourdough starter is cinnamon rolls! Just make the dough as directed in the bread instructions, but instead of making loaves:

Roll dough thinly on a FLOURED surface. Flouring the surface is VERY important. I forgot to do this with the first portion I rolled and I was really stick, resulting in malformed rolls! After you roll the dough out, spread 2T softened margarine over the top. I have used melted in the past but have found that softened is MUCH better. Sprinkle brown sugar over the margarine. I didn't measure this; I just did it until it looked right. You don't need too much, though, or it will fall out after you roll it.

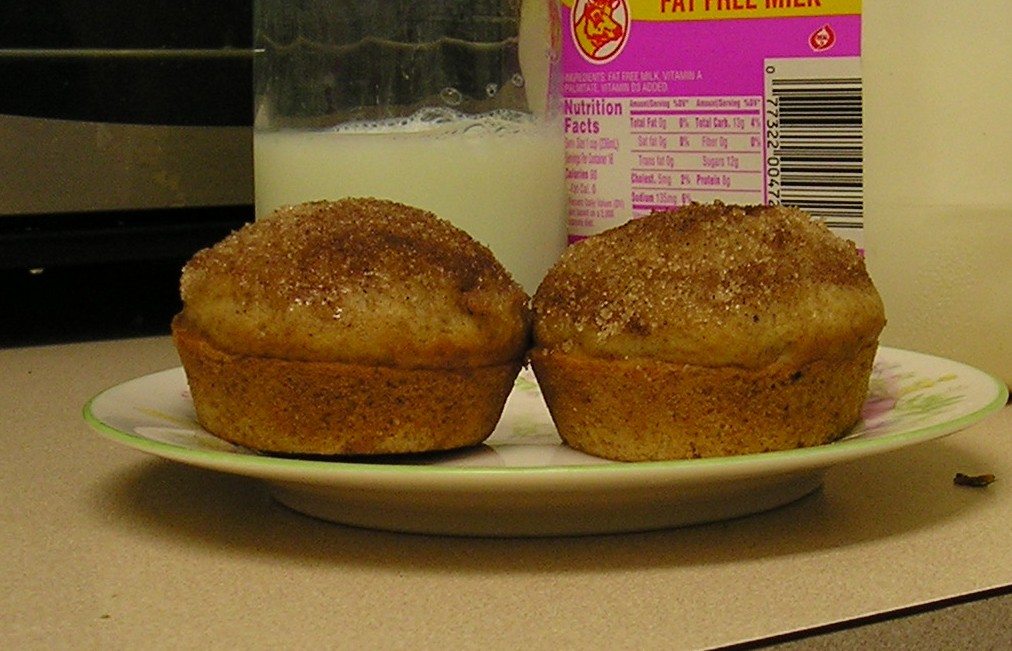
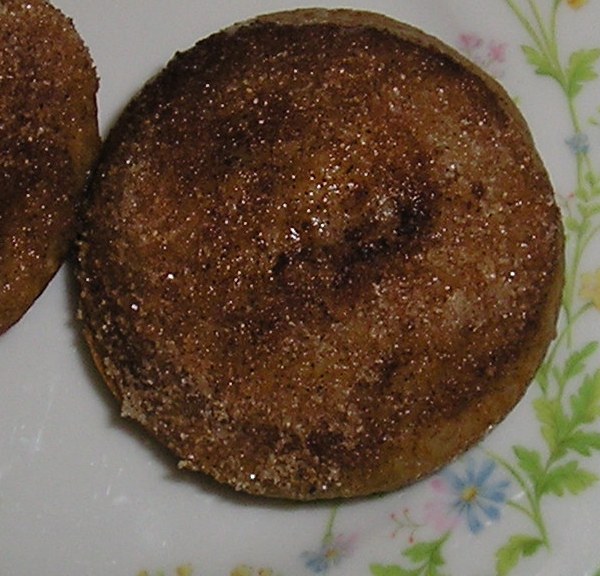
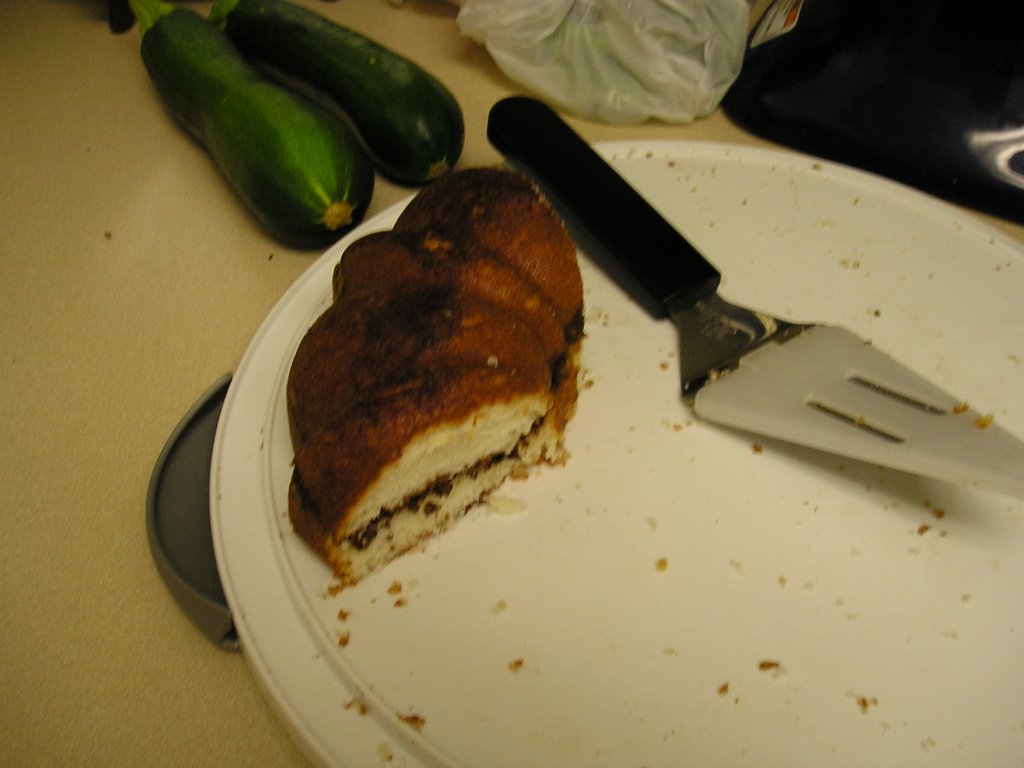
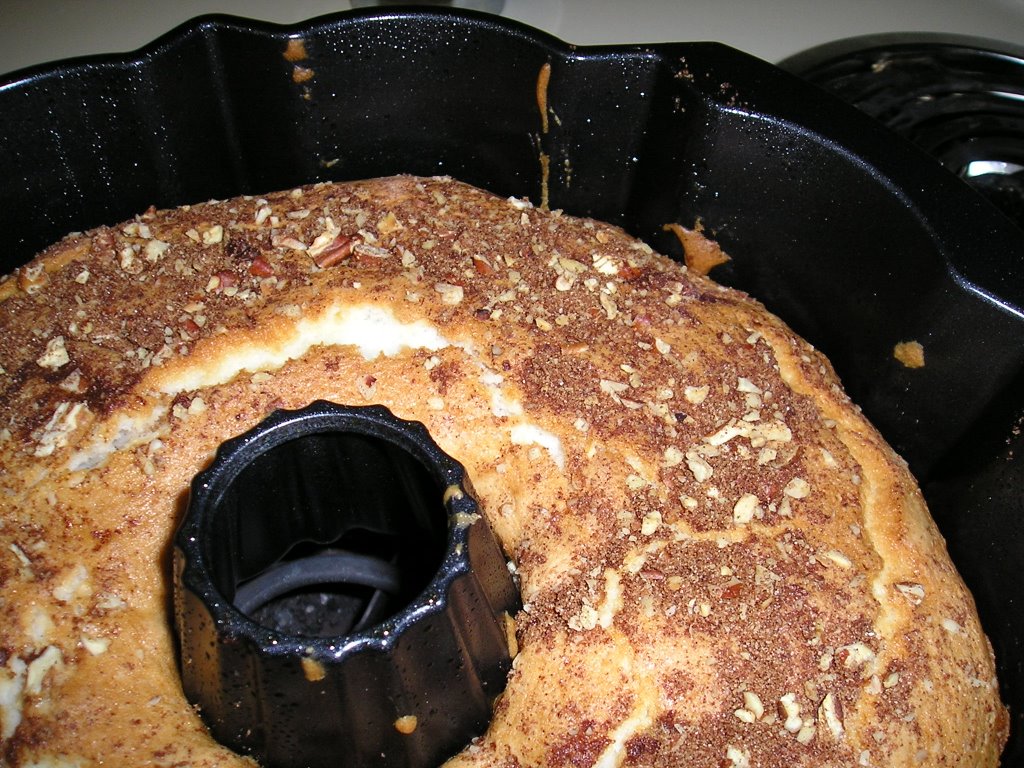
Mix some granulated sugar and cinnamon together. Once again, I didn't measure because I know what I like my cinnamon-sugar mixtures to look like. I always want more cinnamon that directions call for! Sorry! Sprinkle half of this over the brown sugar. If desired, add chopped pecans. Roll jelly roll fashion. Cut with a serrated knife OR a piece of thread or unflavored dental floss! It is more fun to cut with floss/thread, but I don't have any unflavored floss or thread, so I used the knife.

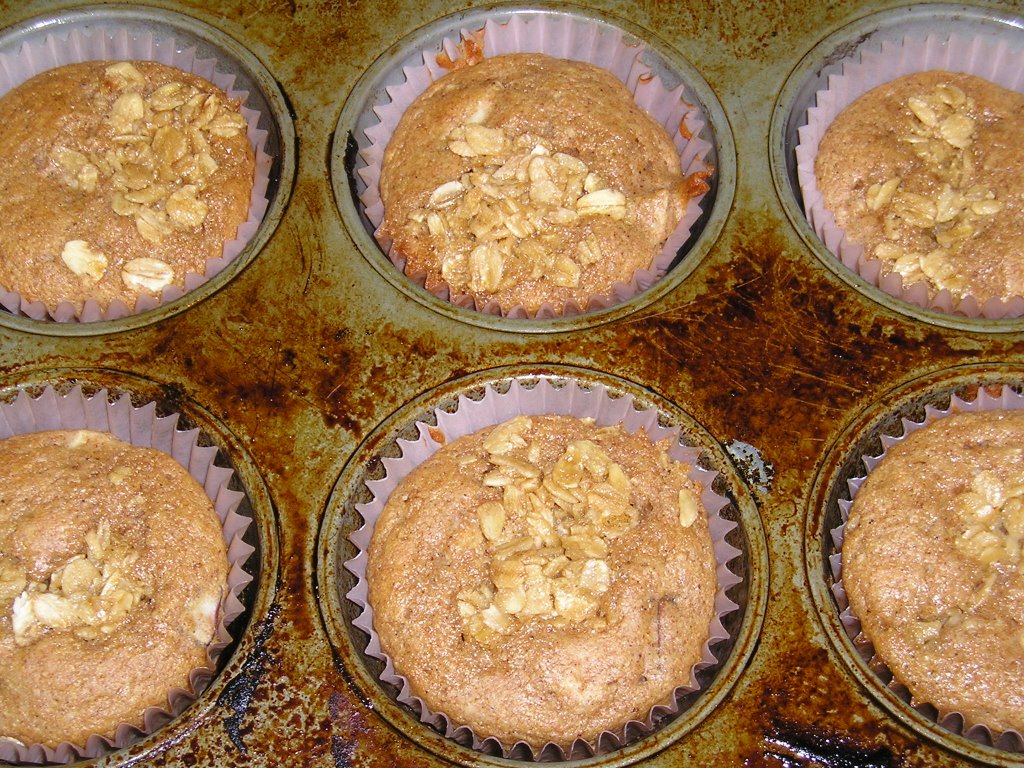
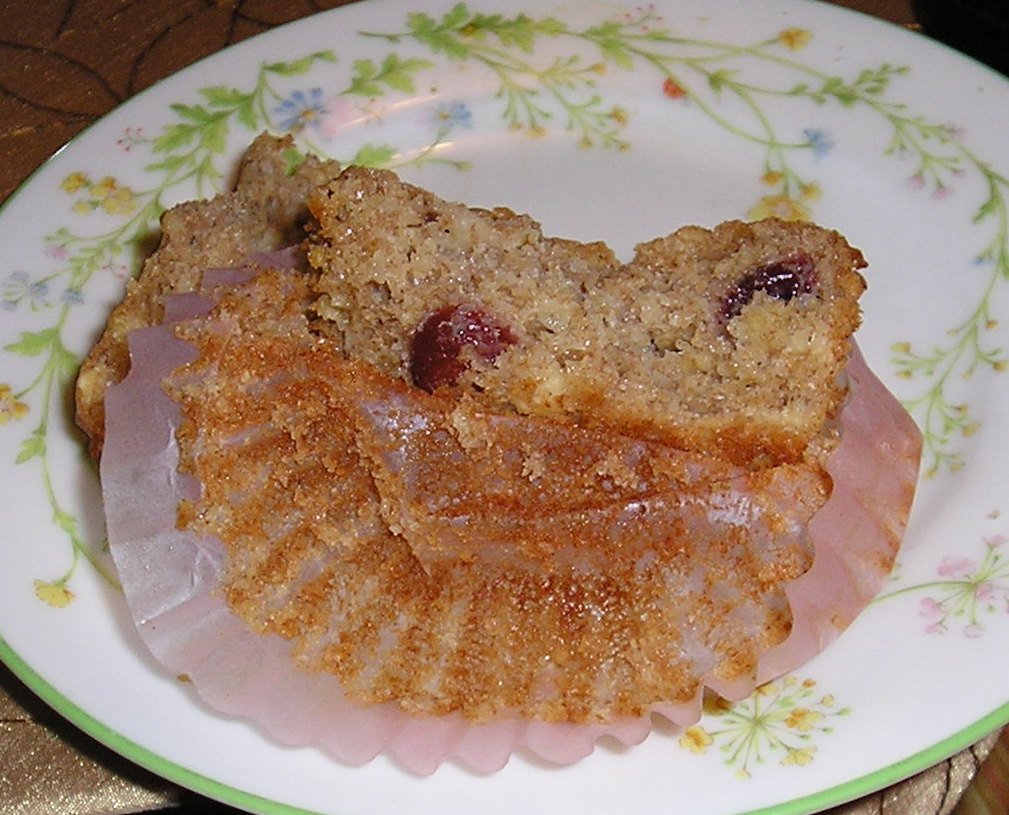
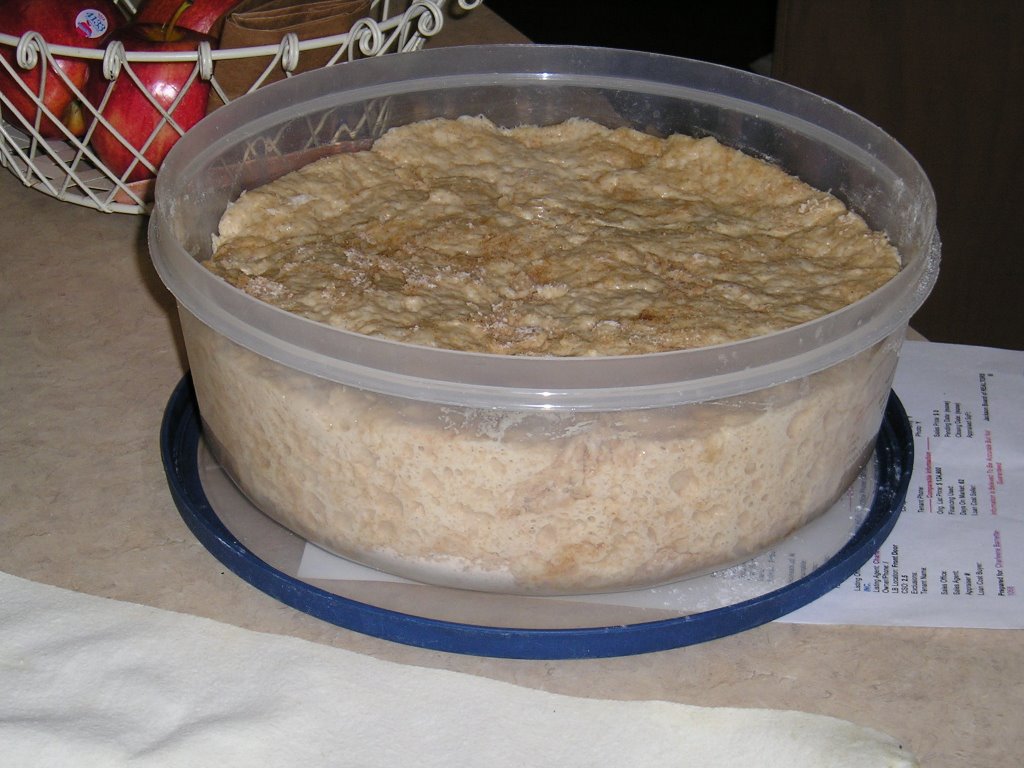
Place the rolls on a pan. Cover and let rise until rolls have doubled in size. You can use a cake pan, cookie pan, or cookie stone...HOWEVER, if you use the stone DON'T put too many on there as I did! When they rose, the pan was VERY full (as you can see, some are already "falling off." Then when I cooked them, some of the rolls on the edge were basically falling off the stone! Oops, I had to pull those off...thus, the open spaces in the picture! Cook in 350 degree F oven for 12-15 minutes.

Let cool slightly. While the rolls are cooling, make a not too thick, not too thin icing (I feel like I live with the Three Bears!), but just right! Once again...I KNOW, I'm bad, I didn't measure anything. I rarely measure for icings, I just put confectioner's sugar in a bowl and add some water. Then stir. If it's not enough liquid, add more. If you've put too much, add sugar. It is easier to add a LITTLE more water (yes, you can use milk if you prefer) than a LOT more sugar, so go under on the liquid to start with. Once the rolls have cooled, drizzle icing on top! Repeat the above procedure for the remaining dough.* Serve warm and enjoy!

Even though these are whole wheat cinnomon rolls, they are still delicious! SO, from one starter you can have a multitude of products. Bread, cinnamon rolls, even dinner rolls! Whole wheat or white! Maybe you can even do rye. My dad wants to try that...I may be coming back with part 4 of sourdough! We'll see!

*These instructions were done for a total of 2/3 of the dough.

Tuesday, August 29, 2006

Pardon the Interruption


Okay, I have to interrupt the bread series for an ARF Tuesday! As much as I said that I didn't like the bright purple eggplant, I decided to try it again in a stir fry. It's good in stir fry. I don't know what made the difference, but it worked. Last night I needed to use up some zucchini from the Farmer's marker two weeks ago as well as a red pepper. I just chopped an onion and stripped the pepper, cubed the eggplant, and sliced the zucchini. Then I threw in some Italian dressing and Catalina dressing along with Tony's seasoning, cook and viola! Yummy stir fry! I'm glad that I liked this because I'm not so sure about the slow cooked chicken I made.

Stir Fry
1 zucchini, sliced thinly
2 small eggplants, cubed
1 onion, chopped
1 red pepper, sliced in strips
1 "stream" Italian dressing
1 "stream" Catalina dressing
Tony's seasoning
olive oil

Put a skillet on the stove and pre-heat. Put oil in the pan to get it hot. Add the onion and pepper. Cook for about 3 minutes. Add eggplant and zucchini. Add Italian and Catalina dressings (put enough to moisten but don't make it soupy). Sprinkle with Tony's seasoning, making sure that all vegetable surfaces are "touched" with the seasoning. Stir while it cooks for a couple of minutes. Let cook on medium until tender but not wilted (make sure the eggplant is cooked). Can be a side dish or main course. Serve over rice or noodles.

With red peppers, zucchini , and eggplant this is a great 5-A-Day ARF food. Thus, it is my entry for ARF Tuesday at Sweetnicks! Check it out and get some ideas for other healthy treats!

Monday, August 28, 2006

Loafing Along

So now that you've made your starter, it's time to make the bread! We make whole wheat bread, but you can just make "regular" sourdough bread by not using whole wheat flour. Over the years, we tried subbing some of the oil for applesauce; however, this made for a dry bread that didn't last very long and crumbled easily. So, we are back to using the full amount of oil...not that it's that much for three loaves of bread!

Although, the total time of making the bread is a good bit, if you time it correctly, it's really not bad. It does not require much actual hands on time; you just need to be available. I usually make the dough before I go to bed and let the first proof be overnight while I sleep! That means I'm actually being productive while I sleep. Imagine that! Then I form the loaves when I get up. I used to do this on Saturday/Sunday and would let the bread rise while I was at church. However, it got to the point where the bread was OVER-RISING. This makes it really dense and VERY yeasty tasting. So...be sure that you can bake the bread BEFORE it rises over the pans or falls.

Whole Wheat Sourdough Bread
1 1/2 cups warm water
2 teaspoons yeast (1 packet)
4 cups bread flour
2 cups whole wheat flour (OR 2 additional bread flour if you don't want whole wheat)
1/2 cup sugar
1 teaspoon salt
1 cup starter
1/2 cup oil

Place water and yeast together (whisk together). Put flour, sugar, and salt in a large bowl (preferably one with a sealing top) and stir. Add starter, oil, and yeast mixture. Stir into flour. As it starts to get hard to stir, begin to knead with your hands (clean please!). Sometimes, no all the flour will go into the dough. This is okay. Just leave it there and it will combine when it rises. Cover with top and place in a warm place to rise. It rises until doubled; this takes about 8-12 hours or overnight.


After it has doubled, knead the dough until the air bubbles are out. Divide the dough into thirds and shape into loaves. Knead these loaves a couple of times. Place in bread pans that have been sprayed with cooking spray. "Punch" down the dough to be sure there are no air bubbles. Place in a warm place and cover with a towel. Let rise until the dough is at the top of the pan. This takes 2-4 hours.


Put oven on 350. Bake for 30 minutes. Remove and allow to cool. Place in bread bags and enjoy, or...

come back Wednesday for a great breakfast treat. This series will be interrupted tomorrow for ARF-Tuesday.

Sunday, August 27, 2006

It's a Start!

About 2-3 years ago, my mom started making our bread. We don't regularly buy bread from the store anymore. When my parents moved, we had to throw out the starter. I have not been able to make any until just this week. I didn't realize how much I missed the homemade bread! Anyway, I had to find the right kind of starter. Thank good ness for allrecipes.com. They had the potato flake/sugar starter that we sused. SO, to get this "series" off to a good start, let's make some sourdough starter! Don't be afraid...it's easy!

Starter
1 cup warm water
3 T instant potato flakes
3 T sugar
2 teaspoons (1 square package) yeast

Combine these ingredients in a glass jar. Stir well. Seal and leave on the counter. Stir every day for five days. On the fifth day, add 1 cup warm water, 3 T potato flakes, and 3 T sugar*. Leave out until the next day. Use amount called for in bread recipe.

After each use, feed with 1 cup warm water, 3 T potato flakes, and 3 T sugar*. Leave out for 12 hours and then refrigerate. Try to refeed every 5 days (if you don't, it WON'T ruin!).

*The starter we used before the move called for 2/3 cup sugar on each feed, so I use around 5-6 T as a "compromise!"

Come back to see how to use this little "tool" in your kitchen!

Saturday, August 26, 2006

A Recipe and A Teaser!


Okay, so my camera wasn't broken....it was out of battery power. I guess I just thought that the lithium batteries would last longer than they did. Oh, well. Sooooo...here I am with a picture of the cornstick mold and corn bread recipe!

I have several food memories associated with my mom's parents from growing up. My grandfather had a great garden in his backyard, so we often had vegetable dinners. That, combined with my grandmother's corn bread sticks, is one of my special memories. So, when we were cleaning out their house after they passed away, the corn bread stick pan along with a cast iron "kitchen" that I played with were the two things I "had" to have. Now whenever I make cornbread, I use those molds (partly because the cast iron pan I have only holds about half a recipe of cornbread!). The recipe I use is also a corn bread recipe my grandmother used. It's my dad's favorite!

Now for a quick teaser! Return the next few days for a series of posts leading up to a yummy breakfast treat and something you can use EVERYDAY!

Corn Bread
1 cup yellow corn meal
1/3 cup flour
1 teaspoon baking powder
1/2 teaspoon salt
1/4 teaspoon baking soda
2 Tablespoons shortening (I use less)
1 cup buttermilk
1 egg, beaten

Preaheat oven to 400 degrees F. Put shortening in a cast iron pan and place in the oven. Stir together corn meal, flour, baking powder, salt, and baking soda. Add buttermilk and egg. When the shortening has melted, remove the pan from the oven and pour shortening into the better. It should sizzle! Stir into batter. Pour batter into hot pan (more sizzle!) and put in oven. Bake for 15-20 minutes. I'd check at 15 minutes or earlier, as you do not want to overcook this! If you don't eat all the cornbread, store in the refrigerator and enjoy later. It saves well for a couple of days. Don't worry, it won't last much longer than that!

You can use a muffin tin to make corn muffins. Adjust time accordingly. It may need just SLIGHTLY less or the same. Just check the muffins!

Cornbread goes well with anything: vegetables, fish, chicken, mexican! Take your pick. It's even good as a "dessert." Just warm bread and butter. The put your favorite jam, jelly, preverve, or honey on top! Tada!

Thursday, August 24, 2006

A Good Southern Meal


On Saturday when I went to the Farmers' Market, I got okra. Well, I used that to make stewed okra and tomatoes. It's been sitting in my refrigerator all week, and I finally used it tonight. I also made corn bread and put it in my grandmother's cornstick molds as well as a small cast iron skillet. For some reason my camera is not working (AGAIN!), so I don't have pictures of the corn bread. I'll try again later for that. In the mean time, I'll talk about the okra.

For some strange reason I like the slimy quality of okra. I know, call me strange, but I like it!!!Although this recipe was good, the okra didn't quite get soft and slimy enough for me. This may be because I used fresh tomatoes rather than canned diced. So, today while I cooked the cornbread and my fish, I "stewed" the okra and tomatoes some more. I think tomorrow I'm taking cornbread and okra stuff for lunch. Mmmm.

Stewed Okra and Tomatoes
1 lb fresh okra, washed and cut
2 fresh tomatoes, diced
1/2 green bell pepper, diced
2 cloves garlic, sliced
1 onion, diced
1 T oregano
salt
season all

Heat saute pan. Spray with cooking spray. Cook onion until translucent (3 minutes). Add okra, pepper, and garlic. Cook for 5 minutes. Add tomatoes and spices. Cover and simmer for 20 minutes (I increased this time from 10 minutes because it wasn't enough for me. If you want more or less, adjust the time as you desire.).

Tuesday, August 22, 2006

An Apple a Day


I LOVE APPLES! Last night when I decided to make muffins (I think my roommate likes having them for breakfast) I was in the mood to make apple muffins. So, I pulled the recipe from Nic's blog and made some modifications. One of my modifications was NOT SO GOOD. I tried to make a topping for the muffins but didn't use a recipe. Now, I haven't made muffin toppings any...so...the topping ended up as soggy oatmeal. Yuk! Another thing I noticed was that my apples, which were gala and, thus, red, turned a teal green color after cooking. Has anyone else seen this?

The muffins were nice and moist. They weren't too sweet but were sweetened by the apples. Although they were good, I still like the whole grain muffins best so far.

Apple Muffins
1 1/2 cups whole wheat flour
scant 1/2 cup AP flour
3/4 cup white sugar
1 1/2 teaspoons baking powder
1/4 teaspoon baking soda
1/2 teaspoon salt
3/4 teaspoon cinnamon
1/4 teaspoon nutmeg
1 cup buttermilk
2 eggs or egg substitute equivalent to 2 eggs
1 teaspoon vanilla
3/4 cup chopped apple (1 large apple)

Preheat oven to 350 degrees F. Spray muffin tin or line with muffin cups. Sift together dry ingredients in bowl (flour through nutmeg). Mix buttermilk, eggs, and vanilla in small bowl. Add to dry ingredients and mix until just combined. Fold in apple. Scoop batter into prepared tins (I got 12 muffins and 4 muffin tops). Bake for 16-20 minutes or until a toothpick inserted into center of muffin comes out clean. Remove to cooling rack and cool.

Monday, August 21, 2006

How to Make Eggplant Parmesan as a Medical Student

Tonight I did the comparison test of the eggplants from Farmer's Market. My verdit: I like the deep purple eggplant (left on the picture with roasting pans seen in recipe instructions) better than the pretty, bright purple eggplant (right). Sorry, I didn't have time to do the research as to what the two kinds were. To mke, the deep colored one had more flavor. It was not bitter (I've bever noticed eggplant being bitter). The other eggplant had a great texture but not much flavor. So, if I'm going to look at the eggplant, I choose bright. If I'm going to eat it, I choose deep purple. Now on to the dish.

I'm going to present this recipe in a different manner tonight. Side note: if you are NOT in medical school, you can make this without the interjections of studying.

Eggplant Parmesan
1-2 eggplants, sliced in 1/4 inch thick discs
1/2 jar spaghetti sauce
1 cup mozzarella cheese
fresh parmesan cheese

Cut the eggplants (I do no peel) and place them on a roasting pan. Spray with cooking spray in a liberal manner. Season with salt. Bake for 15 minutes. *Return to your laptop where you finish listening to the 1 pm lecture, making sure that your notes are correct so that you don't get fined $25 per mistake*

Remove the eggplant from oven and flip the pieces. Return to oven for 5 minutes or until soft. *Return to laptop where you e-mail the printing service to print your now finished notes. Be sure to get the correct number and color of paper. Upload the notes to the digital dropbox making sure that the title is done correctly, once again avoiding fines.*

Remove eggplant from oven and decrease temperature to 325 degrees F. Place 1/2 of the eggplant pieces in a baking dish. Top with tomato sauce so that each piece of eggplant has some sauce on it but can still be seen. Put /4 cup mozarrella on this and grate some parmesan cheese on top. Repeat the layers with a little more spaghetti sauce here than on previous layer. Top with remaining cheese and grate Parmesan liberally over top. Place in oven for 35 minutes.
*Return to laptop where you study about immunoglobulin structure. Be sure to know the difference between epitopes, paraptopes, isotopes, isotypes, and allotopes.*

Remove the Eggplant Parmesan from the oven. While it cools a bit, cook some pasta (I like whole wheat) or serve over whole wheat toast (I like this better than pasta).
*Take a break from studying to enjoy the eggplant you just cooked!*

This is my ARF/5-A-Day submission at Sweetnicks. Be sure to visit there tomorrow (Tuesday) to see other great recipes!

Saturday, August 19, 2006

Another Saturday of Famer's Market

Two weeks in a row! Yes, I went to the Farmer's Market again. I really like getting my produce there. I figure I'm supporting local people and the quality of the produce is SO much better that in the grocery store. When I go, I like to browse the stands before I pick anything out. Today I bought everything except the garlic at one stand. I've already decided that I like this stand the best. It is run by a little old lady and sometimes a "helper." Her fare is so pretty, and everything (barring the watermelons, etc.) is $1 per selected unit (weight, number of items, etc). Here is what I brought home this week.

I'm planning on using one head of garlic to roast. We lived in Kyrgyzstan for a year and discovered garlic there. Roasted garlic is delicious! I've already used the okra and will post on that later. I haven't used the eggplant from last week; however, I'm planning on making Eggplant Parmesan and will put the two eggplants "together." I'm going to taste test them and decide which one I like better. I just couldn't resist this one! It's so round and bright! I've used some of the tomatoes (2 to be exact). I think I actually picked some that will be "small garden home-grown"-like. The zucchini will be used as a simple side veggie. Finally to the peppers! They were just so pretty that I had to pick some. Hey, at 3/$1 how could I not! Stay tuned to see how this wonderful fare is used through the week!

Friday, August 18, 2006

Donut Muffins


I don't eat muffins much but love cooking them, and my roommate likes them...so I've been looking for different muffins to make. I found some last week that even I would eat and enjoy. This week I decided to make some muffins that Sara from I Like to Cook made with her mother. She described them as muffins that taste like donuts. For some reason, my taste buds were thinking regular yeast donuts. So, when I tasted these I thought, "These don't taste like donuts." Then I realized that they did taste like cake donuts! Although this is not the type muffin I would eat regularly, they are good. I think my roommate approved! If you want to original recipe, check the link to Sara's site. I changed just a couple of things, as I like to have some whole wheat flour in my baked goods.

Donut Muffins
1 cup AP flour
1/2 cup whole wheat flour
1/2 teaspoon salt
1/2 teaspoon cinnamon
1/4 teaspoon nutmeg
1/4 cup oil
2/3 cup sugar
1 egg
3/4 cups milk

Topping:
1/2 cup butter, melted
3/4 cup sugar
1 teaspoon cinnamon (mix with the sugar)

Preheat to 350 degrees F. In a bowl combine the flours, salt, cinnamon, and nutmeg. In a separate bowl combine the oil, sugar, egg, and milk. Add the liquids to the dry ingredients and stir until just mixed. Pour into standard size muffin tin and bake for 20-25 minutes. Turn the muffins out of tins. While still warm, dip the muffin tops in the melted butter and then in the cinnamon sugar mixture. Let cool.

Wednesday, August 16, 2006

Sunday School Coffee Cake


I was in a mood to make something to take to Sunday School this past week. However, I didn't want to do anything "too" involved. This meant I wanted to use...gasp...a mix. Really, I have no problem using cake mixes. Cookies mixes, yes. Cake mixes, no. I had a Betty Crocker Cinnamon Swirl cake mix on hand. I have used this in the past to make cake mix snickerdoodles. It works! But I wanted to make a coffee cake. So...I went in search of a coffee cake mix using this type mix. I couldn't find any so I just spread my wings and flew on my own!

What I decided to do was make the cake with a few changes from the normal cake instructions. Then I chopped some pecans and mixed that in with the cinnamon mixture provided in the cake mix. Before doing this I sprinkled a TINY bit of the cinnamon in the bottom of the bundt pan. This turned out to be a good idea! It put some cinnamon on the top of the cake once it was flipped out. Anyway, I put the pecan-cinnamon mixture in the middle of the cake. I think it turned out well and believe that my Sunday School class would agree. A couple of them commented that it was good, but the cake tells the story...only a quarter was left when I left!

Cinnamon Swirl Coffee Cake*
1 box Betty Crocker Cinnamon Swirl cake mix
3 eggs or 1/2 cup egg substitute
1/2 cup buttermilk
1/3 cup water
1/3 cup oil
1 cup chopped pecans

Preheat oven to 350 degrees F. Combine cake mix and remaining ingredients except pecans. Mix on low for 30 seconds and then on medium for 2 minutes. Spray a bundt pan with cooking spray. Sprinkle the pan with some of the cinnamon mix provided with the cake mix. Mix the remaining cinnamon with the pecans. Pour half the batter in the pan. Sprinkle with pecan mixture, reserving some for the top. Pour the remaining batter over the pecans and spread gently. Put the remaining pecans on top. Bake for 38-42 minutes (or as directed on back of box). Remove from oven and let cool. Turn out from pan and enjoy. This cake is good cool or warmed.

*I honestly don't remember the exact measurements of what I used for the buttermilk, water, or oil because I didn't write it down and made it late on Saturday night. So, if you would prefer, use the box instructions for the cake (outside of mixing cinnamon in) and follow this above procedure! Sorry!

Monday, August 14, 2006

Friends for ARF/5 A Day!

Last night two of my friends came over for a catch-up visit and dinner. We each made part of dinner and then enjoyed it together. Jennifer and I have been friends since we were in pre-school. Katie and I, well, we didn't start out on the best of terms! We were in girl scouts together and did NOT like each other! I thought she was loud and silly. She thought I was a goody-goody. Both of which were probably true! however, we grew out of that and now we're good friends!

Anyway, I was responsible for the vegetables. I decided to use some of the squash and zucchini from the Farmer's Market. I roasted the veggies and they turned out great. We also cut the watermelon. It had more seeds than I like but was still good.

Jennifer was responsible for bread and dessert. She brought Italian bread and used fresh ground pepper, fresh Parmesan cheese, and olive oil for dipping. The dessert was just store bought cookie dough, which we ended up not using. I think she was just going to make them at home for her husband and take the rest to the teachers' lounge at school!

Katie said she'd do the entre. It was a very simple but good salsa chicken. I told her that I would be using it in the future for myself! The salsa, because it has tomatoes in it, is healthy with antioxidants and licopene. So, all of our dishes, except maybe the bread and dessert (but we did use the olive oil dip!) are fitting for Sweetnicks' ARF/5-A-Day Tuesday! Check out her other entries.

Roasted Squash
squash
zucchini
onion
olive oil
seasonings (garlic powder, Tony's, salt, pepper)

Preheat oven to 425 degrees F. Slice vegetables in thin discs. Cut onion in small pieces. Put in roasting pan and drizzle with olive oil. Toss to coat. Add garlic powder liberally. Add Tony's, salt and pepper to taste. Place in oven and cook for 15 minutes or until fork tender. Remove to serving dish and top with fresh Parmesan cheese.

Salsa Chicken
Boneless, skinless chicken breasts
Season All
salsa
Mozzarella cheese

Heat saute pan on stove. Cut excess fat from chicken. Pound chicken to 1/2 inch thickness (or desired thickness). Cut to desired serving size. Season liberally with Season All. Spray pan with cooking spray or drizzle with olive oil. Place pieces in pan and cook until cooked halfway through. Flip chicken to opposite side. As the chicken nears doneness, spoon 1-2 T salsa on chicken and top with small piece of mozzarella cheese. Cook until chicken is done through and the cheese is slightly melted.

Sunday, August 13, 2006

Yummy Low Fat Muffins


I have tried multiple times to make low fat muffins and every time they are either extremely dense, tough, or too cakey. However, these muffins were GREAT. I am a Cooking Light subscriber but don't remember seeing this recipe. I found it on Paula's site, The Cookbook Junkie. I don't eat many muffins, but I think I can enjoy these!

As I was making these muffins at night, I did not soak the oatmeal overnight but it worked just fine. I have seen several recipes which use the same buttermilk soak and do it from 15 minutes to a couple of hours. For this reason, I figured that "overnight" was not a must. I think I was probably right. The only thing I might change with these is adding some cinnamon. Otherwise, they are great as is. Mine didn't rise as much as Paula's, but I think maybe my baking soda is old. Anyway, enjoy!

Overnight Oatmeal Muffins
Cooking Light Annual Recipes 2003 Copyright 2002

1 cup regular oats
2 cups low-fat buttermilk
1 2/3 cups whole wheat flour
¾ cup packed dark brown sugar (I used light)
2 tablespoons vegetable oil
1 teaspoon baking powder
1 teaspoon baking soda
1 teaspoon salt
2 large eggs, lightly beaten
2/3 cup dried blueberries (I used craisins)
I also added a FEW white chocolate chips (few meaning MAYBE 3 chips were in each muffin)

Combine oats and buttermilk in a medium bowl, cover and refrigerate overnight (or a couple of hours) Preheat oven to 350 degrees. Lightly spoon flour into dry measuring cups, level with a knife. Place buttermilk mixture, flour and next 6 ingredients in a large bowl; beat with a mixer at medium speed until smooth (I just stirred vigoriously!). Fold in blueberries (or whatever add-ins you have) Spoon ¼ cup batter into each of 24 muffin cups coated with cooking spray. Bake at 350 degrees for 15 minutes or until muffins spring back when touched lightly in center. Remove muffins from pans immediately; place on a wire rack.

Yield: 24 muffins Per muffin: 105 cal, 2.3 gms fat, 3.1 gms protein, 19.4 gms carbs, 1.7 gms fiber, 19 mg cholesterol, 201 mg sodium, 49 mg calcium

Saturday, August 12, 2006

Farmers' Market...Finally!


Well, I finally made it to the Farmers' Market. The last time I went was the first Saturday they were open. I didn't have anything to do today and planner to go there. It was great. I like to meander through the different stands, scope out the products, and then I decide what I'm going to buy where. It's really kind of interesting which stands have good squash, which stands have good tomatoes, good, zucchini, peaches, watermelon. They are differ in quality. I didn't get any, but one stand have tons of different peppers...banana peppers, habeneros, bell, some kind of little tiny pepper. The market also has a chef's stand where a chef is making food. I think today it was some kind of stir fry. All I know is that he was using garlic and is smelled GREAT.


This is my load. I ended up getting eggplant, peaches, green beans, and the sweet baby watermelon from one stand, the squash from another, and the zucchini from the other. This squash and zucchini is the best I've seen. No blemishes, clear color, and smooth! Yummy! I couldn't bring my self to buy any tomatoes. Even Farmers' Market tomatoes that are "home grown" don't stand up to small garden "home grown." You just can't make tomato sandwiches with them.

Later this afternoon, after studying pathology for a little bit, I went to the grocery store and picked up some other groceries. We now have bananas, pears, strawberries, mushrooms, and salad to add to these wonderful veggies!

Thursday, August 10, 2006

Cookies for the Car Guy!


How do you pay back someone who talks your brother into changing out his transmission and engine, talks your dad into buying an old mustand and two (yes, I said TWO) motorcycles, wants YOU to go on a motorcycle ride with him, and, oh yeah, helps take care of your cars? Make him cookies, of course. My dad has a car mechanic friend who has been VERY helpful to our family. He gives Daddy advice on what he needs to do for his car, my brother's truck, and the motorcycles. He loans out equipment. He fixes broken parts and pieces (Hehehe!). He also fixes my car when it needs fixing. His name...Pete. Well, actually there are two Petes!

Yes, Pete and Pete (anyone remember that Nickelodeon show?) are father and son, and they own a car repair shop. Big Pete (the daddy and smaller of the two) and Little Pete (son) have been really helpful to my dad and brother in their car ventures. Daddy decided that I should make them cookies one day. I made peanut butter. Pete and Pete loved them. They asked Daddy how he didn't get fat with me making cookies for him! :-) Anyway, ever since then, I've been delivering cookies on a semi-regular basis. This past week, when my parents were moving, little Pete fed them and let them stay at his house for a night. So, Wednesday I took them cookies. They got cookies, I got two hugs and a card with a business and home phone and a "Call me if you need anything." Peanut butter cookies work for good! :-)

Peanut Butter Cookies
1 cup margarine
1 cup peanut butter (crunch is better, but either will work)
1 cup granulated sugar
1 cup brown sugar
2 eggs
1 teaspoon vanilla
2 1/2 cups flour, sifted
1 teaspoon each baking powder, baking soda, and salt

Preheat oven to 350 degrees F. Cream margarine, peanut butter, and sugars. Beat in eggs and vanilla. Add dry ingredients. Mix until combined. Chill until can be handled. Shape into 1 inch balls (or use cookie scoop, this works well, too) and place on baking stone or sheet. Make criss-cross marks with floured or sugared fork (Mine don't show up because I didn't have time to chill for very long). Bake for 12-15 minutes. Cool on rack.

NOTES: I sometimes use a little less margarine and a little more butter and also a little less sugar. If I'm in the mood, I sometimes substitute some of the AP flour for whole wheat flour. This gives the cookies an even more nutty taste!

Tuesday, August 08, 2006

Disclaimer and "Germy" Bread

Today I officially began my M2 (second year in medical school) year. Yes, we started on August 7th. Yes, we had real class today; six hours of it to be exact! I tell you all this to say that, as much as I hope it doesn't, this may affect my posting frequency. Sometimes I get busy and don't have time to cook. That means I eat eggs or oatmeal (or left overs) for dinner. Anyway, this is my disclaimer to the frequency of posts. Hopefully, not too much will change.

Now to my "germy" bread. Recently Anna, at Cookie Madness, posted a white chocolate, cranberry, oatmeal cookie. It looked great to me but called for wheat germ. I've never used wheat germ but have a banana bread recipe that calls for it (optionally). I decided to get the stuff. Well, thanks Anna! I've decided that I really like the stuff. I have been putting it on my daily breakfast yogurt and enjoying it thoroughly.

Last night I decided that I was tired of seeing the black peeled, frozen bananas in my TINY freezer; so, I pulled them out and put together the banana bread recipe WITH the wheat germ this time. I really like the texture and flavor that the germ provided the bread. Although the bread was a little dry due to the fact that I didn't measure the oil and didn't have buttermilk (I know! Gasp...baking without measuring!), I think that I'll keep the germ in the bread. It adds to the healthfulness (how's that for a Rachel Ray word!) and color of the bread. I do think, however, that I might add more banana than I normally use.

Granny's Healthy Banana Bread
1 1/2 cups flour
1/2 cup wheat germ
1/2 cup sugar
2 teaspoons baking powder
1/2 teaspoon salt
1 cup ripe banana mashed
1/4 cup buttermilk
1/4 cup oil
2 eggs or 4 egg whites
nuts (optional)

Preheat oven to 350 degrees F. Combine dry ingredients and either sift of stir with a whisk (this is what I do). Add remaining ingredients and stir until combined. Do not overmix. Pour in standard size greased bread pan. Place in oven for 50 minutes to 1 hour or until done a toothpick comes out clean. Enjoy warm or toasted.

Monday, August 07, 2006

Stuffed Peppers


This is one of my favorite meals from home. However, recently I just haven't liked the flavor of ground beef. So, I decided to modify the recipe and use ground turkey. I also added some zucchini and mushrooms. It turned out really delicious! My roommate said it was really good. My only disappointment was that I didn't have any cooking sherry. The grocery store near my house didn't have any and I wasn't going to drive across the town just to get sherry!

Stuffed Peppers
3 Green bell peppers*
1/2 lb ground turkey (or lean ground beef)
1/4 cup diced onion
"handful" of presliced mushrooms**
2/3 cup cubed zucchini**
1 clove garlic pressed
1/2 teaspoon dried thyme
2 T dry sherry
dash cayene pepper, salt***
1 cup cooked brown rice****
3/4 cup samsoe or mozzarella (cubed or shredded)
1 can stewed tomatoes

Clean pepper and cut off 1 inch stem end. Cut away stem and choppepper surrounding it. Cut each pepper in half. Parboil peppers for 10 minutes. Saute onion, turkey, peppers, garlic, mushrooms, zucchini, thyme, sherry, pepper, and salt until turkey browns. Fold in rice and cheese. Spoon in to peppers, place tomatoes in dish, arrange peppers on top. Place some cheese on top of each pepper and bake at 350 for 15-20 minutes.

*The original recipe called for 4 peppers NOT cut in half and filled, but this was a little big for us, so we cut them in half. Mama only does two peppers (for a total of 2 halves) but always has leftover filling. I used 3 peppers and had enough to fill them, but if you like ultra-full peppers, just use 4 halves.

**The original recipe did not include these ingredients.
***I didn't measure this but added until I thought it tasted right. Definitely more than a dash!
****The original recipe called for wild rice. This is a really good flavor, but I had brown rice. I added a little curry to it for flavor.

This is my ARF entry at Sweetnicks site. Join in the fun and get your veggies!

Sunday, August 06, 2006

Nashville with a Friend

Over the weekend, I spent some time with a friend who now lives in Nashville. I met her at her apartment, which is GREAT! Then we went to eat lunch at Cheesecake Factory. I've never been there except for cheesecake. When I looked at the menu, I started to look at salads, but then I saw in the appetizer section exactly what I wanted: vietnamese spring rolls! The last time I had these was in Chicago at a great little shop called Penny's Noodle Shop (it's near Wrigley Field). Those were better than CF's, but I still enjoyed them.

As you can see, they were filled with rice noodles, carrots, asparagus, shrimp, and mushrooms (which I still don't think were in there!) as well as cilantro. They came with a peanut dipping sauce and a soy dipping sauce. I thoroughly enjoyed it at lunch AND supper!

Sarah got the barbeque chicken ranch salad. It is HUGE! The salad comes untoossed with a topping of fried onion rings. I tasted the salad and it was very good.

I didn't get a picture, but we both ordered a piece of cheesecake. I took mine home to share with Mama and Daddy. It was the coffee heath bar crunch. It tasted pretty good but should have had more health bar. It seemed that that was just a garnish instead of a big part of the cheesecake. Sarah got some kind of brownie cheesecake. It hink the crust was brownie with original cheesecake on top. All of this was good.

Before we left, I went by Panera Bread to get some bagels for my parents. I got Asiago cheese, Dutch apple and raisin, blueberry, and cinnamon. I think these are the best bagels, although I do not eat bagels much. ON a non-food, side note, Sarah took me to see Vanderbuilt Children's Hostpital! I was great. Nice and bright, family friendly and kid friendly. It made me want o at least go to an away rotation there! We'll see what happens.

After my fun trip to Nashville, I helped with getting moved in. The moving truck arrived on Saturday at 12:30 and didn't leave until 8 pm! That was a long day! My parents are looking for a new refrigerator as the old one arrived with doors that won't shut! It's alright, though. They've had it for 23 years. I think it's time for a new one! I'll try to get a picture when they get it.

Tomorrow I start back to school. Don't really want to, but I must! Such is life.

Thursday, August 03, 2006

An Attempt at Digestives


I know, I said last night would be the last post for the weekend, but we aren't leaving until this afternoon. One of my favorite treats is McVitie's Digestives. These are delicious tea biscuits that can be bought in England (and I'm pretty sure other places in Europe). However, they are not available (at least easily) in the states. So, I have been trying to recreate this wonderful, slightly sweet and flaky treat.

The first recipe I tried was okay but not crisp enough. I just wasn't satisfied. So, last night when I got home from church, I decided to try to make my own recipe. Since I have some wheat germ, I decided that it might be a good thing to add. I don't know if that's what made the difference, but these are definitely CLOSER to what I was looking for. They are a little crisper and not quite that light flakiness of McVities, but I'm pleased. If I can't get McVities, these will suffice. They would be great with coffee or, if you like it, hot tea, maybe even some Earl Grey!

"Digestives"
1/4 cup (4 Tablespoons) butter (at room temperature or slightly softened)
5 Tablespoons brown sugar
7 Tablespoons whole wheat flour, divided
2 Tablespoons wheat germ
2 Tablespoons oatmeal
3 Tablespoons milk

Preheat oven to 375 degrees F. Wash your hands, as you will be using them for your mixers! Combine butter and sugar with hands. Add 4 Tablespoons flour, wheat germ, and oatmeal. Mix with fingers until stiff. Add milk and remaining flour. Place on floured parchment paper, roll until 1/8 inch thick. Use a biscuit cutter (I used a 1/4 cup, as I don't have a biscuit cutter!) to cut rounds. Place on baking sheet or stone. Bake for 15 minutes. Remove and let cook on baking sheet. DO NOT EAT until cooled or they won't be crisp.

NOTE: The pictures are from the FIRST recipe, not the posted recipe; however, they look the same.

Wednesday, August 02, 2006

Cleaning out the Freezer Part 2


Sunday was the last day my parents were to have a working refrigerator, at least until they get to the new house! So, I needed to use the 3 frozen bananas that were in the freezer. How could I waste perfectly good bananas? So, I decided to try a new banana cake recipe to take to a Sunday School party.

This cake was easy to make and turned out pretty good. It was a tad spongy but nothing too noticable. However, I think that I'll stick to banana bread/muffins. I have some wheat germ now that I can use in the banana bread (like the recipe calls for that I've been leaving out!).

Stay tuned for the BEST chocolate chip cookies. They'll be coming in a soon-to-be-done post but after the weekend. I'm going to be helping my parents move in, so I probably won't be posting anything. Happy Weekend Cooking! It's MY last weekend before school starts back.

Banana Cake
1/4 cup shortening
1/2 teaspoon vanilla extract
1 cup mashed bananas
1/2 cup chopped walnuts
1 1/2 teaspoons baking powder
1 cup packed brown sugar
1/2 teaspoon lemon juice
1 1/2 cups all-purpose flour
1/2 teaspoon salt
1/3 cup confectioners' sugar
1 teaspoon ground cinnamon

DIRECTIONS:
Preheat oven to 350 degrees F (175 degrees C). Grease an 11x7 inch pan.
In large mixing bowl, mix shortening, brown sugar, vanilla, lemon juice and banana until well blended.
Sift together the flour, baking powder and salt. Add to the banana mixture; stir until well blended. Stir in chopped nuts. Pour into the prepared pan.
Bake for 30 to 35 minutes in the preheated oven.
While warm, cut into bars and remove from pan. Combine powdered sugar and cinnamon. Gently roll warm bars in sugar-cinnamon mixture.

Recipe from www.allrecipes.com

Tuesday, August 01, 2006

Restaurant Review

I haven't done one of these yet, but we went to a new place to eat last night. It's just a deli type place but the atmosphere makes it feel a little nicer than that and the food is really good. Newk's is a deli made by the same people who started McAllister's. It started in Oxford, MS, home of University of Mississippi. They offer sandwiches, salads, soups, pizzas, and dessert. You can also combine sandwich and soup, sandwich and salad, or soup and salad. Take your pick. Vegetarian? Have no fear. Newk's also offers a veggie sandwich, pizza, or salads. The sandwich and pizza come with portabella mushrooms, peppers, and basil pesto. It think next time I'll try one of these. Let me just say, it's a great menu; I'll be able to go there many times and not get the same thing.

So, what did we order you ask. Philip, after we convinced him he should stay, ordered a pepperoni pizza. The pizzas are 10 inch thin crust. Pepperoni comes with pepperoni, mozzarella and provolone cheese, roma tomatoes, tomato basil sauce, and fresh basil. It looked pretty good, but I think the mediterranean or veggie would be better.

Daddy got the half grilled shrimp po'boy and bowl of tomato basil soup. The Po'Boy comes with grilled shrimp, olive oil, lettuce, tomatoes, pickles, sliced red onion, cocktail sause on the side, and on wheat hoagie bread toasted. Daddy said, and I agree after a small taste, that the shrimp needed a little more flavoring (i.e. spices) on it. However, this was overall a good sandwich. I liked the combination of toppings.

Mama, after deciding she was tired of sandwiches, got the soup and salad. She had the same tomato basil soup that Daddy ordered and a half "Simply Salad." The salad, made of mixed greens, tomatoes, cucumbers, carrots, cheddar cheese, and croutons, is placed in a large bowl and tossed with your choice of dressing. Mama really liked that because everything had a little dressing on it but wasn't drenched. The soup tasted good ( I took a taste of hers) but was a little too salty. To me, the salt covered up the tomato flavor a bit. However, on a cold day, I would definitely order this soup.

I, after much debate, decided to get the Newk's Favorite salad. It is made of mixed greens, grilled shredded chicken breast, gorgonzola cheese, dried cranberries, grapes, aritchoke hearts (I didn't have these), pecans, and croutons (I didn't have these either). The dressing it comes with is a sherry vinaigrette. The salad was HUGE. I came home with enough to eat for dinner tonight. This was really refreshing. I would get it again. However, I'm going to try some other things, like the veggie sandwich and pizza, greek salad, and mediterranean pizza, before I get it again.

Newk's is a great place to eat. I'll be going back again with friends. If you have one around you, try it out!