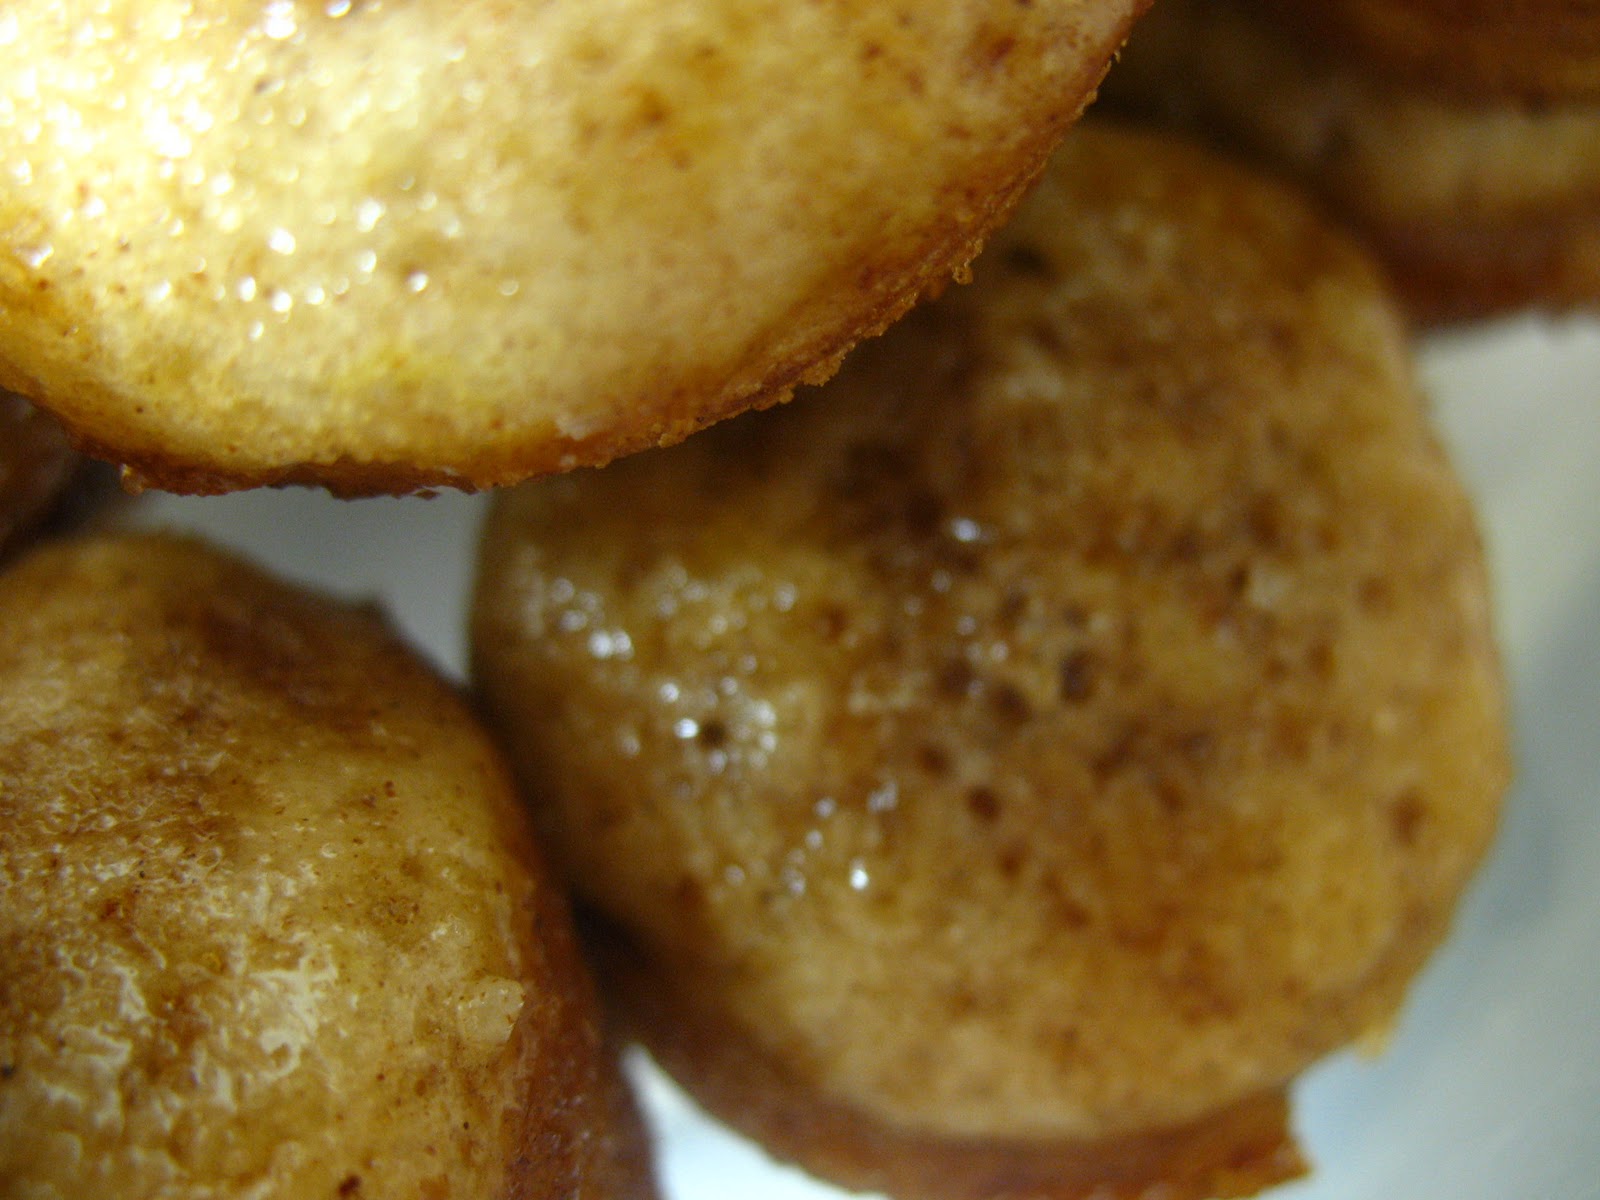
I've been able to go to Sunday School recently. I typically have to work at least half the Sundays of the month, but was able to go three Sundays in October. So, I took to making a breakfast treat for everyone. I took the Daring Baker donuts, then a few weeks ago I took a pumpkin pound cake with buttermilk glaze.
It was pretty good and was actually a cooking light recipes, so it was less caloric than your typical pound cake. I found this on Myrecipes.com. The glaze wasn't exactly what I was expecting, it was a bit more "gel-like" but I kind of liked it.
The recipe says that it serves 16, but I got more slices out of the recipe than that. I was even able to share it with my friends who just had a baby and my best friend from med school. In my opinion, any recipe that lets me share is a good recipe!
Pumpkin Pound Cake with Buttermilk Glaze adapted from Myrecipes
1 can (15 ounce) pumpkin
1/3 cup sugar
3/4 cup packed brown sugar
1/3 cup butter, softened
4 eggs
1 teaspoon vanilla extract
3 cups AP flour
1 1/2 teaspoons baking powder
1/2 teaspoon baking soda
1/2 teaspoon salt
3/4 cup buttermilk
Glaze:
1/3 cup buttermilk
1/4 cup sugar
2 tablespoons butter
2 teaspoons cornstarch
1/8 teaspoon baking soda
Preheat oven to 350 degrees F. Mix butter and sugars together for 3 minutes. Add eggs 1 at a time, beating well after each addition. Beat in pumpkin and vanilla. Spoon dry ingredients together in a separate bowl. Add flour to mixture, alternating with the buttermilk, beginning and ending with the flour. Pour batter into a bundt or tube pan prepared with cooking spray. Place in oven and bake for 55 minutes or until a wooden skewer comes out clean. Cool in pan for 10 minutes. Finish cooling on wire rack.
To prepare the glaze, place all ingredients into a saucepan over medium heat, bring to a boil. Cook for 1 minute, or until thick, stirring constantly. Remove from heat and drizzle over cake. Enjoy!
Thursday, November 11, 2010
Tuesday, November 09, 2010
Pumpkin Kissed Cookies
When I went home, I had eyes on making some new cookies.
At first I didn't think I would be able to make it...my dad didn't seem interested in pumpkin. However, when I showed him the recipe he decided it would be okay. At first I was worried about the cookies as they felt pretty cakey. However, that first night they were great. The perfect cookies to go with milk. Overnight, however, they became very soft and moist. The flavor was still good...and every bite that had a kiss in it was DELICIOUS!
Somehow, I just don't think pumpkin was made to be used in a cookie. All in all, this has great flavors but the texture is just not my preferred cookie flavor. If you like softer cookies, though, I highly recommend this recipe from Picky Palate!
"Double Pumpkin Kissed Cookies"
2 sticks softened butter
1 Cup granulated sugar
3/4 Cup packed light brown sugar
2 large eggs (I think I used 1 egg)
1 Tablespoon pure vanilla
1 Cup pumpkin, from can
3 1/4 Cups all purpose flour
1 teaspoon salt
1 teaspoon baking soda
1 teaspoon ground cinnamon
1/4 teaspoon fresh grated nutmeg
12 oz bag chocolate chips
35 or so unwrapped Pumpkin Spice Kisses, quartered
Preheat oven to 350 degrees F. Cream butter and sugars until light and fluffy. Beat in eggs and vanilla until well combined then add pumpkin. Place flour, salt, baking soda, cinnamon and nutmeg into large bowl; mix to combine then slowly add to wet ingredients then chocolate and kisses. Mix only until just combined. Place dough onto baking pan or stone and bake for 10-12 minutes. Makes about 4 dozen.
Jenny suggests using a muffin top pan to make larger cookies. She says, "If using muffin top pan, scoop 1/4 Cup dough into each muffin top cup that has been sprayed with non-stick cooking spray. Press to spread to edges. Bake 10-12 minutes or until edges begin to brown. Let cool in pan for 5 minutes before transferring to cooling rack. This makes 24 cookies.
Enjoy!
Sunday, November 07, 2010
Fiesta for my Tongue
A few weeks ago, one friend who just had a baby was home alone. Her husband was out of town taking one of the wonderful required tests that all medical students have to take (and pay for!). This test is only offerred in one of five cities in the US. Anyway, she was alone with her five week only who had recently decided that sleeping was for the birds. So before Matt left, I told him I'd check on Kalyn and help her out a bit. So, after I returned from my five year college reunion (CRAZY) I called her to see if she wanted supper and a hand with little man. She, of course, did! So, I came home and made a yummy Mexican soup.
I had planned on putting shredded chicken in it, but my chicken was spoiled...that's where the funny smell in my refrigerator was coming from. Oops! Anyway, it turned out great despite the lack of meat. The only thing I'd do next time would be to decrease the barley and increase some of the veggies. Otherwise, Delicioso!
Mexican Bean Soup
1 onion
1 green pepper
1 teaspoon garlic
1 cup uncooked barley prepared by package instructions
4 cups (though I'd probably use closer to 6 cups next time) stock (chicken or veggie)
2 cans black beans
1 can corn
1 can tomatoes with chiles (I'd use more next time! 2 even 3 cans)
cumin
garlic powder
Cook barley as instructed on the package. In stock pot, saute onion, pepper, and garlic. Season with cumin and garlic powder. When onions are clear add barley, beans, corn, and tomatoes. Add enough stock to make it the desired consistency and allow to simmer for 20 minutes. Taste and reseason as needed. Top with salsa, cheese, sour cream/Greek yogurt as desired. I served with a slaw salad. Enjoy!
Friday, November 05, 2010
Donut or muffin?
My department at work is struggling...we have 5 women who are either pregnant or just had babies! Three of those are fellow residents, which means that we have a decreased work staff to cover the hospital...but we are making due. And being pediatricians...we LOVE babies!!! Needless to say, we also love a good excuse for a party and we have been having quite a few showers lately. For the first shower, I took a couple of things: grape salad and donut muffins.
First let's talk about the donut muffins. You dip the finished muffins in butter and then drench them in cinnamon sugar. Tell me, HOW could that not be good! Everyone loved them. And if you want to get a great grape salad recipe, come back again soon...this is a GREAT shower snack!
Donut Muffins from lemanda at Tasty Kitchen
1-¾ cup Flour
1-½ teaspoon Baking Powder
½ teaspoons Salt
½ teaspoons Nutmeg
½ teaspoons Cinnamon
⅓ cups Oil
¾ cups White Sugar
1 whole Egg
¾ cups Milk
FOR THE TOPPING:
¼ cups Butter
⅓ cups White Sugar
1 Tablespoon Cinnamon
Preheat oven to 350 degrees. Mix flour, baking powder, salt, nutmeg and cinnamon.
Combine oil, sugar, egg and milk. Add dry ingredients and stir only to combine.Bake at 350 degrees for 15-20 minutes. While muffins are baking, melt the butter in a bowl. Combine the white sugar with the cinnamon in another bowl.
Shake muffins out while still hot. Dip muffins in butter, then into the sugar/cinnamon mix. Let cool. Enjoy!
Sunday, October 31, 2010
Welcome Baby Dinner Part 4 - The Easy Part
Since I discovered that pumpkin has reappeared in stores, I have been really wanting to make Pumpkin Gooey Butter Cakes (a Paula Deen recipe...if it has butter in the title it HAS to be Paule Deen!). So, when I "scheduled" myself to make dinner for my friends, I planned to make this before anything else! I have made Gooey Butter Cakes before but not pumpkin style.
I have tasted it, though, and they are delicious! Anyway, I do modify the recipe a bit by decreasing the butter and eggs in the filling, the amount is just not necessary. My only problem...my oven! For some reason, it burned the bottoms of the cake. I had to shave the bottoms off them in order to make them presentable. Otherwise, they were great...and I've been asked for the recipe several times.
Pumpkin Gooey Butter Cakes adapted from Paule Deen
Preheat oven to 350 degrees F. Combine the cake mix, egg, and butter and mix well. Pat the mixture into the bottom of a lightly greased 13 by 9-inch baking pan.
In a large bowl, beat the cream cheese and pumpkin until smooth. Add the eggs, vanilla, and butter, and beat together. Next, add the powdered sugar, cinnamon, nutmeg, and mix well. Spread pumpkin mixture over cake batter and bake for 40 to 50 minutes. Make sure not to overbake as the center should be a little gooey.
Allow to cool. Overnight in the refrigerator isn't a bad idea! Enjoy!
I have tasted it, though, and they are delicious! Anyway, I do modify the recipe a bit by decreasing the butter and eggs in the filling, the amount is just not necessary. My only problem...my oven! For some reason, it burned the bottoms of the cake. I had to shave the bottoms off them in order to make them presentable. Otherwise, they were great...and I've been asked for the recipe several times.
Pumpkin Gooey Butter Cakes adapted from Paule Deen
Cake:
- 1 (18 1/4-ounce) package yellow cake mix
- 1 egg
- 8 tablespoons butter, melted
Filling:
- 1 (8-ounce) package cream cheese, softened
- 1 (15-ounce) can pumpkin
- 2 eggs
- 1 teaspoon vanilla
- 4 tablespoons butter, melted
- 1 (16-ounce) box powdered sugar
- 1 teaspoon cinnamon
- 1 teaspoon nutmeg
Directions
Preheat oven to 350 degrees F. Combine the cake mix, egg, and butter and mix well. Pat the mixture into the bottom of a lightly greased 13 by 9-inch baking pan.
In a large bowl, beat the cream cheese and pumpkin until smooth. Add the eggs, vanilla, and butter, and beat together. Next, add the powdered sugar, cinnamon, nutmeg, and mix well. Spread pumpkin mixture over cake batter and bake for 40 to 50 minutes. Make sure not to overbake as the center should be a little gooey.
Allow to cool. Overnight in the refrigerator isn't a bad idea! Enjoy!
Thursday, October 28, 2010
Welcome Baby Dinner Part 3
After I decided what to make for side dishes, I felt like I should provide some sort of bread but didn't have time to go to the grocery store...again, otherwise I would have just done the old standby of Sister Schubert's! So, I pulled out my Southern Sideboards cookbook and looked up biscuits. I mean, a cookbook with the word southern in the title HAS to have several biscuit recipes.
I haven't really found a recipe for biscuits that I love because I'm used to those frozen Pilsbury biscuits, which are tall and flaky. No matter what I try, I cannot make biscuits like that...I'm not sure that they exist! Anyway, this recipe is true to most biscuit recipes I've found and is fairly flat but it did have a nice, flaky texture. I ended up using white whole wheat flour and enjoyed the extra wheaty flavor that it lended to the biscuits. Try them out and let me know what you think.
Everyday Biscuits from Southern Sideboards
1 cup flour (AP or white whole wheat)
1/4 teaspoon salt
2 teaspoons baking powder
1/4 cup shortening
1/2 cup milk (I accidentally only used 1/4 cup and then added a little later, maybe a total of 1/3 cup?)
Preheat oven to 400. Mix flour, salt, powder in a bowl. Cut (or mash in with your fingers) shortening until it looks like meal. Stir in milk. Let stand for 1 minute. Kneat on a floured board and roll out. Cut with biscuit cutter (or a small glass!). Place on baking sheet. Bake until golden brown. No time was given but probably anywhere from 10-15 minutes. Enjoy!
Wednesday, October 27, 2010
Doughnuts, Donuts
Do-nuts. Doughnuts. Dough nuts. Donuts. No matter how you spell it, these are yummy treats and there are so many versions. The October 2010 Daring Bakers challenge was hosted by Lori of Butter Me Up. Lori chose to challenge DBers to make doughnuts. She used several sources for her recipes including Alton Brown, Nancy Silverton, Kate Neumann and Epicurious. We were given the option of a yeasted doughnut or cake doughnut with a pumpkin twist! I actually made these the first weekend of the month. I decided on the pumpkin cake style doughnuts. I have never deep fried anything on my own and wasn't planning on frying any doughnuts; however, after baking 2/3 of the batch, I decided that I really should try some fried.
Both versions ended up being really good, though I thought that the baked version was better after sitting overnight. The only thing I would recommend would be to wait to glaze them until right before serving. I glazed them the night before and had to re-glaze because they had soaked everything in overnight. I took them to my Sunday School class and everyone really enjoyed them. (Dark - fried, lighter - baked)
I think some people would argue that a doughnut isn't a doughnut unless it's fried...but I would argue that you can enjoy a baked doughnut just as much! Thanks to Lori for a great and fun challenge! Below is the recipe for the pumpkin doughnuts.
Pumpkin Doughnuts:
Preparation time:
Hands on prep time - 15 minutes
Chilling time - 3 hours
Cooking time - 10 minutes
Yield: About 24 doughnuts & 24 doughnut holes
Ingredients
All Purpose Flour 3.5 cup / 840 ml / 490 gm / 17 ¼ oz
Baking Powder 4 teaspoon / 20 ml / 24 gm / .85 oz
Table Salt 1 teaspoon / 5 ml / 6 gm / .2 oz
Cinnamon, ground 1 teaspoon / 5 ml / 6 gm / .2 oz
Ginger, ground ½ teaspoon / 2.5 ml / 3 gm / .1 oz
Baking Soda ½ teaspoon / 2.5 ml / 3 gm / .1 oz
Nutmeg, ground ¼ teaspoon / 1.25 ml / 1.5 gm / .05 oz
Cloves, ground 1/8 teaspoon / .6 ml / ¾ gm / .025 oz
White Granulated Sugar 1 cup / 240 ml / 225 gm / 8 oz
Butter, Unsalted 3 Tablespoon / 45 ml / 42 gm / 1.5 oz
Egg, Large 1
Egg Yolk, Large 2
Pure Vanilla Extract 1 teaspoon / 5 ml
Buttermilk ½ cup + 1 Tablespoon / 135 ml /
Pumpkin 1 cup / 240 ml / 285 gm / 10 oz (Canned pure pumpkin or fresh cooked and pureed pumpkin – DON’T use pumpkin pie mix!)
Canola Oil DEPENDS on size of vessel you are frying in – you want THREE (3) inches of oil (can substitute any flavorless oil used for frying)
Powdered Sugar Glaze:
Powdered (Icing) Sugar 2 cup / 480 ml / 250 gm / 9 oz
Whipping Cream (About 32% butter fat) 4 Tablespoon + more if needed / 60 ml
Directions:
- Whisk together the first 8 ingredients in medium bowl to blend. Using electric mixer, beat sugar and butter in large bowl until blended (the mixture will be grainy and not smooth). Beat in egg, then yolks and vanilla. Gradually beat in buttermilk; beat in pumpkin. Using rubber spatula, fold in dry ingredients in 4 additions, blending gently after each addition. Cover with plastic; chill 3 hours.
- Sprinkle 2 rimmed baking sheets lightly with flour. Press out 1/3 of dough on floured surface to 1/2- to 2/3-inch (12 mm to 15 mm) thickness. Using 2 1/2-inch (65 mm) -diameter round cutter, cut out dough rounds. Arrange on sheets. Repeat with remaining dough in 2 more batches. Gather dough scraps. Press out dough and cut out more dough rounds until all dough is used.
- Using 1-inch (25 mm) diameter round cutter, cut out center of each dough round to make doughnuts and doughnut holes.
- Line 2 baking sheets with several layers of paper towels. Pour oil into large deep skillet to depth of 1 1/2 inches (40 mm). Attach deep-fry thermometer and heat oil to 365°F to 370°F (185°C to 188°C). Fry doughnut holes in 2 batches until golden brown, turning occasionally, about 2 minutes. Using slotted spoon, transfer to paper towels to drain. Fry doughnuts, 3 or 4 at a time, until golden brown, adjusting heat to maintain temperature, about 1 minute per side. Using slotted spoon, transfer doughnuts to paper towels to drain. Cool completely.
- For baking, bake at 375F for about 10-12 minutes.
Monday, October 25, 2010
Welcome Baby Dinner Part 2
When I was trying to decide what to make along side the pork loin for my friends, I knew that I was going to do roasted squash and zucchini. I made that one time for them before and they really enjoyed it. But I wasn't sure what else to make. I didn't really want to do potatoes au gratin, though that is what I think of because it's what my mom usually makes. I thought about dirty rice but I wasn't sure about my skills vs. the dad's taste for rice...he's Asian and has a keen tongue when it comes to rice. So, I started a search which ended on cheese grits. The recipe is from Ina Garten's book The Barefoot Contessa, Back to Basics. I have had this book for a while and haven't made anything from it...but I really should. It is a beautiful cookbook with yummy recipes.
Anyway, the grits were super easy to make (after I found the grits in the store...I was convinced that it was NOT the "cook in 5 minutes grits"...but it was!) and turned out delicious. They even reheated well. So, grab some 5-minute grits and make this quick dish for your family. Come back for so easy, flaky (though not puffy) biscuits)!
Creamy Cheddar Grits adapted from The Barefoot Contessa, Back to Basics
1 cup quick-cooking grits (the 5 minute kind)
1 1/4 cups milk (she called for half and half but I didn't get that)
2 tablespoons unsalted butter (I just used a spoon of Brummel and Brown)
1 1/2 cups strong flavored cheese
1/2 cup chopped green onions
1/2 teaspoon freshly ground black pepper
Boil 4 cups of water in a large saucepan. Add 1-2 teaspoons salt then add the grits in a slow stream, constantly stirring. Reduce heat to low and simmer (stir occasionally) until the grits thicken. This takes around 5 minutes. At this point, add the half and half (or milk...it works just fine!) and butter/margarine to the grits and stir. It will thicken as it cooks. Bring to a simmer, stirring occasionally. Cover, reduce heat to low again, and cook (stir occasionally) for 45 minutes, or until smooth and creamy. Turn off the heat and stir in the cheese, green onions, and pepper. Season to your taste and enjoy!!!
Saturday, October 23, 2010
Welcome Baby Dinner Part 1
I have some friends who just had their first baby. He is quite a cutie and looks just like his daddy. I had told them before he was born that I wanted to make them dinner but I was going to wait a couple of weeks after he was born because her mom was going to be there the first week and his mom the next. When the time came, I didn't want to make a casserole because I feel like that's what is "typical" for a post-baby meal.
I decided on pork loin, roasted squash, cheese grits, biscuits, and pumpkin gooey butter cakes. It was a yummy meal (yes, I kept some for myself! :-) First up is the pork loin. The night before I made a marinade and put that and the pork in a large zip-loc bag and refrigerated overnight.
The next day I cooked it at 350 for about 1.5 hours (thought it was going to take 3...glad I checked!) and it was great. Matt kept raving about how moist it was. Come back soon for cheese grits ala the Barefoot Contessa!
Honey Marinated Pork Loin
1 pork loin
1/3 cup honey
1/3 cup Worchestershire sauce
1 teaspoon garlic
onion flakes
water
Mix honey, W. sauce, garlic, onion flakes together. Add about 1/3 cup of water to thin the marinade slightly. Place pork loin in a gallon sized zip-loc bag and pour the marinade over the meat. Place in refrigerator overnight.
Preheat oven to 350 F. Place loin and marinade in a baking dish and bake for about 1.5-3 hours (depending on size of loin - mine just fit in the gallon sized bag length wise) or until internal temperature is 150-155 degrees F. Enjoy!!
Monday, October 18, 2010
Let's Muddy the Waters
A few days ago, I mentioned making a cookie when I was at home because my mom had picked it out. Well, I wanted to make these cookies...but I gave in and made these first. She found the recipe on an advertisement for Southern Living's Christmas Cookbook. They turned out to be really good and would be a good Chrstmas cookie. The cookie is soft, almost like a fudgy brownie.
I love the marshmallows the best as they browned in the oven. But even for me, a self-professed non-chocolate lover, these were good chocolate cookies! Try them for yourself!
Mississippi Mud Cookies
1 cup semisweet chocolate chips
1/2 cup (1 stick) butter, softened
1 cup sugar
2 eggs
1 tsp vanilla
1 1/2 cups flour
1 tsp baking powder
1/2 tsp salt
1 cup chopped pecans
1/2 cup chocolate chips
1 cup mini marshmallows
Preheat oven to 350. Melt 1 cup chocolate chips in microwave for 1 minute and stir, then melt in 30 second intervals until completely melted. Cream the butter and sugar until creamy. Add eggs one at a time, beating with each addition. Add vanilla and melted chocolate and beat in. Combine dry ingredients and add to chocolate mixture. Mix until well blended, then add nuts and chocolate chips. Stir.
Place by spoonfuls onto a baking stone (or parchment lined sheet). Press 3 marshmallows onto each spoonful of dough.
Bake for 10-12 minutes. Remove from oven and place on cooling rack. Enjoy!
Tuesday, October 12, 2010
Tragedy!!!!
So not really...but I was really disappointed. A couple of weeks ago I came up with a really delicious and satisfying "stoup," as Rachel Ray would say. It was a lentil, eggplant, and spinach dish and I topped it with some tzatziki dip I had. Oh...it was SO good!
Well, I pulled it out of the refrigerator in order to put some in a container so I could take some for dinner on call. I thought, I have to remember to put that back in the refrigerator...and then promptly forgot. But I didn't realize it until I got home from my 30 hour call and wondered where the pot was when I looked in the refrigerator. OH NO! Sure enough, I looked over and there was the pot sitting on the counter. (This picture is when I made it, not from the disaster.)
When I pulled the top off, there were a couple of fuzzy spots already developing. Grrrr....I wasted half the dish because I forgot to put it in the refrigerator. Oh, well! I'll just have to make it again...because it was really good! Try it for yourself....but remember to put it back in the refrigerator!
Lentil, Eggplant, Spinach "Stoup"
1 onion, chopped
2 teaspoons chopped garlic
1 eggplant, cubed
1 cup lentils (not red, they're too soft)
3 cups veggie or chicken broth
1 can chopped, roasted tomatoes
1 box frozen spinach
Cavender's seasoning
Heat a stock pot (I used my LeCruset pot). Put a small amount of olive oil in the bottom (about 1 T). When heated, put onion, garlic, and eggplant in the pot. Season with Cavender's. Cook for 7-8 minutes or until eggplant is softened. Put lentils and broth in the pot. The broth should just cover everything. If you need a little more broth, that is fine. Put heat on simmer and cook for 30-40 minutes, until lentils are tender. When they are tender, add the tomatoes and spinach. Cook until spinach is warmed and stir to distribute. Top with tzatziki, sour cream, or yogurt. Enjoy!
Monday, October 04, 2010
Berry Wonderful Cookies
I always make cookies when I go visit my parents. Well, mama had a recipe she wanted me to make (coming later) and I had a recipe I wanted to make.
So, I made mama's cookies for a cookout ( and made some of the people there take some so that we woud "run out" of cookies) and made "my" cookies toward the end of the visit. I found some dried blueberries on sale (something like 60% off) at Kroger one days...unfortunately, wasn't thinking and only bought one bag, they were still pricey!
Anyway, after I found those, I saw this yummy looking recipe on Jenny's site. Blueberry, oatmeal, and white chocolate...sounds delicious to me! I couldn't find the caramel bits....but these cookies were SO sweet even without those. If you have a sweet tooth, these are definitey cookies you'll like!
Blueberry, White Chocolate, Oatmeal Cookies slightly modified from Jenny
2 sticks softened butter
3/4 Cup granulated sugar
1 Cup packed brown sugar
2 eggs
1 1/2 Tablespoons pure vanilla
2 1/2 Cups all purpose flour
2 1/2 Cups oatmeal
1 teaspoon baking soda
1 1/2 Cups dried blueberries
1 Cup white chocolate chips or chopped white chocolate
1. Preheat oven to 350 degrees F. In a stand mixer, beat the butter and sugars until light and fluffy. Beat in eggs and vanilla until well combined.
2. Place flour, oatmeal, and baking soda into a large bowl; mix to combine. Add dry ingredients to wet ingredients along with the blueberries and white chocolate. Mix until just combined.
3. Use a medium cookie scoop and scoop dough onto a silpat, parchment lined baking sheet, or baking stone. Bake for 9-11 minutes or until edges are just turning golden brown (mine cooked for more like 12-13 minutes). Remove and let cool for 5 minutes before removing from pan. Enjoy!
Sunday, October 03, 2010
Grilled Mexican
When I went home a couple of months ago, I had several ideas for supper. It ended up being a world traveling tour! First we went to the restaurant in Memphis and had Russian food. Then we had Vietnamese Summer Rolls, which I'll post about later, and then we made grilled quesadillas. I think my parents were a bit wary of these. They weren't sure how the grilling bit would work...but it turned out great! We had some leftover chicken and I sauteed some peppers and onions, as well as roasted squash and zucchini.
All you have to do it put the filling ingredients that you want, put some (or a lot) cheese on it, fold in half, and grill! So good! The tortillas got a tad crispy on the grill, which I loved. We served it with salsa, sour cream, and guacamole. Side dish was watermelon and "grilling beans"...which weren't so good!
They were basically baked beans with a kick. So, if you need a quick dinner that can please everyone...even a picky eater...try these quesadillas. You could even do them on an indoor grill/George Foreman.
Grilled Quesadillas
Tortillas
chicken/beef/shrimp/beans (cut chicken/beef into strips)
Sauteed onions
sauteed peppers
roasted/grilled veggies
cheese
Sides: salsa, sour cream, guacamole (just avacados, lemon juice, and salt)
Place desired filling ingredients on HALF of the tortilla. When filled, flip the unfilled side on top of the filled side. Slide on to grill. When most of cheese has melted, flip over (just roll from one side to the other by rolling over the folded edge) and cook until completely melted and you get grill marks. Serve with salsa, sour cream, and guacamole. Enjoy!
Thursday, September 30, 2010
Recipe Box Fun #2
I usually try to make treats to bring for call but this month has just been so busy and tiring that I didn't do it many times. However, one of the recipes that I got from my Granny's recipe box seemed like a fun one to try. It intrigued me because I've tried to make banana blondies but just wasn't pleased.
And I must admit, when I finished these, I wasn't sure either. However, the nurses in the PICU stated differently! They all thoroughly enjoyed them...and they helped us get through another busy night taking care of our kiddos. I did make some slight changes to dress up the blondies. I added coconut and macadamia nuts to the top, which I think really added to the flavor. Be aware, these are not your typical dense, rich blondies but do have a wonderful taste and a moist texture. I enjoyed them and they have been approved by PICU nurses...so take a stab at them!
Banana Blondies
1/2 cup butter/margarine
1 cup brown sugar, packed
1 egg
1 tsp vanilla
1 t baking powder
1/4 tsp salt
1 cup mashed banana (about 2)
3/4 cup coconut + 1/4 cup
1 1/4 cup flour
1 small bag macadamia nuts, chopped
Preheat oven to 325 degrees. Cream together margarine, sugar, egg, and vanilla. Add baking powder and salt. Mix well. Add the banana and 3/4 cup coconut. Blend in flour. Pour into greased 13 X 9 pan. In a small bowl mix the 1/4 cup coconut, 1 T melted butter and 1T sugar and nuts. Spoon across the top of the batter. Bake for 45 minutes. Cool 15 minutes prior to cutting. Enjoy!
Monday, September 27, 2010
Batson Cookies
So sorry for my absence. This has been a long, hard month in the pediatric ICU. The past 5 times I've been on call I have slept less than an hour, with NO sleep for the past three. We've had several tragic cases with too many children passing away...but I still love what I do. Someone needs to be there to take care of not only the kids but their families as well. And so many times, kids DO get better...and can even surprise you with how well they do! That is why, when we were charged as Daring Bakers to decorate sugar cookies to represent what September means to us I decided to do the logo of the children's hospital where I work,
Blair Batson Children's Hospital. The September 2010 Daring Bakers’ challenge was hosted by Mandy of “What the Fruitcake?!” Mandy challenged everyone to make Decorated Sugar Cookies based on recipes from Peggy Porschen and The Joy of Baking. This was a fun challenge as sugar cookies are one of my favorite cookies but I've never been elaborate in my decorating.
At first, I wasn't really pleased with how these turned out...the kite didn't really look like a kite and it just wasn't "clean." However, once the icing firmed I thought they turned out great! I took them to work and as soon as people pulled them out they would say "Aw! These are BATSON cookies! Did you make these?!"
It was quite fun to show them off. :-) Thank you, Mandy, for this simple but delightful challenge!!! I thoroughly enjoyed it this month.
Basic Sugar Cookies:
Makes Approximately 36x 10cm / 4" Cookies
200g / 7oz / ½ cup + 6 Tbsp Unsalted Butter, at room temperature
400g / 14oz / 3 cups + 3 Tbsp All Purpose / Plain Flour
200g / 7oz / 1 cup Caster Sugar / Superfine Sugar
1 Large Egg, lightly beaten
5ml / 1 tsp Vanilla Extract / Or seeds from 1 vanilla bean
Directions
Cream together the butter, sugar and any flavourings you’re using. Beat until just becoming
creamy in texture.Beat in the egg until well combined, make sure to scrape down the sides of the bowl.
Add the sifted flour and mix on low until a non sticky dough forms. Knead into a ball and divide into 2 or 3 pieces. Roll out each portion between parchment paper or saran wrap to a thickness of about 5mm/1/5 inch (0.2 inch) Refrigerate for a minimum of 30mins.
• Tip: Recipes commonly just wrap the whole ball of dough in clingwrap and then refrigerate it for an
hour or overnight, but by rolling the dough between parchment, this shortens the chilling time and
then it’s also been rolled out while still soft making it easier and quicker. I LOVED this tip!!!!!
Once chilled, peel off parchment and place dough on a lightly floured surface. Cut out shapes with cookie cutters or a sharp knife. Preheat oven to 180°C (160°C Fan Assisted) / 350°F / Gas Mark 4. Bake until golden around the edges, about 8-15mins depending on the size of the cookies.
• Tip: Bake same sized cookies together otherwise mixing smaller with larger cookies could result in
some cookies being baked before others are done. Another good tip!
Leave to cool on cooling racks. Once completely cooled, decorate as desired.
Royal Icing: This is not the icing I used but I can't remember what I did...maybe used corn startch instead of egg whites?
315g – 375g / 11oz – 13oz / 2½ - 3 cups Icing / Confectioner’s / Powdered Sugar, unsifted
2 Large Egg Whites
10ml / 2 tsp Lemon Juice
5ml / 1 tsp Almond Extract, optional
Directions
• Beat egg whites with lemon juice until combined.
• Tip: It’s important that the bowls/spoons/spatulas and beaters you use are thoroughly cleaned and
grease free.
• Sift the icing sugar to remove lumps and add it to the egg whites.
• Tip: I’ve listed 2 amounts of icing sugar, the lesser amount is good for a flooding consistency, and the larger amount is for outlining, but you can add even more for a much thicker consistency good for writing. If you add too much icing sugar or would like to make a thinner consistency, add very small amounts of water, a few drops at a time, until you reach the consistency you need.
• Beat on low until combined and smooth.
• Use immediately or keep in an airtight container.
Friday, September 10, 2010
Fun in a Recipe Box
When I was home at the end of the month, I asked my mom for a specific recipe. Well, she pulled out my grandmother's metal recipe box...a box FULL of her recipes. It contains some gems...and some things we questioned. Yes...she had 13...THIRTEEN...recipes for CARROTS, in a section titled "Carrots"! ?????? We asked my dad if they ate carrots a lot and he didn't seem to remember that. Who knows! Anyway, I pulled out several recipes that interested me, one of which was banana pound cake.
This was one of about 20 pound cake recipes. Seems that was a popular thing back in the day. :-) The reason I wanted to try this cake was that it reminded me of the chocolate chip pound cake that my mom makes.
I made it a couple of weeks ago and took it to Sunday School and then the remainder to work. It got many compliments, and though it's not the lightest thing you could have, it's definitely not too bad for a cake! Unlike the traditional pound cake, which can be heavier in texture, this cake is nice and light. Perfect for breakfast or "tea!" So, have a try of my Granny's banana pound cake...which she got from the Ft. Worth Star Teligram! :-)
4 Banana Pound Cake
1 yellow cake mix
4 eggs, room temp
1/3 cup oil
1/2 cup water
4 medium, ripe bananas, mashed
1 pkg. vanilla pudding (I used sugar free)
1/2 teaspoon cinnamon
1/2 teaspoon nutmeg
Preheat oven to 350 degrees. Combine all ingredients in a large bowl and mix until well blended. Then beat for 4 minutes on medium speed. Pour into greased 10 inch Bundt or tube pan. Bake for 1 hour. Cool for 10 minutes and then turn onto a plate to complete cooling. Dust with powdered sugar or a light glaze. Enjoy!
Saturday, September 04, 2010
Joyous Blueberry Muffins
When one of my friends got married, my mom brought me a recipe for a blueberry muffin. It's name...Joyous Blueberry Muffins. Who can resist a name like that!? I waited a while to make them but finally did soon after my brother got married. These are really good muffins!!!
It uses a slightly different technique for mixing in the berries. Instead of stirring them into the batter, you layer the batter and berries into the pan. This prevents any extra juice from the berries from staining the batter, which in and of itself is delicious.
I decreased the sugar and butter slight and still ended up with a tender muffin. The flavor is slightly less sweet than a typical "American breakfast muffin" but more sweet than a "tea muffin".....if any of that makes sense!
Joyous Blueberry Muffins adapted from Jane's Sweets and Baking
1 1/2 cups (recipe called fro 2 1/2 cups) granulated sugar
1/3 cup vegetable oil
5 tablesppoons melted butter
4 eggs
1 T vanilla extract
5 cups All-purpose flour
1 Tablespoon baking powder
1/4 teaspoon baking soda
1 cup buttermilk (I used milk)
1/2 cup Greek yogurt (originally sour cream)
2 1/4 cups frozen or fresh blueberries
coarse sugar for topping the muffins
Preheat oven to 425. Blend oil, butter, sugar together. Add eggs and vanilla and blend well. Mix flour, powder, soda together. Fold into butter mixture. Blend in buttermilk/milk and yogurt. This will be thick!
Prepare your muffin pans with cooking spray or liners. Fill tins 1/3 full of batter. Then add a layer of berries. Spoon more batter on top of this. If you have room, add more berries and a dab more of batter. Bake for 7 minutes and then turn oven to 350 and bake for 6-8 minutes more. If using Jumbo tins, bake for twice the time at each temp. Remove from oven when a toothpick comes out mostly clean and they spring back when lightly pressed with your finger. Let cool for 5 minutes in pan. Makes 24 regular muffins and 12 Jumbo. Enjoy!!!
Sunday, August 29, 2010
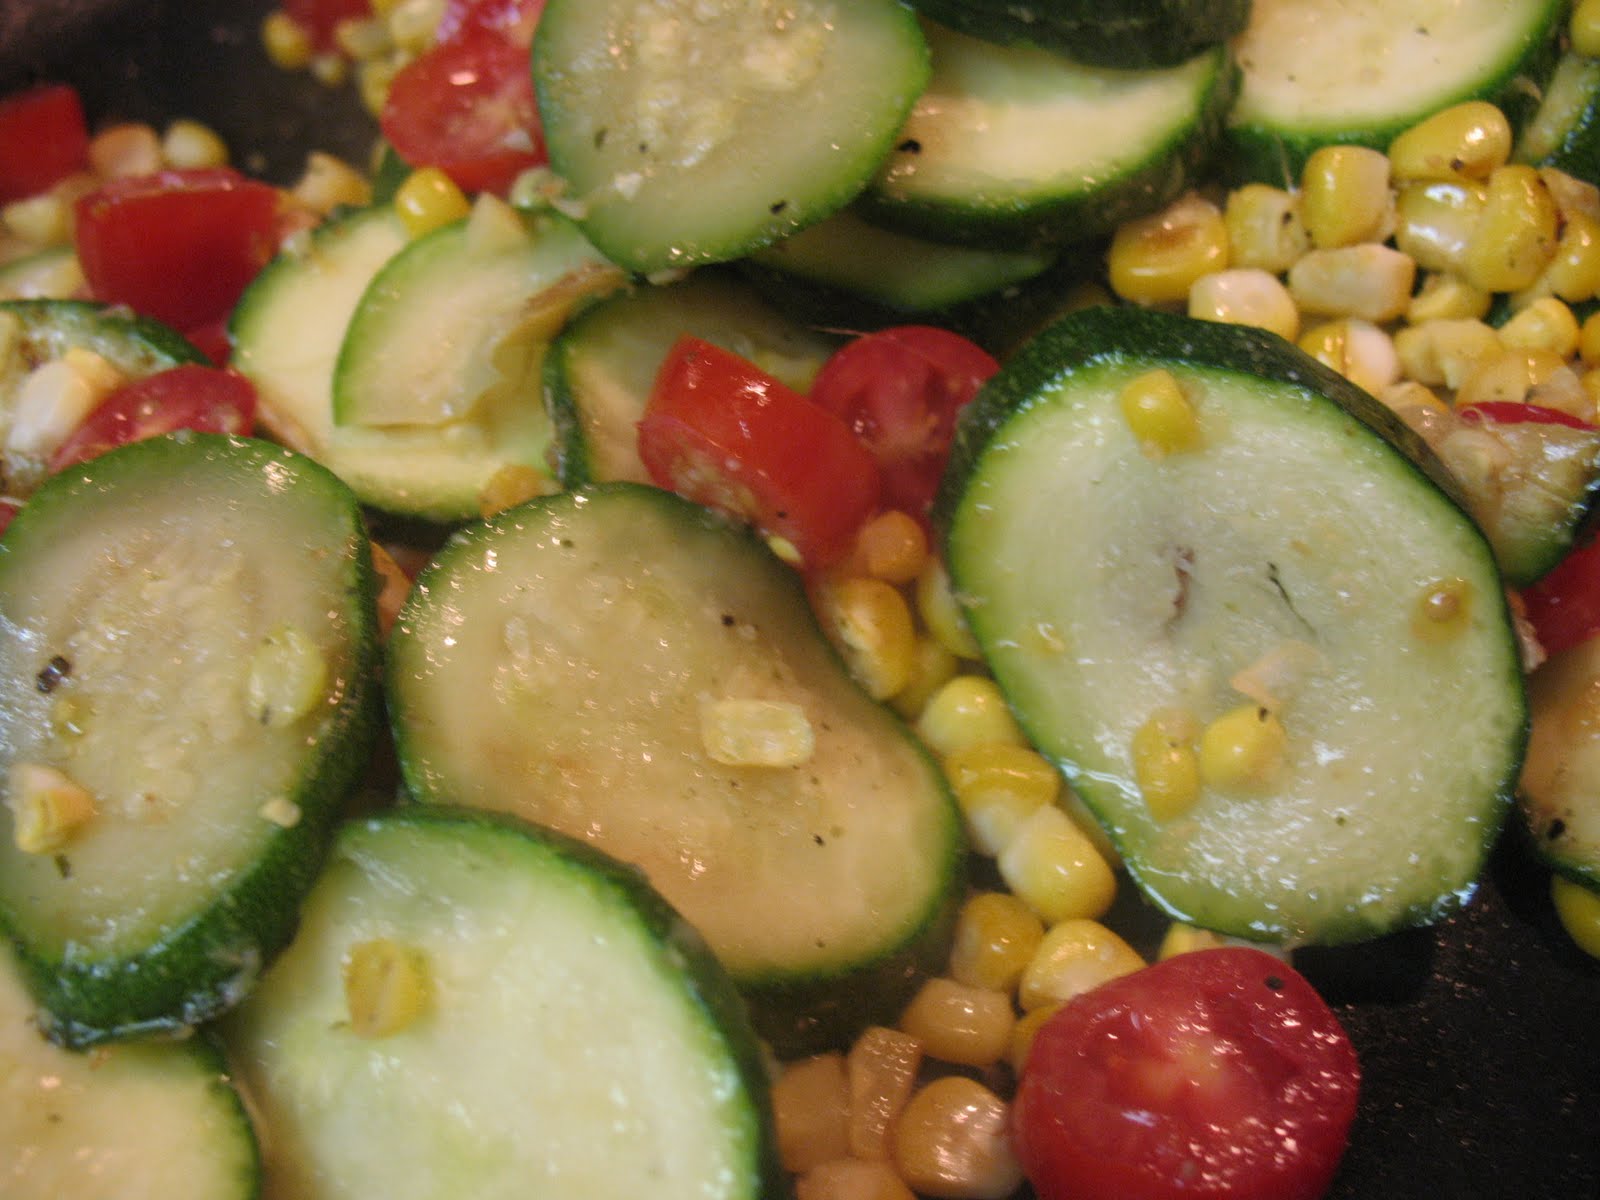
Summer Veggie Shrimp Saute
Earlier in the summer, I saw a simple recipe on The Pioneer Woman's site that just looked so fresh and delicious. Yes, a nice, light meal on Ree's site. She does cook "cowgirl food" at times! I know it's the end of summer (boo hoo, berries and summer squash are fading) but let's give those fresh veggies a good send off with the great saute. Just take a couple of squash, ears of corn, and some tomatoes...saute and add some shrimp. Sooo good and simple!
I just used cooking spray instead of butter but you could use butter (2T) or olive oil (2T) to add some healthy fat. Also, the recipe calls for raw, jumbo shrimp but I used pre-cooked, frozen shrimp (I know...so much for fresh). After having some fresh shrimp this weekend...it does make a difference in the texture of the shrimp. Fresh shrimp is fluffy and almost "pops" in your mouth. However, for convenience and $$ sake, I will continue to use the frozen variety and get fresh when I can.
Add the rest of the butter and oil and heat over medium heat or spray pan with cooking spray. Add zucchini slices in a single layer and cook for one minute, tossing once. Scoot the zucchini to the edges of the pan, then add corn kernels to the middle of the pan. Cook for one minute. I'm sure I cooked them longer than this...I like my veggies a little more tender.
Add grape tomatoes, salt, and pepper, and toss around, then add shrimp. Cook for an additional 30 seconds, then remove from heat. Serve on a big platter.
Allowed to cool for a bit! Yummy and refreshing. Enjoy!
I just used cooking spray instead of butter but you could use butter (2T) or olive oil (2T) to add some healthy fat. Also, the recipe calls for raw, jumbo shrimp but I used pre-cooked, frozen shrimp (I know...so much for fresh). After having some fresh shrimp this weekend...it does make a difference in the texture of the shrimp. Fresh shrimp is fluffy and almost "pops" in your mouth. However, for convenience and $$ sake, I will continue to use the frozen variety and get fresh when I can.
Ingredients
- 4 cloves Garlic, Minced (I used pre-minced)
- 12 whole Jumbo Shrimp, Peeled, Deveined, Tails Left On
- 2 whole Zucchini, Sliced On A Slight Diagonal
- 2 ears Corn, Kernels Sliced Off
- ½ cups Grape Tomatoes, Sliced In Half Lengthwise
- Salt And Freshly Ground Pepper, To Taste
- Chopped Fresh Herbs, If Desired
Preparation Instructions
Heat 1 tablespoon butter and 1 tablespoon olive oil in a large skillet over medium heat. Add minced garlic. When oil/butter is hot, add shrimp and cook for 3 minutes - if using fresh shrimp. If you choose to use frozen, pre-cooked just thaw the shrimp in some water and add to the pan at the end to heat through. Remove to a plate. Do not clean skillet.Add the rest of the butter and oil and heat over medium heat or spray pan with cooking spray. Add zucchini slices in a single layer and cook for one minute, tossing once. Scoot the zucchini to the edges of the pan, then add corn kernels to the middle of the pan. Cook for one minute. I'm sure I cooked them longer than this...I like my veggies a little more tender.
Add grape tomatoes, salt, and pepper, and toss around, then add shrimp. Cook for an additional 30 seconds, then remove from heat. Serve on a big platter.
Allowed to cool for a bit! Yummy and refreshing. Enjoy!
Subscribe to:
Posts (Atom)