I usually try to make treats to bring for call but this month has just been so busy and tiring that I didn't do it many times. However, one of the recipes that I got from my Granny's recipe box seemed like a fun one to try. It intrigued me because I've tried to make banana blondies but just wasn't pleased.
And I must admit, when I finished these, I wasn't sure either. However, the nurses in the PICU stated differently! They all thoroughly enjoyed them...and they helped us get through another busy night taking care of our kiddos. I did make some slight changes to dress up the blondies. I added coconut and macadamia nuts to the top, which I think really added to the flavor. Be aware, these are not your typical dense, rich blondies but do have a wonderful taste and a moist texture. I enjoyed them and they have been approved by PICU nurses...so take a stab at them!
Banana Blondies
1/2 cup butter/margarine
1 cup brown sugar, packed
1 egg
1 tsp vanilla
1 t baking powder
1/4 tsp salt
1 cup mashed banana (about 2)
3/4 cup coconut + 1/4 cup
1 1/4 cup flour
1 small bag macadamia nuts, chopped
Preheat oven to 325 degrees. Cream together margarine, sugar, egg, and vanilla. Add baking powder and salt. Mix well. Add the banana and 3/4 cup coconut. Blend in flour. Pour into greased 13 X 9 pan. In a small bowl mix the 1/4 cup coconut, 1 T melted butter and 1T sugar and nuts. Spoon across the top of the batter. Bake for 45 minutes. Cool 15 minutes prior to cutting. Enjoy!
Thursday, September 30, 2010
Monday, September 27, 2010
Batson Cookies
So sorry for my absence. This has been a long, hard month in the pediatric ICU. The past 5 times I've been on call I have slept less than an hour, with NO sleep for the past three. We've had several tragic cases with too many children passing away...but I still love what I do. Someone needs to be there to take care of not only the kids but their families as well. And so many times, kids DO get better...and can even surprise you with how well they do! That is why, when we were charged as Daring Bakers to decorate sugar cookies to represent what September means to us I decided to do the logo of the children's hospital where I work,
Blair Batson Children's Hospital. The September 2010 Daring Bakers’ challenge was hosted by Mandy of “What the Fruitcake?!” Mandy challenged everyone to make Decorated Sugar Cookies based on recipes from Peggy Porschen and The Joy of Baking. This was a fun challenge as sugar cookies are one of my favorite cookies but I've never been elaborate in my decorating.
At first, I wasn't really pleased with how these turned out...the kite didn't really look like a kite and it just wasn't "clean." However, once the icing firmed I thought they turned out great! I took them to work and as soon as people pulled them out they would say "Aw! These are BATSON cookies! Did you make these?!"
It was quite fun to show them off. :-) Thank you, Mandy, for this simple but delightful challenge!!! I thoroughly enjoyed it this month.
Basic Sugar Cookies:
Makes Approximately 36x 10cm / 4" Cookies
200g / 7oz / ½ cup + 6 Tbsp Unsalted Butter, at room temperature
400g / 14oz / 3 cups + 3 Tbsp All Purpose / Plain Flour
200g / 7oz / 1 cup Caster Sugar / Superfine Sugar
1 Large Egg, lightly beaten
5ml / 1 tsp Vanilla Extract / Or seeds from 1 vanilla bean
Directions
Cream together the butter, sugar and any flavourings you’re using. Beat until just becoming
creamy in texture.Beat in the egg until well combined, make sure to scrape down the sides of the bowl.
Add the sifted flour and mix on low until a non sticky dough forms. Knead into a ball and divide into 2 or 3 pieces. Roll out each portion between parchment paper or saran wrap to a thickness of about 5mm/1/5 inch (0.2 inch) Refrigerate for a minimum of 30mins.
• Tip: Recipes commonly just wrap the whole ball of dough in clingwrap and then refrigerate it for an
hour or overnight, but by rolling the dough between parchment, this shortens the chilling time and
then it’s also been rolled out while still soft making it easier and quicker. I LOVED this tip!!!!!
Once chilled, peel off parchment and place dough on a lightly floured surface. Cut out shapes with cookie cutters or a sharp knife. Preheat oven to 180°C (160°C Fan Assisted) / 350°F / Gas Mark 4. Bake until golden around the edges, about 8-15mins depending on the size of the cookies.
• Tip: Bake same sized cookies together otherwise mixing smaller with larger cookies could result in
some cookies being baked before others are done. Another good tip!
Leave to cool on cooling racks. Once completely cooled, decorate as desired.
Royal Icing: This is not the icing I used but I can't remember what I did...maybe used corn startch instead of egg whites?
315g – 375g / 11oz – 13oz / 2½ - 3 cups Icing / Confectioner’s / Powdered Sugar, unsifted
2 Large Egg Whites
10ml / 2 tsp Lemon Juice
5ml / 1 tsp Almond Extract, optional
Directions
• Beat egg whites with lemon juice until combined.
• Tip: It’s important that the bowls/spoons/spatulas and beaters you use are thoroughly cleaned and
grease free.
• Sift the icing sugar to remove lumps and add it to the egg whites.
• Tip: I’ve listed 2 amounts of icing sugar, the lesser amount is good for a flooding consistency, and the larger amount is for outlining, but you can add even more for a much thicker consistency good for writing. If you add too much icing sugar or would like to make a thinner consistency, add very small amounts of water, a few drops at a time, until you reach the consistency you need.
• Beat on low until combined and smooth.
• Use immediately or keep in an airtight container.
Blair Batson Children's Hospital. The September 2010 Daring Bakers’ challenge was hosted by Mandy of “What the Fruitcake?!” Mandy challenged everyone to make Decorated Sugar Cookies based on recipes from Peggy Porschen and The Joy of Baking. This was a fun challenge as sugar cookies are one of my favorite cookies but I've never been elaborate in my decorating.
At first, I wasn't really pleased with how these turned out...the kite didn't really look like a kite and it just wasn't "clean." However, once the icing firmed I thought they turned out great! I took them to work and as soon as people pulled them out they would say "Aw! These are BATSON cookies! Did you make these?!"
It was quite fun to show them off. :-) Thank you, Mandy, for this simple but delightful challenge!!! I thoroughly enjoyed it this month.
Basic Sugar Cookies:
Makes Approximately 36x 10cm / 4" Cookies
200g / 7oz / ½ cup + 6 Tbsp Unsalted Butter, at room temperature
400g / 14oz / 3 cups + 3 Tbsp All Purpose / Plain Flour
200g / 7oz / 1 cup Caster Sugar / Superfine Sugar
1 Large Egg, lightly beaten
5ml / 1 tsp Vanilla Extract / Or seeds from 1 vanilla bean
Directions
Cream together the butter, sugar and any flavourings you’re using. Beat until just becoming
creamy in texture.Beat in the egg until well combined, make sure to scrape down the sides of the bowl.
Add the sifted flour and mix on low until a non sticky dough forms. Knead into a ball and divide into 2 or 3 pieces. Roll out each portion between parchment paper or saran wrap to a thickness of about 5mm/1/5 inch (0.2 inch) Refrigerate for a minimum of 30mins.
• Tip: Recipes commonly just wrap the whole ball of dough in clingwrap and then refrigerate it for an
hour or overnight, but by rolling the dough between parchment, this shortens the chilling time and
then it’s also been rolled out while still soft making it easier and quicker. I LOVED this tip!!!!!
Once chilled, peel off parchment and place dough on a lightly floured surface. Cut out shapes with cookie cutters or a sharp knife. Preheat oven to 180°C (160°C Fan Assisted) / 350°F / Gas Mark 4. Bake until golden around the edges, about 8-15mins depending on the size of the cookies.
• Tip: Bake same sized cookies together otherwise mixing smaller with larger cookies could result in
some cookies being baked before others are done. Another good tip!
Leave to cool on cooling racks. Once completely cooled, decorate as desired.
Royal Icing: This is not the icing I used but I can't remember what I did...maybe used corn startch instead of egg whites?
315g – 375g / 11oz – 13oz / 2½ - 3 cups Icing / Confectioner’s / Powdered Sugar, unsifted
2 Large Egg Whites
10ml / 2 tsp Lemon Juice
5ml / 1 tsp Almond Extract, optional
Directions
• Beat egg whites with lemon juice until combined.
• Tip: It’s important that the bowls/spoons/spatulas and beaters you use are thoroughly cleaned and
grease free.
• Sift the icing sugar to remove lumps and add it to the egg whites.
• Tip: I’ve listed 2 amounts of icing sugar, the lesser amount is good for a flooding consistency, and the larger amount is for outlining, but you can add even more for a much thicker consistency good for writing. If you add too much icing sugar or would like to make a thinner consistency, add very small amounts of water, a few drops at a time, until you reach the consistency you need.
• Beat on low until combined and smooth.
• Use immediately or keep in an airtight container.
Friday, September 10, 2010
Fun in a Recipe Box
When I was home at the end of the month, I asked my mom for a specific recipe. Well, she pulled out my grandmother's metal recipe box...a box FULL of her recipes. It contains some gems...and some things we questioned. Yes...she had 13...THIRTEEN...recipes for CARROTS, in a section titled "Carrots"! ?????? We asked my dad if they ate carrots a lot and he didn't seem to remember that. Who knows! Anyway, I pulled out several recipes that interested me, one of which was banana pound cake.
This was one of about 20 pound cake recipes. Seems that was a popular thing back in the day. :-) The reason I wanted to try this cake was that it reminded me of the chocolate chip pound cake that my mom makes.
I made it a couple of weeks ago and took it to Sunday School and then the remainder to work. It got many compliments, and though it's not the lightest thing you could have, it's definitely not too bad for a cake! Unlike the traditional pound cake, which can be heavier in texture, this cake is nice and light. Perfect for breakfast or "tea!" So, have a try of my Granny's banana pound cake...which she got from the Ft. Worth Star Teligram! :-)
4 Banana Pound Cake
1 yellow cake mix
4 eggs, room temp
1/3 cup oil
1/2 cup water
4 medium, ripe bananas, mashed
1 pkg. vanilla pudding (I used sugar free)
1/2 teaspoon cinnamon
1/2 teaspoon nutmeg
Preheat oven to 350 degrees. Combine all ingredients in a large bowl and mix until well blended. Then beat for 4 minutes on medium speed. Pour into greased 10 inch Bundt or tube pan. Bake for 1 hour. Cool for 10 minutes and then turn onto a plate to complete cooling. Dust with powdered sugar or a light glaze. Enjoy!
This was one of about 20 pound cake recipes. Seems that was a popular thing back in the day. :-) The reason I wanted to try this cake was that it reminded me of the chocolate chip pound cake that my mom makes.
I made it a couple of weeks ago and took it to Sunday School and then the remainder to work. It got many compliments, and though it's not the lightest thing you could have, it's definitely not too bad for a cake! Unlike the traditional pound cake, which can be heavier in texture, this cake is nice and light. Perfect for breakfast or "tea!" So, have a try of my Granny's banana pound cake...which she got from the Ft. Worth Star Teligram! :-)
4 Banana Pound Cake
1 yellow cake mix
4 eggs, room temp
1/3 cup oil
1/2 cup water
4 medium, ripe bananas, mashed
1 pkg. vanilla pudding (I used sugar free)
1/2 teaspoon cinnamon
1/2 teaspoon nutmeg
Preheat oven to 350 degrees. Combine all ingredients in a large bowl and mix until well blended. Then beat for 4 minutes on medium speed. Pour into greased 10 inch Bundt or tube pan. Bake for 1 hour. Cool for 10 minutes and then turn onto a plate to complete cooling. Dust with powdered sugar or a light glaze. Enjoy!
Saturday, September 04, 2010
Joyous Blueberry Muffins
When one of my friends got married, my mom brought me a recipe for a blueberry muffin. It's name...Joyous Blueberry Muffins. Who can resist a name like that!? I waited a while to make them but finally did soon after my brother got married. These are really good muffins!!!
It uses a slightly different technique for mixing in the berries. Instead of stirring them into the batter, you layer the batter and berries into the pan. This prevents any extra juice from the berries from staining the batter, which in and of itself is delicious.
I decreased the sugar and butter slight and still ended up with a tender muffin. The flavor is slightly less sweet than a typical "American breakfast muffin" but more sweet than a "tea muffin".....if any of that makes sense!
Joyous Blueberry Muffins adapted from Jane's Sweets and Baking
1 1/2 cups (recipe called fro 2 1/2 cups) granulated sugar
1/3 cup vegetable oil
5 tablesppoons melted butter
4 eggs
1 T vanilla extract
5 cups All-purpose flour
1 Tablespoon baking powder
1/4 teaspoon baking soda
1 cup buttermilk (I used milk)
1/2 cup Greek yogurt (originally sour cream)
2 1/4 cups frozen or fresh blueberries
coarse sugar for topping the muffins
Preheat oven to 425. Blend oil, butter, sugar together. Add eggs and vanilla and blend well. Mix flour, powder, soda together. Fold into butter mixture. Blend in buttermilk/milk and yogurt. This will be thick!
Prepare your muffin pans with cooking spray or liners. Fill tins 1/3 full of batter. Then add a layer of berries. Spoon more batter on top of this. If you have room, add more berries and a dab more of batter. Bake for 7 minutes and then turn oven to 350 and bake for 6-8 minutes more. If using Jumbo tins, bake for twice the time at each temp. Remove from oven when a toothpick comes out mostly clean and they spring back when lightly pressed with your finger. Let cool for 5 minutes in pan. Makes 24 regular muffins and 12 Jumbo. Enjoy!!!
It uses a slightly different technique for mixing in the berries. Instead of stirring them into the batter, you layer the batter and berries into the pan. This prevents any extra juice from the berries from staining the batter, which in and of itself is delicious.
I decreased the sugar and butter slight and still ended up with a tender muffin. The flavor is slightly less sweet than a typical "American breakfast muffin" but more sweet than a "tea muffin".....if any of that makes sense!
Joyous Blueberry Muffins adapted from Jane's Sweets and Baking
1 1/2 cups (recipe called fro 2 1/2 cups) granulated sugar
1/3 cup vegetable oil
5 tablesppoons melted butter
4 eggs
1 T vanilla extract
5 cups All-purpose flour
1 Tablespoon baking powder
1/4 teaspoon baking soda
1 cup buttermilk (I used milk)
1/2 cup Greek yogurt (originally sour cream)
2 1/4 cups frozen or fresh blueberries
coarse sugar for topping the muffins
Preheat oven to 425. Blend oil, butter, sugar together. Add eggs and vanilla and blend well. Mix flour, powder, soda together. Fold into butter mixture. Blend in buttermilk/milk and yogurt. This will be thick!
Prepare your muffin pans with cooking spray or liners. Fill tins 1/3 full of batter. Then add a layer of berries. Spoon more batter on top of this. If you have room, add more berries and a dab more of batter. Bake for 7 minutes and then turn oven to 350 and bake for 6-8 minutes more. If using Jumbo tins, bake for twice the time at each temp. Remove from oven when a toothpick comes out mostly clean and they spring back when lightly pressed with your finger. Let cool for 5 minutes in pan. Makes 24 regular muffins and 12 Jumbo. Enjoy!!!
Sunday, August 29, 2010
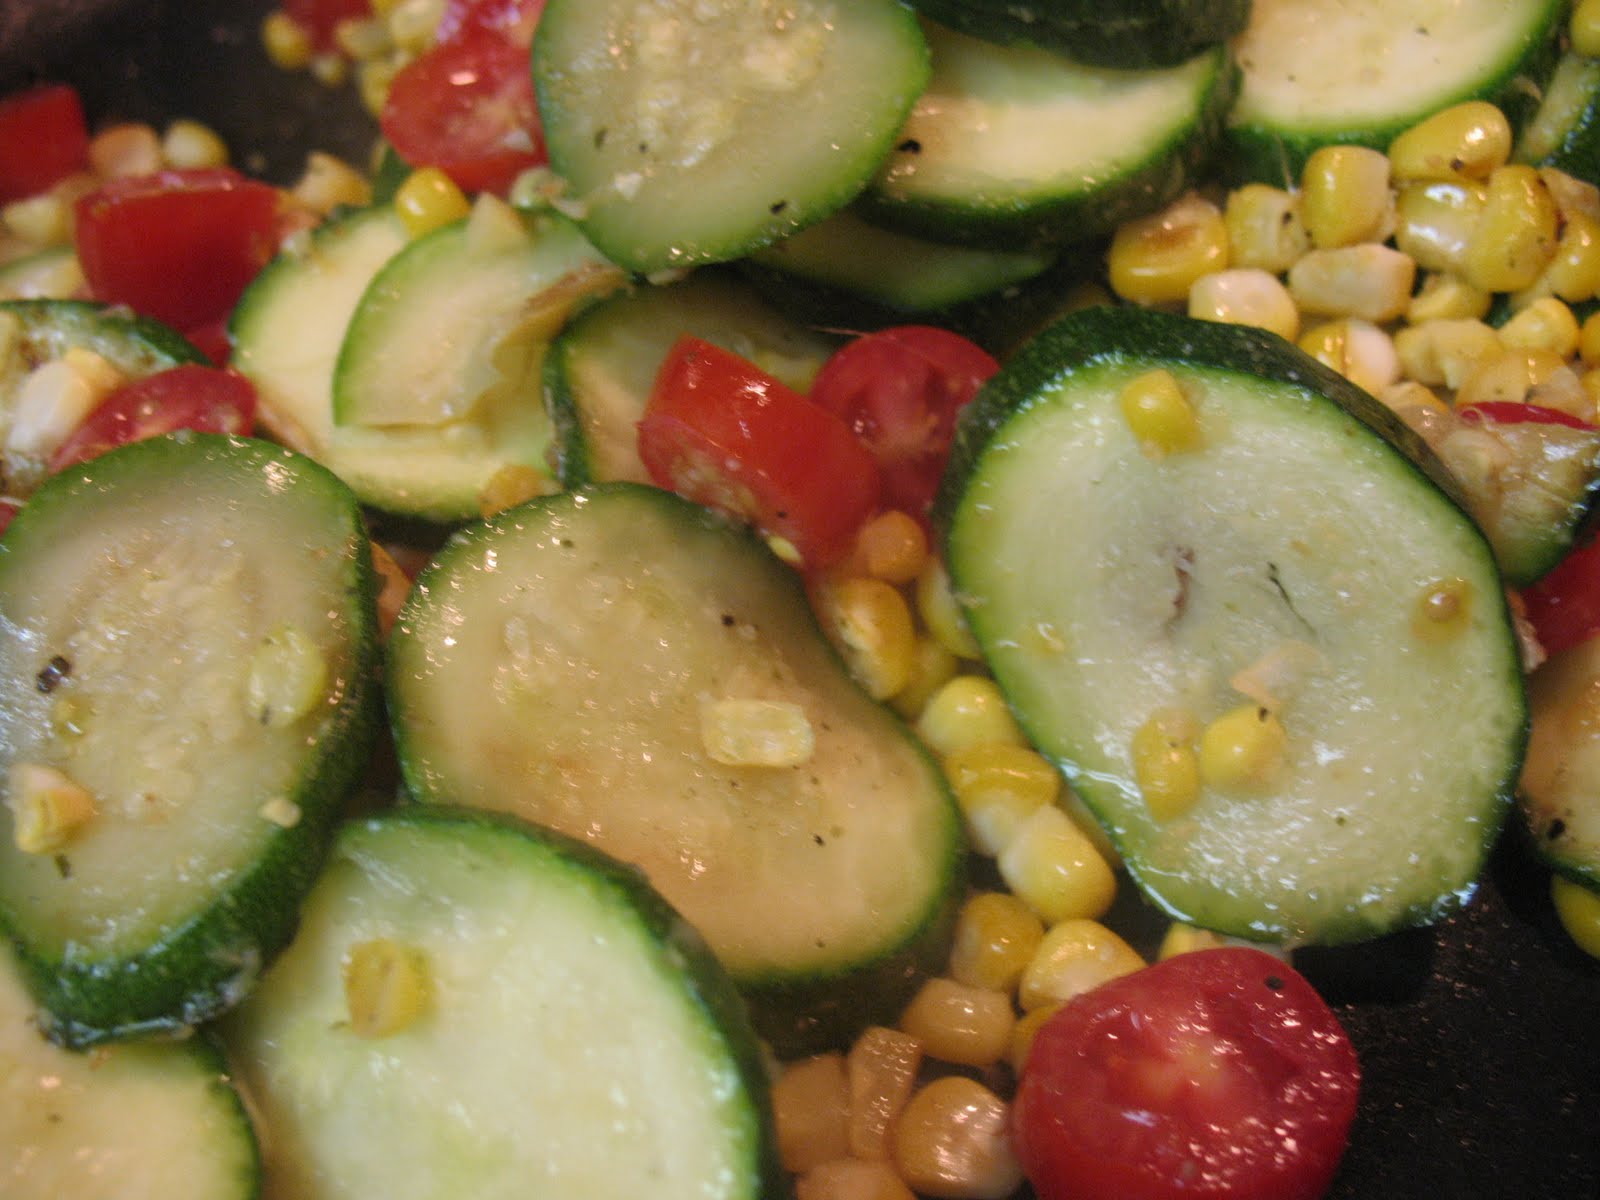
Summer Veggie Shrimp Saute
Earlier in the summer, I saw a simple recipe on The Pioneer Woman's site that just looked so fresh and delicious. Yes, a nice, light meal on Ree's site. She does cook "cowgirl food" at times! I know it's the end of summer (boo hoo, berries and summer squash are fading) but let's give those fresh veggies a good send off with the great saute. Just take a couple of squash, ears of corn, and some tomatoes...saute and add some shrimp. Sooo good and simple!
I just used cooking spray instead of butter but you could use butter (2T) or olive oil (2T) to add some healthy fat. Also, the recipe calls for raw, jumbo shrimp but I used pre-cooked, frozen shrimp (I know...so much for fresh). After having some fresh shrimp this weekend...it does make a difference in the texture of the shrimp. Fresh shrimp is fluffy and almost "pops" in your mouth. However, for convenience and $$ sake, I will continue to use the frozen variety and get fresh when I can.
Add the rest of the butter and oil and heat over medium heat or spray pan with cooking spray. Add zucchini slices in a single layer and cook for one minute, tossing once. Scoot the zucchini to the edges of the pan, then add corn kernels to the middle of the pan. Cook for one minute. I'm sure I cooked them longer than this...I like my veggies a little more tender.
Add grape tomatoes, salt, and pepper, and toss around, then add shrimp. Cook for an additional 30 seconds, then remove from heat. Serve on a big platter.
Allowed to cool for a bit! Yummy and refreshing. Enjoy!
I just used cooking spray instead of butter but you could use butter (2T) or olive oil (2T) to add some healthy fat. Also, the recipe calls for raw, jumbo shrimp but I used pre-cooked, frozen shrimp (I know...so much for fresh). After having some fresh shrimp this weekend...it does make a difference in the texture of the shrimp. Fresh shrimp is fluffy and almost "pops" in your mouth. However, for convenience and $$ sake, I will continue to use the frozen variety and get fresh when I can.
Ingredients
- 4 cloves Garlic, Minced (I used pre-minced)
- 12 whole Jumbo Shrimp, Peeled, Deveined, Tails Left On
- 2 whole Zucchini, Sliced On A Slight Diagonal
- 2 ears Corn, Kernels Sliced Off
- ½ cups Grape Tomatoes, Sliced In Half Lengthwise
- Salt And Freshly Ground Pepper, To Taste
- Chopped Fresh Herbs, If Desired
Preparation Instructions
Heat 1 tablespoon butter and 1 tablespoon olive oil in a large skillet over medium heat. Add minced garlic. When oil/butter is hot, add shrimp and cook for 3 minutes - if using fresh shrimp. If you choose to use frozen, pre-cooked just thaw the shrimp in some water and add to the pan at the end to heat through. Remove to a plate. Do not clean skillet.Add the rest of the butter and oil and heat over medium heat or spray pan with cooking spray. Add zucchini slices in a single layer and cook for one minute, tossing once. Scoot the zucchini to the edges of the pan, then add corn kernels to the middle of the pan. Cook for one minute. I'm sure I cooked them longer than this...I like my veggies a little more tender.
Add grape tomatoes, salt, and pepper, and toss around, then add shrimp. Cook for an additional 30 seconds, then remove from heat. Serve on a big platter.
Allowed to cool for a bit! Yummy and refreshing. Enjoy!
Friday, August 27, 2010
Broiled Florida...errr...Baked Alaska?
The August 2010 Daring Bakers’ challenge was hosted by Elissa of 17 and Baking. For the first time, The Daring Bakers partnered with Sugar High Fridays for a co-event and Elissa was the gracious hostess of both. Using the theme of beurre noisette, or browned butter, Elissa chose to challenge Daring Bakers to make a pound cake to be used in either a Baked Alaska or in Ice Cream Petit Fours. The sources for Elissa’s challenge were Gourmet magazine and David Lebovitz’s “The Perfect Scoop”.
I must admit that when I saw the Daring Bakers Challenge this month involved making ice cream for the second month in a row, I was a bit disappointed. However, this month I would actually be able to make the ice cream from scratch as I had a WEEK !!!!! of vacation. As evidenced in my last post, I went home for a little bit to spend some time with my parents (last time I was there was 6 months ago), so I used their ice cream maker. Let me just say that make ice cream is fun! I don't know what makes it so, but it just is. My mom even said she didn't know why they didn't do it more often based on how simple it is.
Initially I was going to make the petit fours...I've always wanted to make those and the icing on top just fascinates me. However, I came up with a fun idea for a baked alaska...so, I changed directions. I saw a recipe for a lime ice cream on another blog and thought that it would be neat to make a "key lime pie" baked alaska.
So....that's what I did. I found a pretty simple recipe on allrecipes for lime ice cream. It did turn out a tad bit more like a sherbet but it was still delicious. In fact, all of us liked it the best out of the entire dessert. When I scooped it after the first night, I just giggled with delight in the perfect little rolled scoop of ice cream.
I wish that it had been more green but my dad didn't mind...he said "Well, a lime slush at Sonic isn't green"...so by all means our lime ice cream shouldn't be green! ;-) The second day I made the browned butter pound cake. The first time I took this out of the oven I thought it wasn't done. In hindsight, I wish that I had just taken it out then.
After I cut it to fit the bowl, I put it on the ice cream and back in the freezer. Unfortunately, I'm afraid that the freezing process just dried the cake out and made it too hard to eat. We ended up not eating most of that layer. The scrap pieces were good, though I think that the browned butter in a pound cake was just too rich for me. The meringue was very easy to make. Torching it, however, was another story!
We attempted to use the propane torch that my dad had (in the garage!) but it was too hot and just burned the meringue. So, I baked it (appropriate for the title of the dessert - and yes, I know it's not broiled Florida...that came from my dad who was trying to be funny - love you Daddy!) and it turned out great!
All in all this was a fun dessert to make...and yes, I'd try the technique again but would probably use a different cake base. Elissa, thanks for such a fun recipe...and making me discover the fun of making ice cream!
19 tablespoons (9.5 oz) (275g) unsalted (sweet) butter (I used 16 or 2 sticks butter)
2 cups (200g) sifted cake flour (not self-rising; sift before measuring) (See “Note” section for cake flour substitution)
1 teaspoon (5g) baking powder
1/2 teaspoon (3g) salt
1/2 cup (110g) packed light brown sugar
1/3 (75g) cup granulated sugar
4 large eggs
1/2 teaspoon pure vanilla extract
1. Preheat the oven to 325°F/160°C and put a rack in the center. Butter and flour a 9”x9” (23cmx23cm) square pan.
2. Place the butter in a 10” (25cm) skillet over medium heat. Brown the butter until the milk solids are a dark chocolate brown and the butter smells nutty. (Don’t take your eyes off the butter in case it burns.) Pour into a shallow bowl and chill in the freezer until just congealed, 15-30 minutes.
3. Whisk together cake flour, baking powder, and salt.
4. Beat the brown butter, light brown sugar, and granulated sugar in an electric mixer until light and fluffy, about 2 minutes. Beat in the eggs one at a time, mixing well, and then the vanilla extract.
5. Stir in the flour mixture at low speed until just combined.
6. Scrape the batter into the greased and floured 9”x9” (23cmx23cm) square pan. Smooth the top with a rubber spatula and rap the pan on the counter. Bake until golden brown on top and when a toothpick inserted into the center comes out clean, about 25 minutes.
7. Cool in the pan 10 minutes. Run a knife along the edge and invert right-side-up onto a cooling rack to cool completely.
Meringue (For the Baked Alaska)
8 large egg whites
½ teaspoon (3g) cream of tartar
½ teaspoon (3g) salt
1 cup (220g) sugar
Beat the egg whites, cream of tartar, and salt on high speed in an electric mixer until soft peaks form. Beat in the sugar gradually in a slow stream until stiff peaks form.
Assembly Instructions – Baked Alaska
1. Fill desired rounded dish to the top with ice cream (I used a mixing bowl but you can use individual sized bowls as well). Cover the top with plastic wrap. If you line the bowl with wrap just use the overhanging portion to cover it. Freeze for several hours or until solid. I did overnight.
2. Level the top of the brown butter pound cake with a serrated knife or with a cake leveler. Cut out desired number and size circles from the cake. Enjoy scraps!!!
3. Make the meringue (see above.)
4. Unwrap the ice cream “cups” and invert on top of a cake round. If you did not line with wrap you can place the bowl(s) in some slightly warm water to loosen the ice cream.
5. Pipe the meringue over the ice cream and cake, or smooth it over with a spatula, so that none of the ice cream or cake is exposed. Freeze for one hour or up to a day. I smoothed over and then spiked it using a knife.
6. Burn the tips of the meringue with a cooking blow torch. Or, bake the meringue-topped Baked Alaskas on a rimmed baking sheet in a 500°F/260°C oven for 5 minutes until lightly golden. Serve immediately.
I must admit that when I saw the Daring Bakers Challenge this month involved making ice cream for the second month in a row, I was a bit disappointed. However, this month I would actually be able to make the ice cream from scratch as I had a WEEK !!!!! of vacation. As evidenced in my last post, I went home for a little bit to spend some time with my parents (last time I was there was 6 months ago), so I used their ice cream maker. Let me just say that make ice cream is fun! I don't know what makes it so, but it just is. My mom even said she didn't know why they didn't do it more often based on how simple it is.
Initially I was going to make the petit fours...I've always wanted to make those and the icing on top just fascinates me. However, I came up with a fun idea for a baked alaska...so, I changed directions. I saw a recipe for a lime ice cream on another blog and thought that it would be neat to make a "key lime pie" baked alaska.
So....that's what I did. I found a pretty simple recipe on allrecipes for lime ice cream. It did turn out a tad bit more like a sherbet but it was still delicious. In fact, all of us liked it the best out of the entire dessert. When I scooped it after the first night, I just giggled with delight in the perfect little rolled scoop of ice cream.
I wish that it had been more green but my dad didn't mind...he said "Well, a lime slush at Sonic isn't green"...so by all means our lime ice cream shouldn't be green! ;-) The second day I made the browned butter pound cake. The first time I took this out of the oven I thought it wasn't done. In hindsight, I wish that I had just taken it out then.
After I cut it to fit the bowl, I put it on the ice cream and back in the freezer. Unfortunately, I'm afraid that the freezing process just dried the cake out and made it too hard to eat. We ended up not eating most of that layer. The scrap pieces were good, though I think that the browned butter in a pound cake was just too rich for me. The meringue was very easy to make. Torching it, however, was another story!
We attempted to use the propane torch that my dad had (in the garage!) but it was too hot and just burned the meringue. So, I baked it (appropriate for the title of the dessert - and yes, I know it's not broiled Florida...that came from my dad who was trying to be funny - love you Daddy!) and it turned out great!
All in all this was a fun dessert to make...and yes, I'd try the technique again but would probably use a different cake base. Elissa, thanks for such a fun recipe...and making me discover the fun of making ice cream!
Lime Ice Cream
2 cups milk
1 cup sugar
1/3 cup fresh lime juice
1 1/2 tsp lime zest
1 cup heavy whipping cream
1 cup sugar
1/3 cup fresh lime juice
1 1/2 tsp lime zest
1 cup heavy whipping cream
In a saucepan, combine milk and sugar. Cook over medium heat until sugar is dissolved and mixture reaches 175 degrees F. Cool to room temperature. Stir in the lime juice and peel. Freeze in an ice cream freezer according to manufacturer's directions.
Transfer frozen lime mixture to a bowl; allow to soften slightly. In a small mixing bowl, beat whipping cream until stiff peaks form. Fold into softened lime mixture. Allow ice cream to firm up in your refrigerator freezer for 4 hours before serving (This is the point where I put the ice cream in my rounded bowl for the baked Alaska).
Brown Butter Pound Cake
2 cups (200g) sifted cake flour (not self-rising; sift before measuring) (See “Note” section for cake flour substitution)
1 teaspoon (5g) baking powder
1/2 teaspoon (3g) salt
1/2 cup (110g) packed light brown sugar
1/3 (75g) cup granulated sugar
4 large eggs
1/2 teaspoon pure vanilla extract
1. Preheat the oven to 325°F/160°C and put a rack in the center. Butter and flour a 9”x9” (23cmx23cm) square pan.
2. Place the butter in a 10” (25cm) skillet over medium heat. Brown the butter until the milk solids are a dark chocolate brown and the butter smells nutty. (Don’t take your eyes off the butter in case it burns.) Pour into a shallow bowl and chill in the freezer until just congealed, 15-30 minutes.
3. Whisk together cake flour, baking powder, and salt.
4. Beat the brown butter, light brown sugar, and granulated sugar in an electric mixer until light and fluffy, about 2 minutes. Beat in the eggs one at a time, mixing well, and then the vanilla extract.
5. Stir in the flour mixture at low speed until just combined.
6. Scrape the batter into the greased and floured 9”x9” (23cmx23cm) square pan. Smooth the top with a rubber spatula and rap the pan on the counter. Bake until golden brown on top and when a toothpick inserted into the center comes out clean, about 25 minutes.
7. Cool in the pan 10 minutes. Run a knife along the edge and invert right-side-up onto a cooling rack to cool completely.
Meringue (For the Baked Alaska)
8 large egg whites
½ teaspoon (3g) cream of tartar
½ teaspoon (3g) salt
1 cup (220g) sugar
Beat the egg whites, cream of tartar, and salt on high speed in an electric mixer until soft peaks form. Beat in the sugar gradually in a slow stream until stiff peaks form.
Assembly Instructions – Baked Alaska
1. Fill desired rounded dish to the top with ice cream (I used a mixing bowl but you can use individual sized bowls as well). Cover the top with plastic wrap. If you line the bowl with wrap just use the overhanging portion to cover it. Freeze for several hours or until solid. I did overnight.
2. Level the top of the brown butter pound cake with a serrated knife or with a cake leveler. Cut out desired number and size circles from the cake. Enjoy scraps!!!
3. Make the meringue (see above.)
4. Unwrap the ice cream “cups” and invert on top of a cake round. If you did not line with wrap you can place the bowl(s) in some slightly warm water to loosen the ice cream.
5. Pipe the meringue over the ice cream and cake, or smooth it over with a spatula, so that none of the ice cream or cake is exposed. Freeze for one hour or up to a day. I smoothed over and then spiked it using a knife.
6. Burn the tips of the meringue with a cooking blow torch. Or, bake the meringue-topped Baked Alaskas on a rimmed baking sheet in a 500°F/260°C oven for 5 minutes until lightly golden. Serve immediately.
Labels:
Cakes/Cupcakes,
Daring Bakers,
Desserts,
Family,
ice cream
Tuesday, August 24, 2010
My Mouth is Happy!
Long ago.......seriously......17 years ago, I lived far, far away.....seriously........in Bishkek, Kyrgyzstan. When I was in fifth grade, my family went to live in a family's apartment and they came and lived in our house for ten months. My dad taught English and physics (THAT was interesting...teaching physics to students using their second (or third) language!
We also worked with some other Americans with the IMB. While we were there we had MANY opportunities to enjoy the local cuisine. Let me must tell you, if you even go to a Russian or Kyrgyz house for a meal...don't eat anything beforehand! They expect you to eat and likely to seconds...if you don't, "you must be ill!" One house we went to seriously provided a seven course meal!
(This is one of the salads we had....pickled carrots and cucubmers...so good!) Salads, bread, main course 1, main course 2, main course 3, dessert, and tea! We ate for 3-4 hours....though it was all good, it was too much! Since leaving 17 years ago, I haven't had any of this delicious food....until Friday night! We recently discovered that tucked away in Memphis there is a restaurant owned by a Uzbek man (from Kyrgyzstan) that serves many of the dishes we remember. It is called EuroStyle and was, oh, so authentic! We walked in and there was a man sitting at the door with an electric synthesizer and microphone singing with lots of revirb. The floor are wooden and the tables covered in plastic, lace tablecloths (not really as tacky as it sounds). We sat down at the table and there was a table of women sitting next to us, chatting away in Russian. A nearby table was for a birthday party...with a bouquet of flowers in the center of the table (VERY authentic!). We were immediately transported back to Bishkek just by the atmosphere. Then came the food. Oh, goodness! We ordered three dishes to share, but there were others we wanted to try. First we ordered plov.
This is a delicious rice dish with carrots, onion, and lamb. According to recipes I've seen, you should use equal parts carrot, onion, and lamb. Then the rice is cooked on top of all that without stirring. It was great! One thing I liked about this recipe was that it was not nearly as oily as the plov we had in Bishkek. The only thing missing was roasted garlic! You WILL see this dish recreated on my blog in the future! The next dish was laghman, which is apparently the national dish of Kyrgyzstan.
I was SO excited about this. It is basically a vegetable and lamb soup over HOMEMADE noodles. Oh my yum! I'm not big on pasta but these noodles were fantastic! This was the last thing I had, and my mouth loved it....Daddy did too!
(This picture was posed!) Once again....at some point, not promising when, this (or a version of it) will appear on my blog! Finally, the piece de resistance....pelmeini!
Oh goodness. THIS was my reaction to pelmeini....I spontaneously made a silly face and just giggled!
You may think, "oh, but that's just ravioli!" My dear friends, I must beg to differ! There is just something unique about the filling of pelmeini that defines it from any other filled pasta. I don't know what it is but it is delicious! We learned to make this when we were in Bishkek, but never made it at home.
I've got to figure this one out, too. It is served with smitana (sour cream) but we often added salsa to it. SOOO very good. Finally, we ended with blini. This is basically a dessert crepe.
When we were in Bishkek, we would fill them ourselves, usually with honey or raspberry preserves and may dip it in smitana. These were serves already rolled with blueberry filling and whipped cream. The blini itself was very good but I left like they really needed to serve it with honey to make it "authentic" in my eyes. Still delicious! Another offering on the menu that we wanted to try were the varenki (or piroshki....and bread pocket filled with potato, mushrooms, and/or meat). These were street foods in Bishkek and were great. There is another dish called Beshbarmak that we want...and the owner said that if we called him a couple of days before coming, he'd make it for us....but he couldn't use horse like they would in Kyrgyzstan...we're okay with that!!! :-) So, if you live near Memphis and want to try Russian, Central Asian, or European cuisine, we HIGHLY recommend trying out EuroStyle. It is fantastic!!!!
We also worked with some other Americans with the IMB. While we were there we had MANY opportunities to enjoy the local cuisine. Let me must tell you, if you even go to a Russian or Kyrgyz house for a meal...don't eat anything beforehand! They expect you to eat and likely to seconds...if you don't, "you must be ill!" One house we went to seriously provided a seven course meal!
(This is one of the salads we had....pickled carrots and cucubmers...so good!) Salads, bread, main course 1, main course 2, main course 3, dessert, and tea! We ate for 3-4 hours....though it was all good, it was too much! Since leaving 17 years ago, I haven't had any of this delicious food....until Friday night! We recently discovered that tucked away in Memphis there is a restaurant owned by a Uzbek man (from Kyrgyzstan) that serves many of the dishes we remember. It is called EuroStyle and was, oh, so authentic! We walked in and there was a man sitting at the door with an electric synthesizer and microphone singing with lots of revirb. The floor are wooden and the tables covered in plastic, lace tablecloths (not really as tacky as it sounds). We sat down at the table and there was a table of women sitting next to us, chatting away in Russian. A nearby table was for a birthday party...with a bouquet of flowers in the center of the table (VERY authentic!). We were immediately transported back to Bishkek just by the atmosphere. Then came the food. Oh, goodness! We ordered three dishes to share, but there were others we wanted to try. First we ordered plov.
This is a delicious rice dish with carrots, onion, and lamb. According to recipes I've seen, you should use equal parts carrot, onion, and lamb. Then the rice is cooked on top of all that without stirring. It was great! One thing I liked about this recipe was that it was not nearly as oily as the plov we had in Bishkek. The only thing missing was roasted garlic! You WILL see this dish recreated on my blog in the future! The next dish was laghman, which is apparently the national dish of Kyrgyzstan.
I was SO excited about this. It is basically a vegetable and lamb soup over HOMEMADE noodles. Oh my yum! I'm not big on pasta but these noodles were fantastic! This was the last thing I had, and my mouth loved it....Daddy did too!
(This picture was posed!) Once again....at some point, not promising when, this (or a version of it) will appear on my blog! Finally, the piece de resistance....pelmeini!
Oh goodness. THIS was my reaction to pelmeini....I spontaneously made a silly face and just giggled!
You may think, "oh, but that's just ravioli!" My dear friends, I must beg to differ! There is just something unique about the filling of pelmeini that defines it from any other filled pasta. I don't know what it is but it is delicious! We learned to make this when we were in Bishkek, but never made it at home.
I've got to figure this one out, too. It is served with smitana (sour cream) but we often added salsa to it. SOOO very good. Finally, we ended with blini. This is basically a dessert crepe.
When we were in Bishkek, we would fill them ourselves, usually with honey or raspberry preserves and may dip it in smitana. These were serves already rolled with blueberry filling and whipped cream. The blini itself was very good but I left like they really needed to serve it with honey to make it "authentic" in my eyes. Still delicious! Another offering on the menu that we wanted to try were the varenki (or piroshki....and bread pocket filled with potato, mushrooms, and/or meat). These were street foods in Bishkek and were great. There is another dish called Beshbarmak that we want...and the owner said that if we called him a couple of days before coming, he'd make it for us....but he couldn't use horse like they would in Kyrgyzstan...we're okay with that!!! :-) So, if you live near Memphis and want to try Russian, Central Asian, or European cuisine, we HIGHLY recommend trying out EuroStyle. It is fantastic!!!!
Monday, August 16, 2010
Sour or Not?
I had my first call in the PICU last night. As this is the critical care unit for our hospital, it has the potential to be really busy and to have really sick children. I was hoping that, being a Sunday, it wouldn't be too busy! HA! We didn't sit down until 10pm. There were 3 admits, one transfer, and we did a total of seven procedures (I did four of them!). There are several pretty sick kiddos but they stabilized a little bit overnight. The PICU has a potential to be "sour," but I wouldn't call my experience last night sour. We were all busy and tired, which led to some tense moments; but everyone worked together well and the right decisions were made at that point. As to sour food, you would think that something titled "sour" would not be good for use in a sweet treat. However, that is definitely NOT the case!
Sour cream is often used in baked goods to add moisture. This cakes uses it and, quite often, cheesecakes use it as a topping (not my favorite). Well, I found a recipe for sour cream sugar cookies on Anna's site and made them last month. I added some toffee to "dress it up" a bit. They were fantastic. The texture was just perfect and the taste was light and had a faint tang to it (TOTALLY a good thing!). I think this recipe could be used as a base for many types of cookies...so try it out!
Sour Cream Sugar Cookies from Cookie Madness
Sour cream is often used in baked goods to add moisture. This cakes uses it and, quite often, cheesecakes use it as a topping (not my favorite). Well, I found a recipe for sour cream sugar cookies on Anna's site and made them last month. I added some toffee to "dress it up" a bit. They were fantastic. The texture was just perfect and the taste was light and had a faint tang to it (TOTALLY a good thing!). I think this recipe could be used as a base for many types of cookies...so try it out!
Sour Cream Sugar Cookies from Cookie Madness
12 tablespoons unsalted butter, room temperature
2 cups granulated sugar
1 teaspoon vanilla extract
¼ teaspoon almond extract
1 large egg
1/2 teaspoon salt
1 cup room temperature sour cream (I used Greek Yogurt)
3 ¼ cups all purpose flour
1 teaspoon baking soda
1 teaspoon baking powder
Toffee pieces (optional)
Preheat the oven to 350F. In your mixer bowl, cream the butter and sugar for about 3 minutes or until light and fluffy. Scrape sides of bowl often and add in the vanilla and almond extract. After creaming the butter and sugar, add the egg and salt and beat just until mixed. Stir in the sour cream or yogurt.
Stir together the flour, soda, and baking powder in a separate bowl, then add to the batter and stir until mixed.
Scoop batter up by heaping tablespoons and arrange scoops of dough a couple of inches apart on parchment lined cookie sheets. Sprinkle toffee pieces on top of dough, if desired. Bake for 12-15 minutes or until cookies are brown around the edges. Remove from oven and scoop cookies onto a cooling rack to cool. Enjoy!
Thursday, August 12, 2010
Quick and Easy Side
First of all, PLEASE forgive me for the lack of photography skill lately. I've gotten a bit lazy recently but will improve soon...I promise!
As summer comes to an end, you've gotta take advantage of those yummy garden vegetables. A really quick and easy was to do that is to saute. One evening, I was looking for something easy to go along with my delicious salmon (which I baked with Cavender's seasoning...a new favorite!) and had 2-3 small squash and some spinach that was about to be bad. Well, I've found that the best way to use almost bad spinach is to cook it. Cooking it wilts the spinach, which is kind of how it gets on it's own when it's going bad...perfect! So, I just cut the squash in half moons and sauteed them until they were soft. Then I added the spinach along with a little chopped garlic and cooked until wilted.
Served alongside the salmon it was fantastic!
As summer comes to an end, you've gotta take advantage of those yummy garden vegetables. A really quick and easy was to do that is to saute. One evening, I was looking for something easy to go along with my delicious salmon (which I baked with Cavender's seasoning...a new favorite!) and had 2-3 small squash and some spinach that was about to be bad. Well, I've found that the best way to use almost bad spinach is to cook it. Cooking it wilts the spinach, which is kind of how it gets on it's own when it's going bad...perfect! So, I just cut the squash in half moons and sauteed them until they were soft. Then I added the spinach along with a little chopped garlic and cooked until wilted.
Served alongside the salmon it was fantastic!
Monday, August 09, 2010
Mr. and Mrs.
This weekend was a big one for my family. My brother married his "love and best friend" on Saturday. It was a great day of celebration and fun. We are so excited about having Kenna in the family.
Per tradition, my parents hosted a rehearsal dinner on Friday. We spent that afternoon putting together party favor boxes with mints in them and decorating the tables.
Then that evening we had dinner catered from Philip and Kenna's favorite restaurant, Amerigo. We had salad, chicken penne pasta, and duck and sausage bowtie pasta (apparently, it's better with angel hair but they don't use that for catering jobs).
Then we had tiramisu for dessert. It was good...very rich and I thought that the tiramisu here was a bit better.
The next day turned out beautiful and HOT!
However, I think Philip and Kenna are quite happy to be husband and wife.
The bride's cake was strawberry and white. They served this with forks.
What's with that?! The groom's cake was caramel...YUM!!!
They tried to do the fork thing again but I convinced them that they needed to use their fingers. :-)
At the end of the day, they drove off in a pretty cool ride to start off a pretty cool ride in life! Congrats Kenna and Philip! Love you!
Per tradition, my parents hosted a rehearsal dinner on Friday. We spent that afternoon putting together party favor boxes with mints in them and decorating the tables.
Then that evening we had dinner catered from Philip and Kenna's favorite restaurant, Amerigo. We had salad, chicken penne pasta, and duck and sausage bowtie pasta (apparently, it's better with angel hair but they don't use that for catering jobs).
Then we had tiramisu for dessert. It was good...very rich and I thought that the tiramisu here was a bit better.
The next day turned out beautiful and HOT!
However, I think Philip and Kenna are quite happy to be husband and wife.
The bride's cake was strawberry and white. They served this with forks.
What's with that?! The groom's cake was caramel...YUM!!!
They tried to do the fork thing again but I convinced them that they needed to use their fingers. :-)
At the end of the day, they drove off in a pretty cool ride to start off a pretty cool ride in life! Congrats Kenna and Philip! Love you!
Subscribe to:
Posts (Atom)